Easy Zucchini Orzo

Easy Zucchini Orzo

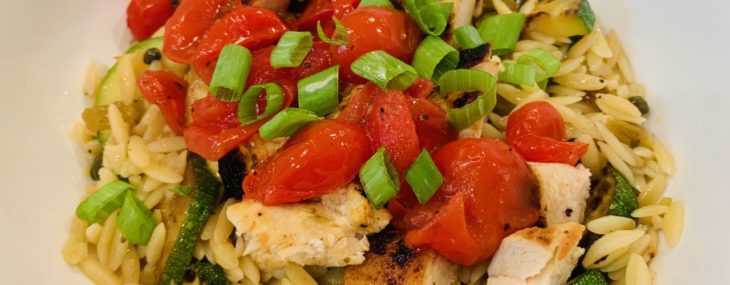
This orzo was in last week’s Blue Apron box and it was delicious so I thought I’d share the easy recipe with you. This side dish was served with grilled chicken but it would be great with seafood and fish also.

Zucchini Orzo with Grilled Chicken

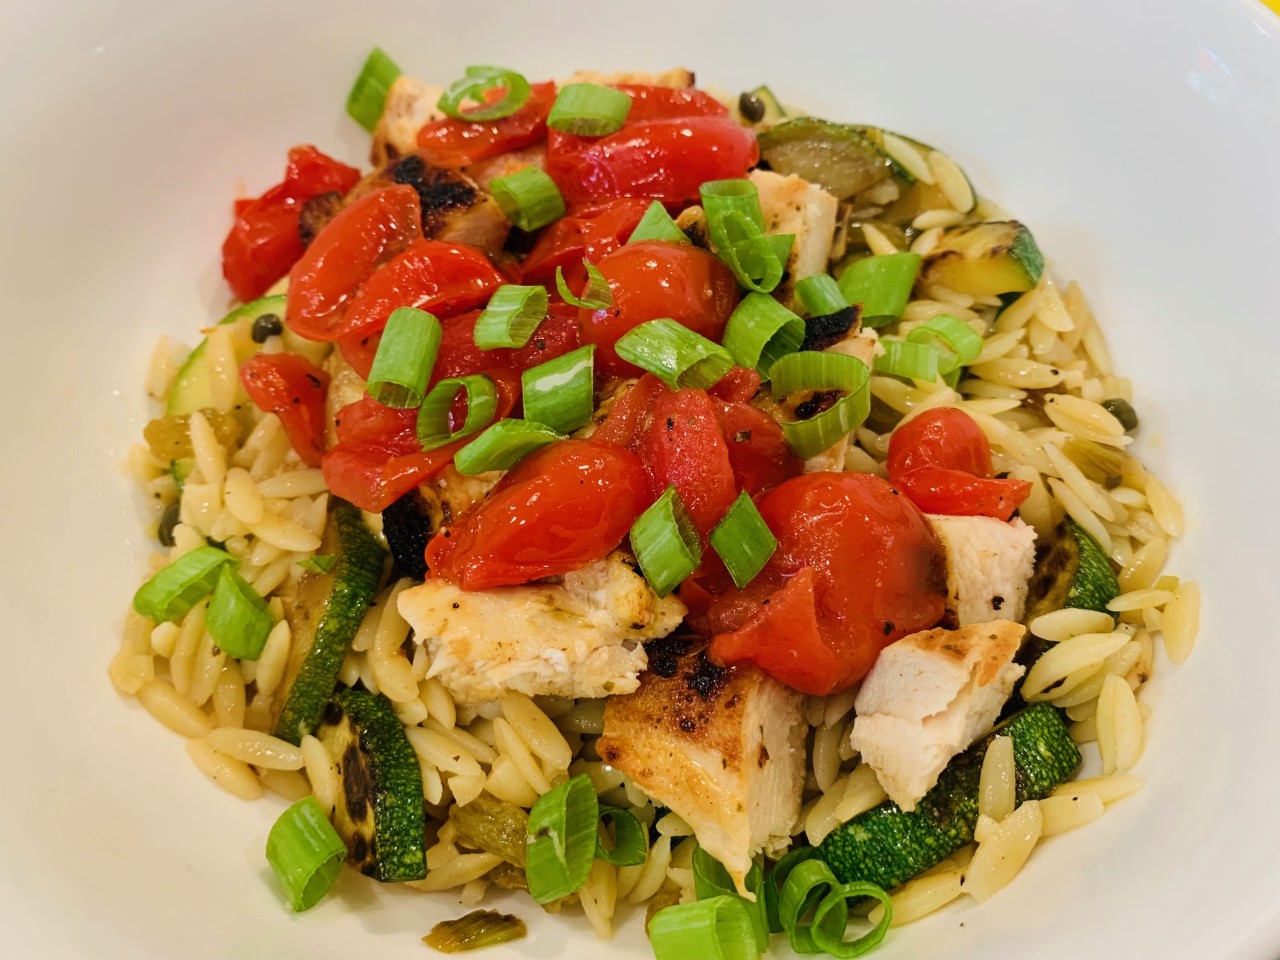
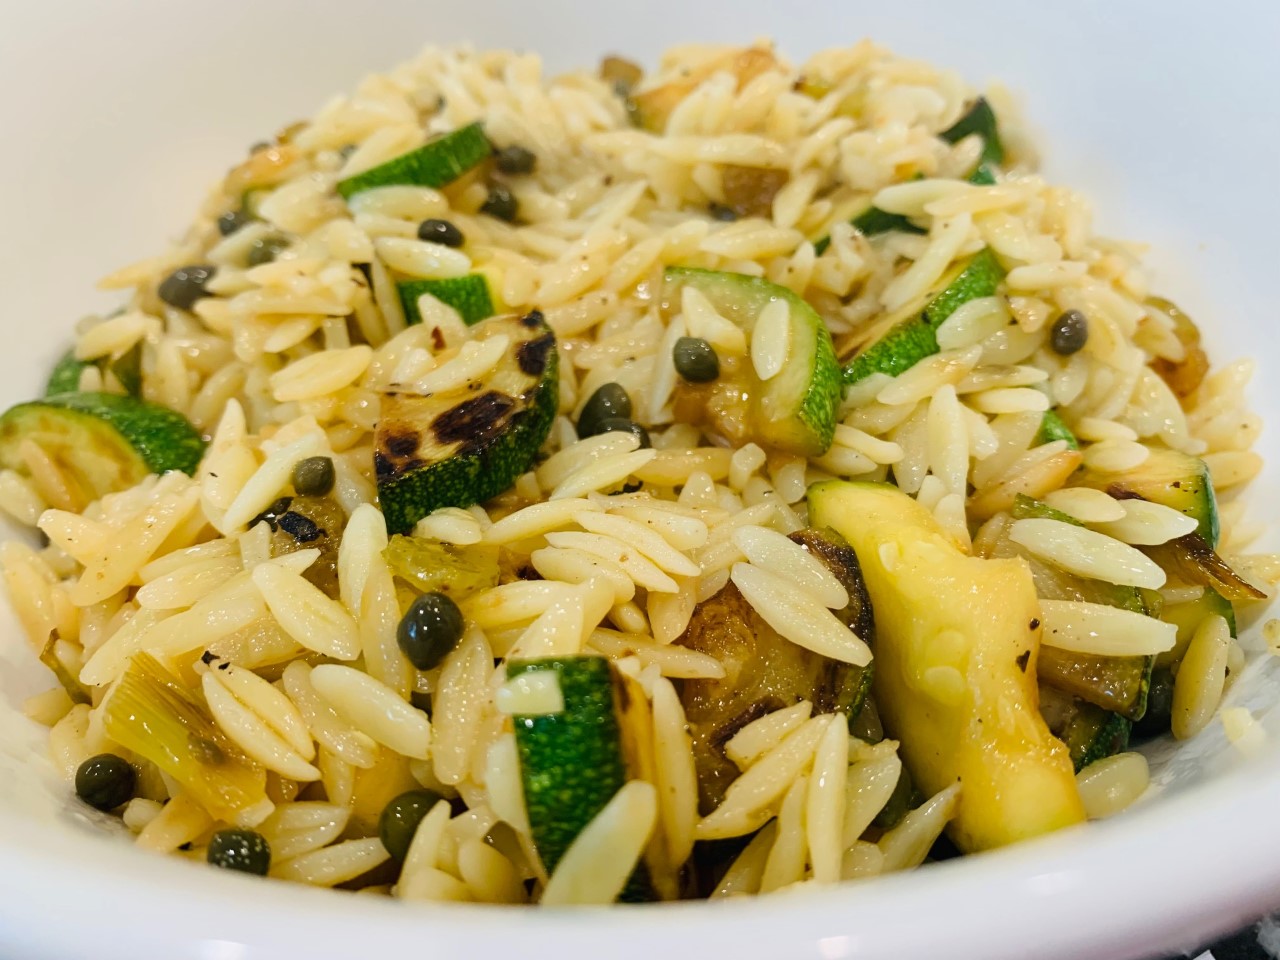
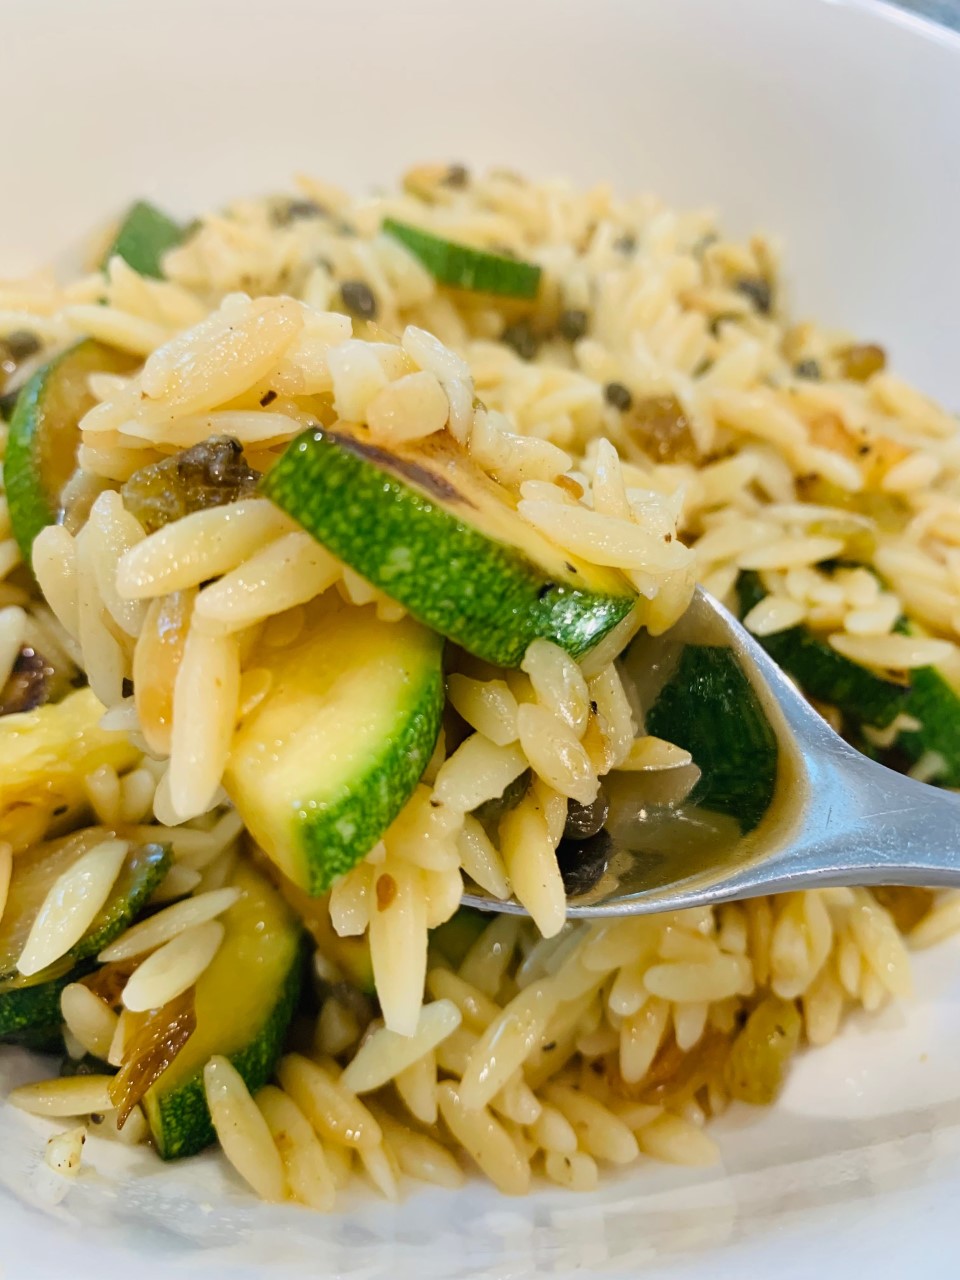
This zucchini orzo is a breeze to prepare and a great way to use up garden zucchini which can be plentiful this time of year. This recipe makes enough for two servings, but is easy to double or triple if you have guests.

Ingredients:

  • 4 ounces orzo
  • 2 scallions
  • 2 cloves garlic
  • 1 medium zucchini
  • 4 tsp. olive oil
  • 1 Tbsp. verjus blanc (or white wine vinegar)
  • 2 Tbsp. Mascarpone cheese
  • 1½ Tbsp. golden raisins
  • 1 Tbsp Weeknight Hero Spice Blend (Onion Powder, Garlic Powder, Smoked Paprika & Whole Dried Parsley)
  • ¼ tsp Crushed Red Pepper Flakes
  • 1 Tbsp. Capers

Directions:

  1. Over high heat, place a medium pot ¾ of the way full with salted water and bring to a boil.
  2. Small dice the zucchini. Peel and roughly chop the garlic. Thinly slice the scallions, separating the white bottoms and hollow green tops.
  3. Add the orzo to the pot of boiling water. Cook, stirring occasionally, 7 to 9 minutes, or until tender. Turn off the heat. Drain thoroughly and return to the pot. Cover to keep warm.
  4. In a large sauté pan, heat 2 teaspoons of olive oil on medium-high until hot. Add the diced zucchini in an even layer. Cook, without stirring, 2 to 3 minutes, or until lightly browned. Add the chopped garlic and sliced white bottoms of the scallions and season with a pinch of salt and pepper. Cook, stirring occasionally, 2 to 3 minutes, or until softened. Add the verjus (or the white wine vinegar) and cook, stirring constantly, 30 seconds. Transfer to the pot of cooked orzo, drizzle with the remaining olive oil and stir to combine.
  5. To the pot of cooked pasta and zucchini, add the mascarpone, raisins, and capers and stir to combine. Taste, then season with salt and pepper if needed.

Makes 2 side servings.

Mediterranean Pasta Salad

Mediterranean Pasta Salad

This isn’t really a recipe, more of a reminder to make this Mediterranean pasta salad more often. All the ingredients can be prepped in advance. I even cook the pasta, cool it and add to a zip top bag so I don’t have to boil water the day of my BBQ. The dressing I typically use is my Easy Greek Vinaigrette which is tangy and delicious and can be made and stored in a canning jar (or other small jar).

This image of my salad is just one version. I sometimes add artichocke hearts, garbanzo beans or skip the pasta – it’s just pretty and a salad everyone enjoys.

A pound of dry pasta with the various fixings will feed eight diners.

Enjoy!

Veronique

Maple Blondies with Maple Icing

Maple Blondies with Maple Icing

I’ve never been much of a Blondies girl – there, I’ve said it. I love chocolate and it seems senseless to make brownies without chocolate. Well, that WAS my mindset until I baked these MAPLE blondies. As a Canadian, maple is queen and tops even chocolate in baked goods, in my humble opinion. I then took this dessert over the top by adding MAPLE icing which gets a bit crackly when it cools and is fabulous – maple2 if you will.

This recipe comes together very easily and I used THIS RECIPE for the Blondies that I found on Pinterest (are we friends there yet?) and created a quick maple icing that I drizzled on while the Blondies were still warm. I’ve frosted cookies with this icing in the past, but on MAPLE Blondies, it’s amazing.

In terms of baking time for the Blondies, less is more. It indicates to bake 30-35 minutes in the recipe, and I went 32 minutes and next time, I’d go 29-30 minutes to get an even chewier texture. I know my oven runs a bit hot too, so test with a toothpick after 29-30 to see how you’re doing with doneness.

Blondies right out of the oven
Making the icing
The finished icing – smells incredible!

Blondies Recipe

Maple Icing Ingredients:

  • 2 Tbsp. butter
  • 1/3 cup pure maple syrup, ideally from Quebec!
  • 1 cup powdered sugar, sifted
  • ¼ tsp. sea salt

Maple Icing Directions:

  1. Allow Blondies to cool for 10 minutes while making the icing.
  2. Over medium-low heat in a small saucepan, melt the butter, add the maple syrup, and stir to combine. Turn the heat off.
  3. Add the powdered sugar and the salt and stir until fully incorporated with no lumps remaining.
  4. Drizzle over the blondies (I placed the hot icing in a zip top bag and cut a small corner and used the bag as a pastry bag – this is optional!) and allow to set for 15 minutes.

Yields 12 Blondies.

Mom’s Strawberry Muffins

Mom’s Strawberry Muffins

My mom, who lives in Quebec, Canada, is so cute. Over the years, she’s learned that I need to see photos of the food she cooks. No photos…it didn’t happen!

Today, she baked strawberry muffins that she made using fresh strawberries she’d frozen last summer for such a recipe. I had her take three different photos of the muffins and she complied and now I can share the recipe and her images with you.

This easy muffin recipe can also be made using raspberries, blackberries or blueberries.

Fresh out of the oven!

Ingredients:

  • 2 1/3 cups all-purpose flour
  • ¾ cup granulated sugar
  • ¼ cup brown sugar
  • 2 ½ tsp. baking powder
  • 1 cup strawberries, either fresh or frozen then thawed, diced into small pieces
  • 1 cup milk
  • 1/3 cup vanilla yogurt
  • 1 large egg, beaten
  • 1 tsp. pure vanilla extract
Just want to cut into it!
Look at the juicy strawberries!

Directions:

  1. Preheat oven to 400 degrees.
  2. Either coat in cooking spray a 12-muffin tin or add paper liners.
  3. In a medium bowl, combine the flour, sugars and the baking powder. Carefully add the strawberry pieces and set aside.
  4. In a separate medium bowl, whisk together the milk, yogurt, egg and vanilla extract.
  5. Pour the liquid mixture over the dry ingredients and carefully incorporate with a spatula or wooden spoon – don’t overmix!
  6. Fill the muffin cups until about 2/3 full and bake until the muffin tops are golden brown and no longer wet on the inside when a wooden toothpick is inserted, about 20 minutes.
  7. Allow to cool 10 minutes before unmolding (if not using the paper liners).

Yields 12 muffins.

Old York Cellars Cod with Vegetable Sauce

Old York Cellars Cod with Vegetable Sauce

As families prepare for another socially distanced Easter and Passover meal, some may be looking for ways to make their holiday a bit more special this year.

Old York Cellars Chef Jose Diaz has prepared this easy, DIY recipe for cod for two that offers the perfect touch for an Easter or Passover meal to be remembered.

You’ll see that the recipe calls for Old York Cellars dry white wine and that’s available for purchase at the winery’s website. The recipe also features a Old York Cellars Malbec Marinara, a sauce hand-made by Dogwood Farms in Hillsborough NJ using Old York Cellars Malbec – yum!

Photo by Old York Cellars

Ingredients

  • 1 russet potato – peeled
  • 4 Tbsp. olive oil, divided
  • 1 celery stalk – chopped
  • 1 carrot – chopped
  • 1 leek – sliced
  • 1 onion – chopped
  • 1 tomato – chopped
  • 2 garlic cloves – minced
  • 1 red bell pepper – chopped
  • 1 ½ tsp. each salt and freshly group black pepper, divided
  • 1 Tbsp. paprika
  • ½ cup Old York Cellars dry white wine
  • ½ cup Old York Cellars Malbec Marinara
  • 1 tablespoon fresh parsley
  • 6-ounce filet with skin on

Directions:

  1. In a pot of boiling water, cook the potato for 35-45 minutes, or until tender. Remove from the water and let stand 3 minutes then slice.
  2. Set a medium-large pot over medium-high heat and once warmed, add one tablespoon of olive oil. After 30 seconds, add the celery, the carrots, the leeks, the onion, the tomato, the garlic and the red pepper. Stir for a minute then add two more tablespoons of olive oil over vegetables along with one teaspoon each of the salt/pepper, and the paprika. Cook for 5 minutes, stirring occasionally, then add the wine and marinara sauce. Decrease heat to low, cover the pot and allow the sauce to simmer for 25 minutes, stirring occasionally.
  3. Once the saucy vegetables are cooked, purée the mixture until smooth using either an immersion blender or a food processor.
  4. Put the pureed sauce through fine mesh strainer using a rubber spatula (optional if you want).
  5. Return pureed and strained (if straining) vegetables to the pot and simmer over low heat while the fish is being sauteed.
  6. Season the cod with the remaining salt and pepper.
  7. Place frying pan on stove over high heat. Add remaining two tablespoons olive oil to the pan and warm up. Once oil begins to shimmer, add the cod, skin side down and cook for 5 minutes until cod begins to firm up and turns slightly white.
  8. Remove cod from pan and place skin side up into the vegetable purée and cook for an additional 10 minutes.
  9. To serve, spoon two tablespoons of vegetable purée onto a plate and swirl around the plate with the back of the spoon.
  10. Add cooked potatoes over the vegetable purée then place the cod skin side down on potatoes and add more sauce to plate.
  11. Garnish with fresh parsley and drizzle with olive oil.

Serves 2.

About Old York Cellars

Set amidst some of the oldest vineyards in the Garden State, Old York Cellars is a working farm that offers a full selection of award-winning wines and an extraordinary experience both inside and outside of the tasting room. The winery plays host to a variety of special events and exciting programs including seasonal Wine Festivals, Music Under the Stars, Comedy Nights, Specialty Tasting Experiences, and the exclusive Vintner’s Club.

Winery in Ringoes Open Daily 12 – 5 PM  (Starting April 3rd the winery will be open until 7 PM)

Old York Cellars Winery & Vineyards, 80 Old York Road, Ringoes, New Jersey 08551, Phone:  908-284-9463

Old York Cellars Tasting Room & Restaurant, Quaker Bridge Mall, Route 1, Lawrenceville, NJ, Phone:  609-799-2707

Old York Cellars Wine Shop, Bridgewater Commons Mall, 400 Commons Way, Bridgewater, NJ, Phone:  908-722-2222

Creamy Chicken Noodle Soup

Creamy Chicken Noodle Soup

At our home, we love soup. If we’re connected on Facebook or Instagram, you’ll see lots of soup pics, especially in the winter. I’m Canadian and my guy is Dutch, two countries big on soups, and while we each have favorites, this Creamy Chicken Noodle Soup is one we both love.

Every so often when I have a few hours of downtime in the house, I’ll simmer or roast a whole chicken and then take the meat off the bones and bag individual portions and freeze for quick weeknight meals and for soup. For this soup, I do a double bag, about two cups. I’ll then simmer down the chicken carcass and make broth that I also freeze for future use, like this soup.

In this soup, you could use leftover rice or pasta for a great way to clear up the fridge with no waste. I often use linguine or fettucine. If you don’t have a blender/stick blender, simply skip that step and you’ll have a lovely soup that’s a bit chunkier. The soup gets its lovely coral color from the cooked carrots.

Ingredients:

  • 2 Tbsp. vegetable oil
  • 3 medium carrots, diced
  • 1 medium yellow onion, diced
  • 4 stalks celery, diced
  • 2 garlic cloves, minced
  • 8 cups low-sodium chicken broth
  • 1 tsp. each dried thyme, salt and pepper
  • 1 cup heavy cream combined with 1 Tbsp. cornstarch
  • 2 cups diced/shredded roasted chicken
  • ¼ pound linguine, broken into 2” pieces

Directions:

  1. In a large stockpot warm the oil over medium heat. Add the carrot, onion and celery and sauté until tender, about 10 minutes, stirring occasionally. Add the garlic and continue cooking for another minute.
  2. Add chicken broth, thyme, salt, pepper and cook for 10 more minutes.
  3. Add half the soup to a blender (or use a stick blender) and purée for about a minute. Return the puréed soup to a clean saucepan and purée the second half of the soup and add to the 1st batch of puréed soup.
  4. Turn the heat to medium and add the cream/cornstarch mixture to the soup. Bring to a simmer and cook/stir for 3-4 minutes until the soup has thickened.
  5. Add the pasta, lower heat to medium-low and cook 10-15 more minutes, until the pasta is cooked through. If using cooked pasta or cooked rice, reduce the cooking time to 2 minutes instead of 10-15 minutes just to reheat the cold pasta/rice.

Serves 6 generously.

Vegan Fudge with Walnuts

Vegan Fudge with Walnuts

Yes, you read that recipe title correctly – VEGAN! My dear friend Sharon’s been living a vegan, unprocessed foods lifestyle for a while now and posts recipes of foods she’s reinventing as vegan that always look tasty and interesting. This past week, she posted a recipe I finally decided to try and post here as it’s perfect for the upcoming holidays – Vegan Fudge!

Photo Credit: Diane Biancamano

The recipe was created by amazing vegan chef/recipe creator/food blogger Dianne Wenz. Dianne and I ran in some of the same circles both being New Jersey food bloggers, before I relocated to Charlotte. Her popular food blog, Dianne’s Vegan Kitchen, is filled with fantastic recipes and tips for adopting and living a vegan lifestyle.

Two things attracted me to this recipe: 1) the fudge looks creamy and velvety 2) the recipe calls for homemade dairy-free condensed milk – WHAT!!?? If find all this intriguing and fantastic.

Photo Credit: Sharon Lewis

Here’s Dianne’s recipe for Vegan HOMEMADE VEGAN FUDGE (WITH DAIRY-FREE CONDENSED MILK). The recipe calls for walnuts, which I think are a must in fudge, but please skip if you don’t like them or if there are food allergies in your homes.

I cannot wait to make this for the holidays and hope you give it a try too!

Cheers,

Veronique

Cheesy Bacon Chicken Bake

Cheesy Bacon Chicken Bake

While baked chicken recipes can be boring and sometimes even bland, this easy weeknight Cheesy Bacon Chicken Bake recipe is just the opposite.

It came to me as we were trying to empty our freezer and fridge before our move out of state. We had some chicken breasts in the freezer, that I thawed, and a block of cream cheese and some pre-cooked bacon to use up, so the Cheesy Bacon Chicken Bake was born.

This low carb recipe comes together in mere minutes and is perfect for weeknights or an easy weekend dinner. You could add things like cubed ham instead of bacon or add cooked spinach or cooked mushrooms and it would be delicious. The shredded cheese you use can also be changed to Swiss or Colby or Jack, or whatever you have on hand.

The chicken can be served with rice or a side salad for those living the keto life.

Ingredients:

  • 4 boneless, skinless breasts halves, sliced in half horizontally (you’ll have 8 pieces)
  • 1/3 cup mayonnaise (I used Duke’s)
  • 8 ounces cream cheese, softened
  • 2 cups shredded sharp Cheddar cheese, divided
  • ½ tsp. each salt, pepper and garlic powder
  • 8 slices cooked bacon, chopped into bite size pieces
  • Chopped scallions, optional

Directions:

  1. Preheat the oven to 375 degrees.
  2. In a rectangular baking dish (I used an 11’x7” Pyrex) place the chicken breasts in an even layer (a bit of overlap is fine).
  3. In a medium bowl, combine the mayo, cream cheese, 1 cup shredded Cheddar, the spices and chopped bacon.
  4. Top the chicken with the cheese/bacon mixture then top that with the rest of the Cheddar.
  5. Bake for 35-40 minutes or until the internal temperature of the chicken is 165 degrees and the cheese has melted and is lightly golden.
  6. Garnish with the scallions, if using.

Serves 4.

Mediterranean Spinach and Feta Quiche

Mediterranean Spinach and Feta Quiche

I recently hosted a Greek-themed dinner party when I overbought a ton of ingredients (surprise surprise). With a buttery pie crust in the freezer, lots of sautéed spinach, Feta cheese, eggs and red onions on hand, I decided on a Mediterranean quiche!

Quiches are so versatile as they’re a great way to use up leftovers. This version is a vegetarian quiche but adding cooked bacon, leftover roast chicken or diced ham would also be great.

I think the crust is the most important part of a good quiche and I provide the EASY way to make a fail proof crust below where you put all the ingredients in the food processor and let it do the work – try it!

You’ll see that I added some Mozzarella for that cheesy stringy pull but replacing with all Feta would also work well.

Ingredients:

  • 1 pie crust, homemade or store-bought
  • 1 Tbsp. vegetable oil
  • ½ medium red onion, thinly sliced
  • 6 large eggs
  • 1 cup heavy cream
  • ½ tsp. each salt, freshly cracked pepper and oregano
  • Big pinch of ground nutmeg
  • 2 cups cooked spinach, squeezed dry
  • 1 cup crumbled Feta cheese
  • 1 cup shredded Mozzarella cheese

Directions:

  1. Preheat oven to 375 degrees.
  2. Add the pie crust to a 9″ pie plate and place in the freezer for 15 minutes.
  3. In a medium sauté pan over medium high heat, add the oil and sliced onion. Cook stirring frequently until the onions have softened, about 4 minutes. Take the pan off the heat and allow to cool for 10 minutes.
  4. In a large bowl, whisk together the eggs, cream and the spices for 60 seconds.
  5. Top the pie crust with the sautéed onion, then the spinach, then the Feta and then the Mozzarella. Place the pie plate on a baking sheet in case of spills. Carefully pour the egg mixture over the cheeses and place the quiche in the oven to bake for 40-45 minutes. The quiche is done when the center is no longer giggly. If the surface of the quiche browns quicker than the allotted time, cover loosely with foil.
  6. Allow to cool 15 minutes before serving. The quiche is great at room temperature.

Makes 6-8 servings.

Easy Root Vegetable Salad

When the weather cools off, I roast vegetables almost every Sunday. Depending on what looks good at the market, I roast beets, various squashes (butternut would be my favorite), Brussels sprouts, turnips, carrots and more. Little drizzle of olive oil, thyme, salt and pepper and into the oven we go. I find that having these cooked veggies on hand during the week can be used in so many different applications from soups to simple side dishes to pastas and in salads.

This isn’t really a recipe, but more of a reminder that root vegetables can be amazing during the week as a salad. I use a pretty bowl and add a variety of veggies, some cheese– this time it was goat cheese crumbles, maybe some dried cranberries and chopped almonds….and a killer tangy dressing, like my Easy Greek Vinaigrette. Give it all a toss and voila, a delicious meal.

Hope this post gives you some new ideas for weekday lunch salad meals.

Cheers,

Veronique