Copycat Hooters Chicken Wings

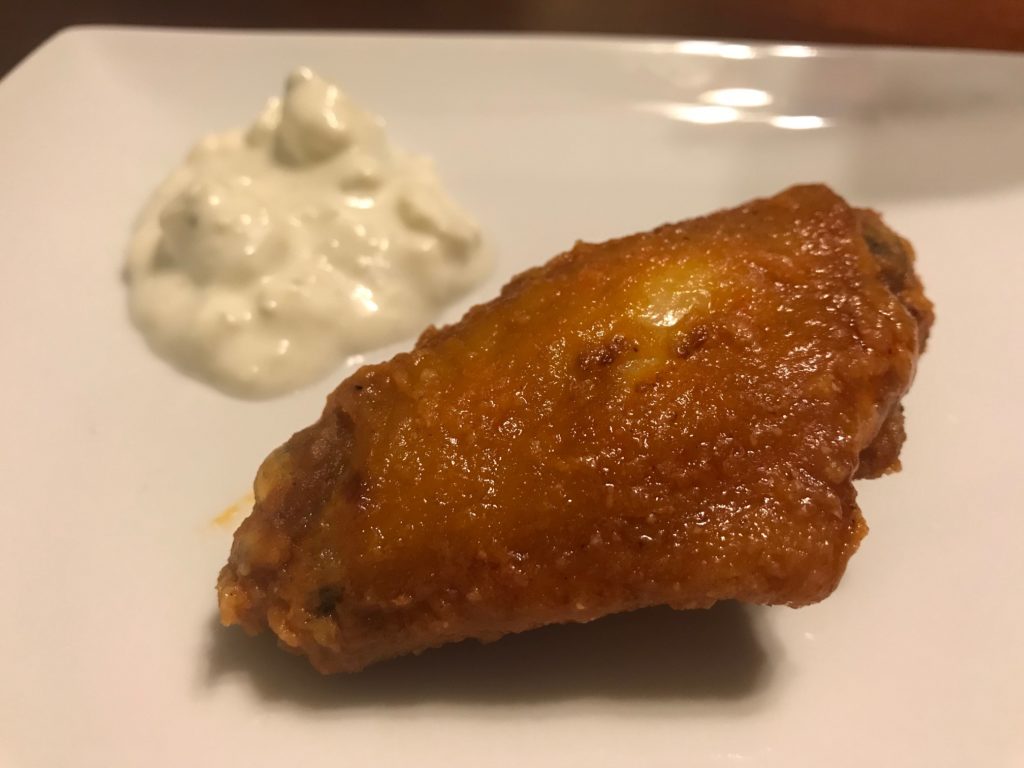
My guy and I like Buffalo chicken wings and his favorites are the ones from Hooters (it’s about the wings, really lol). I’ve perfected their buffalo shrimp recipe (you must try them) and I think we now have a pretty great handle on their chicken wings.

This recipe is for medium spicy Buffalo chicken wings but just decrease the hot sauce if you prefer mild wings.

Buffalo Sauce Ingredients:

  • ¼ pound butter (1 stick)
  • 1 cup hot sauce (I use Frank’s)
  • 1 tsp. garlic powder
  • 2 Tbsp. lemon juice
Wings Coating

Wings Coating Ingredients:

  • 1 cup all-purpose flour
  • 1 tsp. salt
  • ¼ tsp. black pepper
  • ½ tsp. cayenne pepper
  • ½ tsp. paprika
  • ½ tsp. garlic powder
  • 12 chicken wings (we use flats and drummettes)
  • Peanut or vegetable oil for frying
  • Blue cheese dressing, carrot and celery sticks, optional

Buffalo Sauce Directions:

  1. Melt the butter in a small saucepan over high heat. Add the hot sauce, garlic powder and lemon juice – whisk to combine. Set aside on low heat until ready to use.
Tossing Wings in Sauce

Wings Directions:

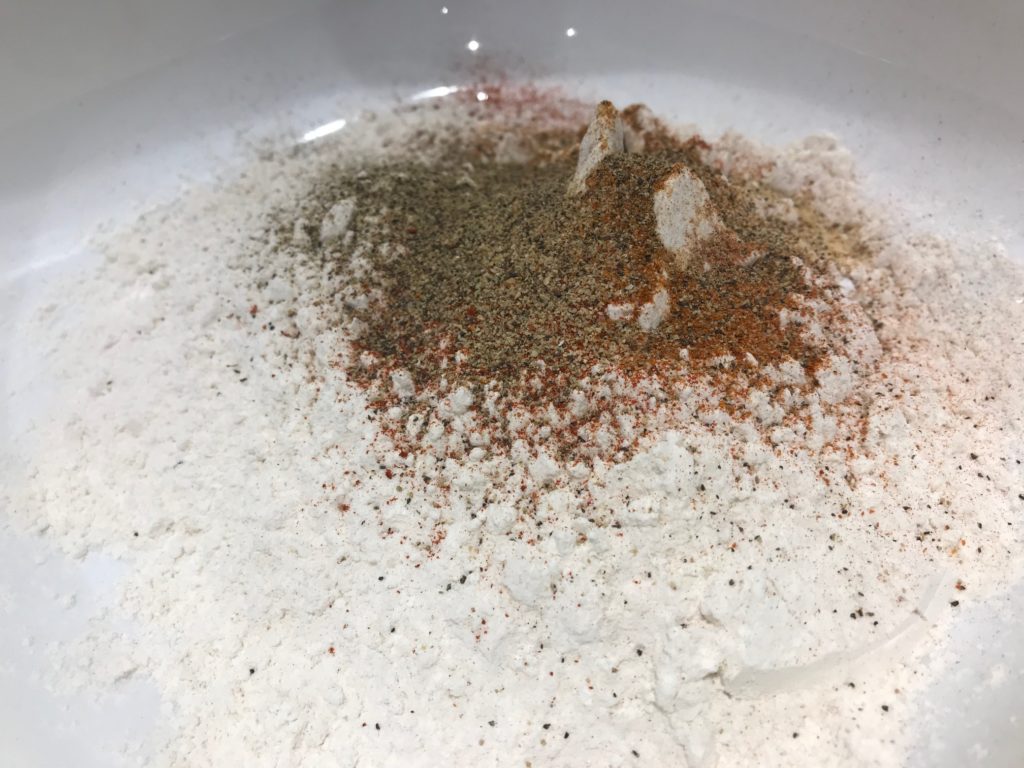
  • In a shallow dish (I use a pie plate), combine the flour, salt, black pepper, cayenne, paprika and garlic powder. Coat the wings in the flour mixture, place the wings on a platter and refrigerate for one hour. Coat wings again with the flour mixture (may have leftover flour mixture).
  • Add oil to a deep fryer and bring temperature to 375 degrees (could use a deep saucepan also). Add 6 wings and fry for 13 minutes for medium-sized wings or 15 minutes for extra-large ones. Place cooked wings on a wire rack for a minute to drain excess oil.
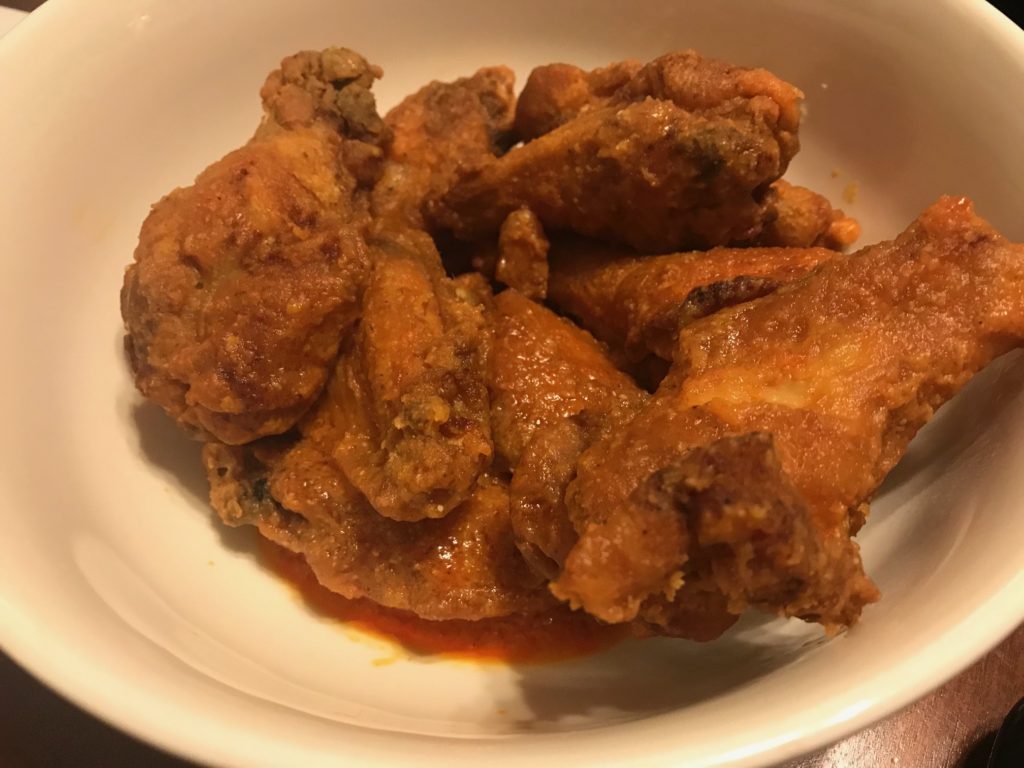
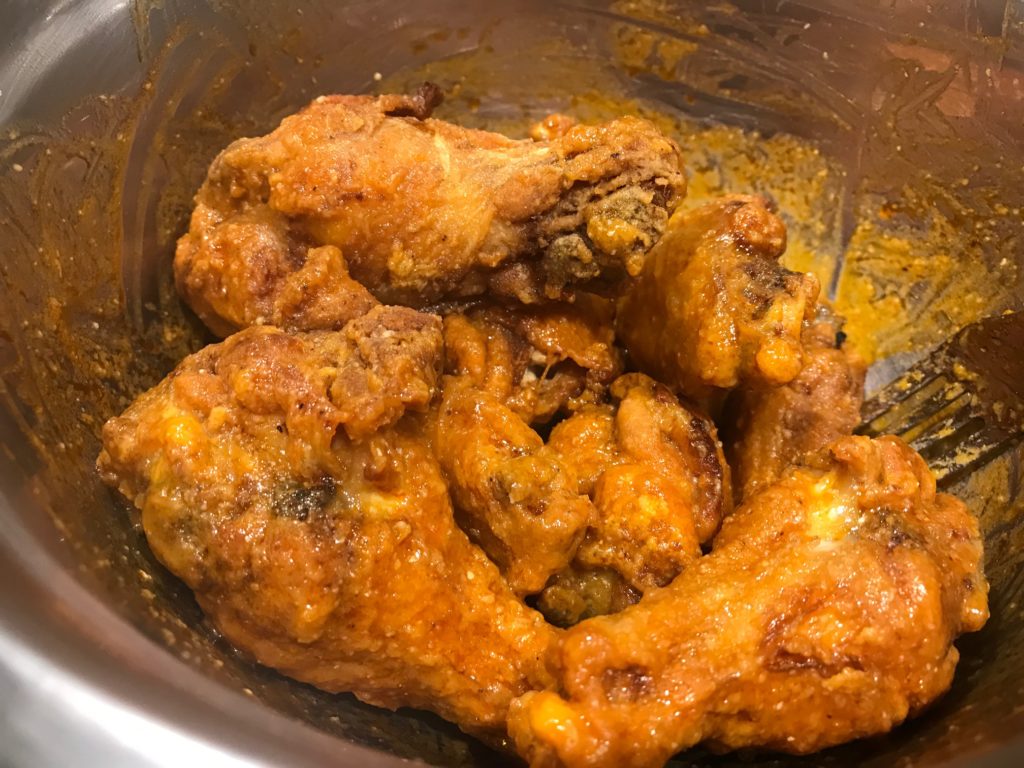
  • Pour the hot buffalo sauce in a large heat-proof bowl and toss the wings in the sauce.
  • Repeat frying, draining and tossing in the sauce the remaining 6 wings.
  • Serve with blue cheese dressing, carrot and celery sticks if using.

Makes a dozen wings.

Let me know what you think once you try these!

Enjoy,

Veronique

Easy Grilled Lobster Tails

I grew up 20 miles from Maine in Quebec so lobster is something we ate a lot of when I was growing up. While I think a lobster boil is hard to beat, I sometime like grilled lobster tails to pair with a steak. Who doesn’t like a great surf and turf?

This recipe is a breeze and so fun do to for an outdoor party. Once you have the Lobster Butterfly Technique down, everything else comes together in minutes.

Ingredients:

  • 2 8-ounce lobster tails
  • ½ cup butter
  • 2 cloves garlic, finely minced
  • ½ tsp. paprika
  • Big pinch of salt and pepper
  • Grated zest of ½ lemon (I use a microplane for this)
Lemon Butter

Directions:

  1. Coat a few layers of paper towels with a neutral oil like vegetable or Canola. Grease the grates of a grill. Preheat the grill on medium-high for 10-15 minutes.
  2. Using the Lobster Butterfly Technique shown in the linked video, use kitchen shears to cut down the shell of the lobster tail from fleshy end to right before what I call the tail ‘feathers’. Gently pull the meat out of the shell leaving the meat attached to the tail feathers intact. Lay the meat over the shell.
  3. In a small saucepan over medium heat, place the butter, garlic, paprika, salt, pepper and lemon zest. Cook stirring occasionally until the butter starts to brown slightly, about 4 minutes. Take off the heat.
  4. Spoon half the butter mixture over the lobster meat. Carefully place the lobster tails on the grill, meat side up, cover and cook for 12 minutes, basting once during the cooking process.
  5. Rewarm the remaining butter and serve with the lobster tails for dipping.

Serves two.

Easy Maple Rice Pudding

Easy Maple Rice Pudding

This creamy rice pudding is flavored with maple syrup and is the perfect comfort food. Ideally, this recipe is made using Arborio rice (same rice used to make risotto), but other short grain white rice could also work.

Maple Rice PuddingIngredients:

  • ½ cup Arborio rice, uncooked
  • 4 cups whole milk
  • ½ cup maple syrup
  • 1 tsp. pure vanilla extract
  • Pinch of cinnamon
  • ½ cup powdered milk

Directions:

  1. Place the rice in a sieve or colander and run cold water over it for 30 seconds while shaking the sieve/colander. This removes a bit of the outer starch which can cause your rice to clump while cooking. Shake to remove as much of the water as possible.
  2. In a medium saucepan over medium-high heat, combine all the ingredients except the powered milk, stir well to combine. Bring to a simmer, then turn the heat down to medium-low and cook for 40 minutes, stirring frequently. After 35 minutes, if the rice mixture is VERY thick and the rice rains feel tender, turn off the heat. Depending on the rice you use and how hot your stove runs, 35 minutes might be enough.
  3. Remove the pan from the heat and add the powdered milk. Stir to fully combine.
  4. Allow to cool to lukewarm to serve.

Note: This pudding can also be served cold with a drizzle of maple syrup, granola and berries.

Yields six servings.

One Minute Brownie in a Cup

One Minute Brownie in a Cup

This is a perfect little one minute brownie recipe for when you have sugar cravings but don’t want to wait 45 minutes to satisfy your sweet tooth.

Ingredients:

  • 1 Tbsp. all-purpose flour
  • 2 Tbsp. powdered milk
  • 2 Tbsp. granulated sugar
  • 1 Tbsp. cocoa powder
  • 2 Tbsp. whole milk

Directions:

  1. In a small bowl, combine all the ingredients. Pour mixture in a microwaveable-safe mug and microwave for one minute.

Serves one.

Pesto and Roasted Zucchini Panini

Pesto and Roasted Zucchini Panini

We love panini at our home and try to make them for lunch every few weeks. My guy loves them loaded with meats like cold cuts or grilled chicken (here’s his blackened chicken version), and I think the vegetarian versions, like this Pesto and Roasted Zucchini Panini, are also fantastic.

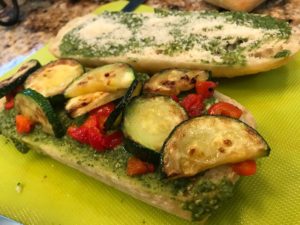
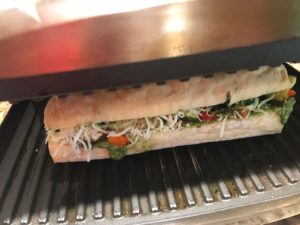
We served this Pesto and Roasted Zucchini Panini with a side of roasted cauliflower tossed in a mixture of red wine vinegar/Parmesan and garlic and it was delish.

If you don’t have a panini press (it’s a great investment), you could use a grill pan and weight the panini down with another pan to ensure you get a great crisp bread exterior.

Ingredients:

  • 2 Ciabatta rolls
  • 1 Tbsp. olive oil
  • 1 Tbsp. vegetable oil
  • 1 medium zucchini, cut crosswise into ½-inch rounds
  • ⅓ cup basil pesto, homemade or store-bought
  • 1 ounce roasted red peppers, chopped
  • ¼ cup grated Parmesan cheese
  • ½ cup shredded Mozzarella cheese

Directions:

  1. Halve the rolls long ways/horizontally and rub the olive oil over the exterior.
  2. In a medium nonstick pan over medium-high heat, heat the vegetable oil. Add the zucchini rounds in an even layer and season with salt and pepper. Cook 2 to 3 minutes per side, or until lightly browned. Turn off the heat.
  3. Spread the pesto on the inside of the rolls. Top the bottom pieces of the rolls with the zucchini rounds, roasted pepper, Parmesan and Mozzarella cheeses. Season with salt and pepper. Place the roll tops over the toppings.
  4. Heat a panini press or, alternatively, heat a tablespoon of vegetable oil in a grill pan over medium-high heat.
  5. Add the panini to the press and grill 5 minutes. If using the grill pan, make sure to use a second pan over the panini to press them down for a crisp exterior, about 2 minutes per side. Transfer the panini to a cutting board and carefully halve on an angle.

Makes two sandwiches.

Braised Beef Short Ribs

Braised Beef Short Ribs

Fall’s here and I’m now starting to crave slow braises and roasts. I enjoy the whole process – searing the meat, sautéing the vegetables, splashing wine and broth. Smelling the awesome aromas in the house as the short ribs or the roasts braise in the oven is truly intoxicating!

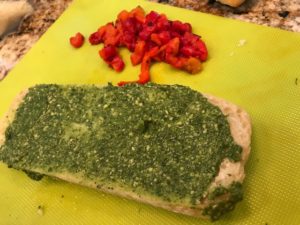
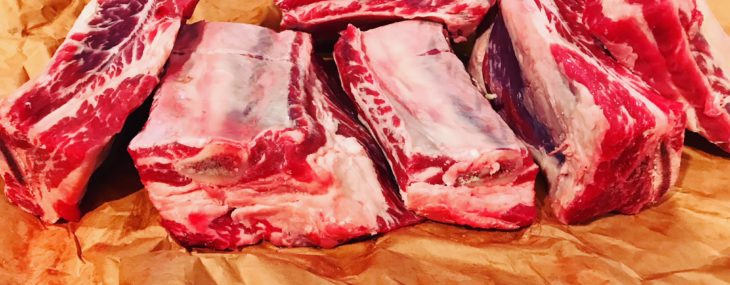
While I was visiting my favorite craft butcher, Denville Meat Shop (https://www.denvillemeatshop.com), last week, I saw amazing-looking short ribs and I knew they’d be perfect for dinner for the out-of-town company I was entertaining.

I serve these beauties and creamy mashed potatoes in casual bowls for a rustic look. I also love serving short ribs over creamy soft polenta also. Depends on the mood.

Ingredients:

  • 3 Tbsp. vegetable oil
  • 1 tsp. each salt and pepper
  • 6 large bone-in beef short ribs
  • Large Spanish onion, diced
  • 3 large carrots, chopped
  • 1 pound Cremini mushrooms, sliced
  • 2 Tbsp. tomato paste
  • 3 cups dry red wine, like a Cabernet Sauvignon
  • 4 cups beef broth
  • 2 bay leaves
  • 1 Tbsp. fresh thyme

Directions:

  1. Preheat oven to 300 degrees.
  2. Over high heat, warm the oil in a large Dutch oven (I actually used two medium-sized ones).
  3. Sprinkle the salt and pepper all over the short ribs.
  4. Sear the ribs in the hot oil until browned, about 2 minutes on each side. Place the ribs on a plate.
  5. Lower the heat to medium-high, add the onion and carrots and cook for 5 minutes until slightly-browned, stirring occasionally. Add the mushrooms and continue cooking for another 3 minutes, until mushrooms have softened. Add the tomato paste and cook for a minute. Add the wine and broth and scrape all the brown bits that have formed on the bottom of the pot (the fond). Add the bay leaves, the thyme and the seared short ribs to the pot then cover and place in the oven to braise for 4-6 hours. Check that the cooking liquid doesn’t seem dry every 30 minutes. If liquid seems low, add ½ cup more beef broth.

Makes 6 servings.

Cheers,

Veronique

Shrimp, Avocado and Freekeh Bowl

Shrimp, Avocado and Freekeh Bowl

With all my traveling for work, I don’t always have time to grocery shop for weekday lunches. I haven’t posted one of my beloved “there’s nothing to eat in this house” recipes in a while, so he’s a good one that uses mostly pantry items that won’t require a trip to the grocery store.

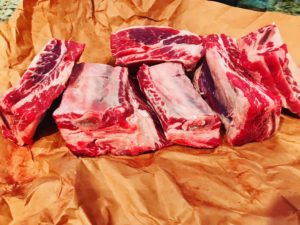
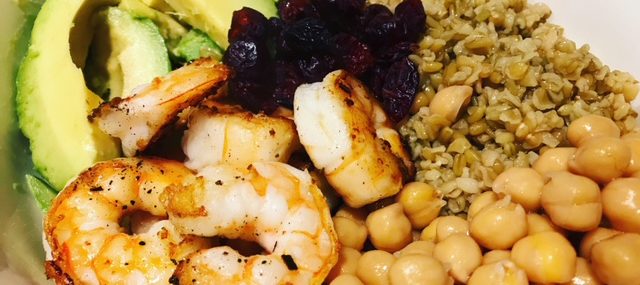
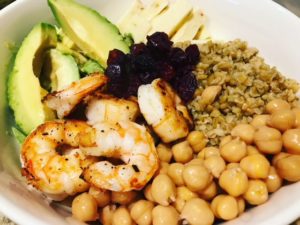
These types of bowls are all the rave right now and for good reason – they’re delicious and so versatile! I like the start with a grain or pasta, this time I’m using freekeh, and add whatever staples you have on hand. Here’s I’m using sliced avocado, canned chickpeas (don’t hate), leftover pepper jack cheese, cranberries and shrimp I thawed from the freezer that I used blackening spices on. Drizzle my favorite dressing and I was good to go in the time it took to cook the freekeh!

For those not familiar with freekeh, it’s an ancient grain that’s long been recognized as a main ingredient in Middle Eastern and Mediterranean cooking. It’s nutty and has great texture and it’s perfect for grain bowls.

Ingredients:
• ½ cup cooked chickpeas
• 1 avocado, sliced
• ¾ cup of cooked freekeh, cooled
• 2 Tbsp. dried cranberries
• 6-8 large shrimp, sprinkled with blackening or Cajun seasoning and cooked for 4-5 minutes then cooled
• 2 ounces pepper jack cheese, cut into bit size pieces
• 4 Tbsp. Easy Greek Vinaigrette (or similar store-bought)

Directions:
Place all the items in a large bowl and coat with the dressing – enjoy!

Serves one very generously or two in more appropriate servings :).

Cheers,
Veronique

Eat with Dan Easy Strawberry Jam

Eat with Dan Easy Strawberry Jam

Oh how I want to make my own strawberry jam. I’ve taken classes on canning and I’m still uncomfortable with the whole process. Will my jars be airtight? Did I sanitize the jars long enough? Will I poison everyone around me with contaminated canned food? All questions that I ask myself when I’m tempted to try canning.

Photo by Danny Chin

Last week, I took my foodie brother Danny Chin, of Eat with Dan, to brunch and he surprised me on HIS birthday with homemade strawberry jam. What a guy! He told me the process of making the jam is simple and I shouldn’t be intimidated. The key to success to good strawberry jam according to Danny? “Pick ripe strawberries that have that bright strawberry flavor”. We both pick our berries at the amazing Donaldson Farms in Hackettstown, NJ – the place is gorgeous and its produce is outstanding.

This delicious jam is bursting with strawberry flavors and isn’t too sweet. It requires no candy thermometer or expensive equipment. It’s perfect on a hot English muffin.

Connect with Eat with Dan

Have I mentioned that Danny’s a very talented photographer specializing in fashion and food? For amazing, drool-worthy food photography, do yourself a favor and follow Danny on Facebook, on Twitter and on Instagram.

Ingredients:

  • 2 quarts ripe strawberries
  • 1 1.75-ounce box SURE-JELL Fruit Pectin
  • ½ tsp. butter
  • 7 cups granulated sugar, measured into separate bowl

Directions:

  1. Bring large pot/canner half full of water to a boil over high heat.
  2. Wash jars and screw bands in hot soapy water; rinse with warm water. Pour boiling water over flat lids in saucepan on the heat. Let stand in hot water until ready to use. Drain well before filling.
  3. Destem and crush strawberries thoroughly. Place exactly 5 cups of crushed strawberries into 6- or 8-quart pot. Add the pectin to the berries in pot and stir to combine. Add butter to reduce foaming. Bring mixture to full rolling boil on high heat, stirring constantly. Stir in sugar. Return to full rolling boil and boil exactly 1 min., stirring constantly. Remove from heat. Skim any foam with metal spoon. 

    English Muffin with Jam

  4. Immediately ladle the mixture into prepared jars, filling to within ¼ inch of tops. Wipe jar rims and threads. Cover with two-piece lids. Screw bands tightly. Carefully lower jars into the pot of boiling water or canner. Important: Water must cover jars by 1 to 2 inches – add boiling water to the pot if needed. Cover the pot and bring water to gentle boil. Process 10 min. Remove jars and place upright on a towel to cool completely.
  5. After jars cool, check seals by pressing middle of lids with finger – If the lids spring back, lids are not sealed and refrigeration is necessary (up to a month).

Note: you can expect properly-sealed jars of jam to last about two years when stored in a cool, dry place. Once opened, keep your homemade jam in the refrigerator for up to a month.

Yields about eight (1-cup) jars.

Recipe based on this.

Chocolate French Silk Pie

Chocolate French Silk Pie

Growing up, I’d always ask for chocolate silk pie for my birthday. I much preferred it over cakes and my love for pie started around that time. My grandma made the best super tall chocolate silk pie and I wish I could have a slice of it just one more time.

I have my old standard Mile High Chocolate Cream Pie recipe (https://www.foodandwinechickie.com/2012/01/16/mile-high-chocolate-cream-pie) that produces this light and velvety pie but I thought I’d go a different route to see if I could get a better result and tried the below. It was really creamy and light with big chocolate flavors boosted by the espresso powder.

If you want to go with a store-bought pie crust, that’s perfectly fine. The recipe below yields two 9” pie crusts that freeze well, so I typically use one and freeze one.

INGREDIENTS:

For the Filling

  • 1 cup butter, soften
  • 1 ½ cups granulated sugar
  • 4 ounces unsweetened chocolate, melted and slightly cooled
  • 2 tsp. pure vanilla extract
  • ¼ tsp. instant espresso/coffee powder
  • 2 Tbsp. Dutch-processed cocoa powder
  • 4 large eggs
  • 2 cups heavy cream, whipped
  • Chocolate shavings or curls (optional)

DIRECTIONS:

  1. Preheat oven to 400F.
  2. Place a pie crust in a 9” pie plate, embellish the edges and dock the dough by piercing with a fork several times around the bottom and sides to prevent the crust from bubbling or puffing up while baking. Add a piece of parchment paper over the crust and fill with dried beans/pie weights (I use beans that I cool after baking and store in a zip top baggies for the next pie). Bake in the bottom third of the oven for 15 minutes. Remove the parchment/dried beans and return to the oven for 10 more minutes, or until the crust is lightly golden. Let the crust cool completely on a wire rack before adding the filling – don’t be tempted to add the filling until the crust is cooled, it’ll be a mess and won’t work or set correctly.
  3. In the bowl of an electric mixer fitted with the paddle attachment, cream the butter and sugar until light and fluffy, scraping the bowl with a rubber spatula a couple of times to ensure all is well-incorporated.
  4. With the mixer running at low speed, pour the cooled melted chocolate into the butter mixture. Add the vanilla, the espresso powder and the cocoa powder. Scrape down the bowl again to fully combine.
  5. Add the eggs one at a time, beating for 3 minutes after each addition (12 minutes total) at a high speed. Mixing for 12 minutes is crucial to getting a light and silky texture.
  6. Add the filling to the cooled crust and allow to set in the refrigerator for at least 4 hours and up to 2 days prior to serving.
  7. Top the pie with whipped cream and chocolate shavings or curls (if using).

RECIPE NOTES:

Consuming raw or undercooked eggs may increase your risk of food borne illness, especially if you have a medical condition.

Serves 8.

Inspired by this recipe.

Garlic Miso Cremini Mushrooms

Garlic Miso Cremini Mushrooms

It’s prime grilling season and, unlike other times of the year, we find ourselves gravitating to the meat counter at our local butcher shop for steaks. If you’re a carnivore, there’s nothing better than a medium-rare ribeye seared to perfection and served with a carb-loaded side.

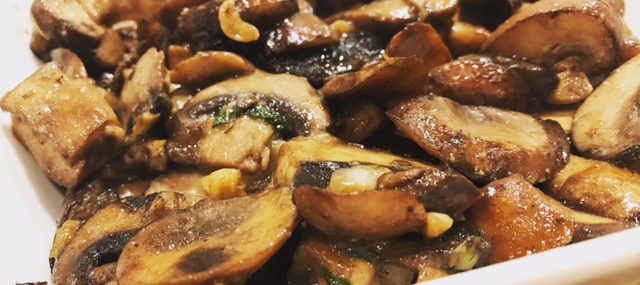
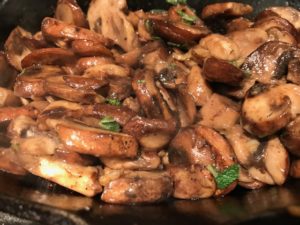
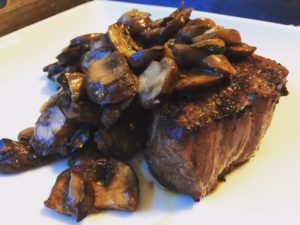
In an effort to cut down on carbs, we often forego the typical baked potatoes and corn in favor of grilled vegetables. Asparagus, zucchini and squash are veggies we like, but, our very favorites are mushrooms. We enjoy all kinds of mushrooms cooked many different ways.

One of those ways is to sauté mushrooms in garlic brown butter and finish with white miso and sage – yum!! Miso is a traditional Japanese seasoning produced by fermenting mashed soybeans (could also use rice or barley) with salt and a mold called Koji. After fermenting for anywhere from a few months to a few years, the miso turns into a thick paste that can be used in many ways to season things like soups and marinades. White miso paste, which is milder in flavor and lighter in color than its dark/red miso kin, can be found in the refrigerated section of the grocery store or at Asian markets.

These Garlic Miso Cremini Mushrooms are also great on burgers and served with grilled salmon or pork chops.

Ingredients:

  • 4 Tbsp. butter
  • 2 garlic cloves, minced
  • 16-ounces sliced Cremini mushrooms (can use button or other mushrooms too)
  • ½ tsp. each salt and pepper
  • 1 Tbsp. white miso paste (this is the one I use)
  • 1 Tbsp. chopped fresh sage

Directions:

  1. Place a large skillet over high heat and add butter. Once the butter is slightly browned, after about 1 minute, add the garlic and cook for 30 seconds, until fragrant. Add the mushrooms and toss to coat in garlic butter then cook for about 5 minutes over medium heat, stirring occasionally, until soften and slightly golden.
  2. Add the salt and pepper and stir to combine.
  3. Add the miso paste and stir into the mushroom mixture until it’s fully dissolved, about 1 minute.
  4. Add the sage and stir to combine for about 30 seconds.

Makes 2 large side servings.