Hot Chocolate Cookies

hot-chocolate-cookies
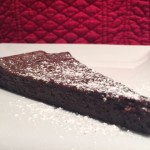
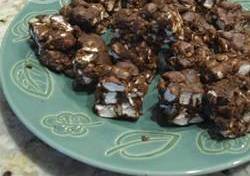
Day 3 of my 12 Days of Christmas Baking compilation!

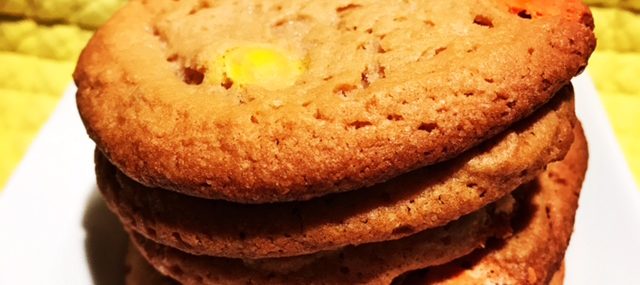
We had our first snow of the season this week and as I was sipping a cup of hot cocoa, I thought of how great a cookie with these flavors would be. Who doesn’t like mini marshmallows anyways – nobody!

Ingredients:

  • 1¼ cups/2 ½ sticks butter, softened
  • ⅔ cup brown sugar
  • 1 cup granulated sugar
  • 2 large eggs
  • 1 tsp. pure vanilla extract
  • 3 cups all-purpose flour
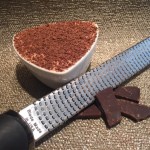
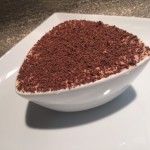
  • ¼ cup Dutch-processed cocoa
  • 4 – 0.73 ounce packets of milk chocolate hot cocoa mix, I used Swiss Miss Classics Milk Chocolate Hot Cocoa Mix
  • 1 ¼ tsp. baking soda
  • 1 tsp. baking powder
  • 1 cup semi-sweet chocolate chips
  • ½ cup mini marshmallows

Directions:

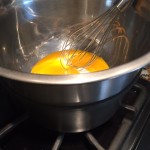
  1. In the bowl of an electric mixer, beat the butter, brown and granulated sugars together until light and fluffy, about 2 minutes.
  2. Add eggs and vanilla and beat an additional minute.
  3. In a medium bowl, sift together the flour, Dutch-processed cocoa, the hot cocoa mixes, the baking soda and the baking powder. Gradually add the flour mixture to the butter mixture and beat just to combine.
  4. Fold in the chocolate chips and the mini marshmallows. Chill the dough for about 30 minutes.
  5. Preheat oven to 350 degrees.
  6. Drop the dough by the tablespoonful onto greased cookie sheets, 2 inches apart.
  7. Bake for 9-10 minutes until the edges of the cookies are set. Cool on the cookie sheets for 5 minutes then place the cookies on cooling racks.

Yields 2 dozens.

Reese’s Pieces Cookies

Reese’s Pieces Cookies

reeses-pieces-cookies
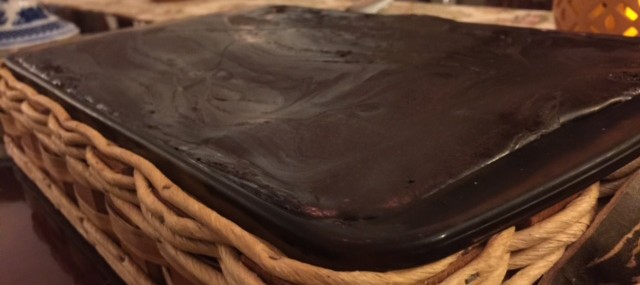
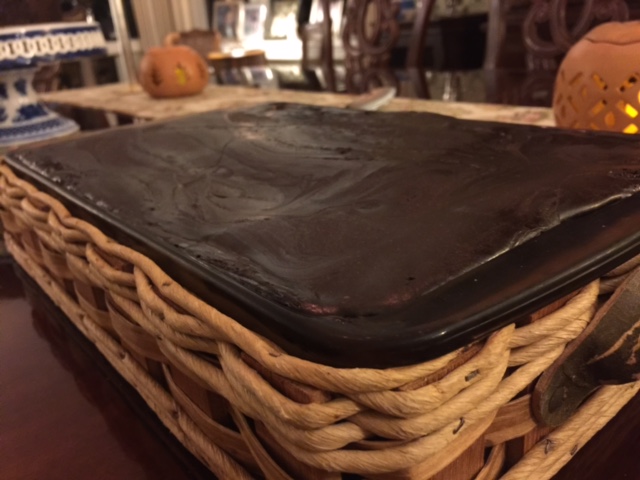
Day 2 of my 12 Days of Christmas Baking.

I must admit, I’m not a huge fan of peanut butter cookies. Why did I create this recipe, you might ask? Because I’m doing a 12 days of cookies compilation and don’t want to devour dozens upon dozens of cookies…..with this recipe, I, of course, tasted my final product – but, didn’t feel like having 2 dozens…genius!  

These would be even more PB-tasting by replacing ½ cup of the chocolate chips with peanut butter chips. Up to you how PB-fanatic your entourage is.

Ingredients:

  • ½ cup/1 stick butter, softened
  • 1 cup granulated sugar
  • 1 cup brown sugar
  • ½ cup vegetable oil
  • 2 large eggs
  • 1 tsp. pure vanilla extract
  • 1 tsp. baking powder
  • 1 tsp. baking soda
  • 1 tsp. salt
  • 3 cups all-purpose flour
  • 1 ½ cups Reese’s Pieces
  • 1 cup semi-sweet chocolate chips

Directions:

  1. Add the butter to the bowl of an electric mixer and beat until light and fluffy, about 2 minutes.
  2. Add the granulated and brown sugar and beat an additional minute.
  3. Add the oil, the eggs and the vanilla and beat for another minute.
  4. In a medium bowl, sift the baking powder, the soda, the salt and the flour. Add the flour mixture to the batter and beat just enough to incorporate.
  5. Fold in the Reese’s Pieces and the chocolate chips. Refrigerate for 15 minutes.
  6. Preheat oven to 350 degrees.
  7. Drop the dough by the tablespoonful onto greased cookie sheets.
  8. Bake for 7­-8 minutes, until lightly golden brown. Cool on the cookie sheets for 5 minutes then place the cookies on cooling racks.

Yields about 2 dozen cookies.

Sugarpova Chocolate Mousse

Sugarpova Chocolate Mousse

Chocolate Mousse CupA few weeks ago, I was approached by a new chocolate line to create an exclusive recipe using its product. I don’t typically do product reviews, but I was intrigued since the new brand, Sugarpova Premium Chocolates, is by Maria Sharapova, the international tennis sensation, who is the company’s founder.

Sugarpova offers a decadent collection of 100g chocolate bars in Dark, Milk, Dark with Toasted Coconut and Milk with Strawberry. The unique product is non-GMO, Certified Kosher, Halal and made with natural ingredients. The bars have a suggested retail price of $3.99 to $4.99 and are available at www.sugarpova.com.

The samples I received were:

Sugarpova Bars

DARK CHOCOLATE COCONUT – “50% cocoa dark chocolate is made all the richer with the delightful addition of toasted coconut. A match made in heaven, you’re sure to fall in love with this tempting combination”.

MILK CHOCOLATE STRAWBERRY – “Is there anything better than chocolate dipped strawberries? Treat yourself to a taste of luxury anytime with the only bar that combines creamy milk chocolate with the flavor of fresh strawberries”.

70% COCOA DARK CHOCOLATE – “Kick back, relax, and indulge in the full-bodied flavor of 70% premium dark chocolate. Not too sweet, it engages all your senses with every perfect bite”.

MILK CHOCOLATE – “Take a break from the hustle and bustle with a smooth, creamy bite of premium milk chocolate. We won’t tell if it ends up being more than just one bite”.

I wanted to use as many of the bars as I could in my recipe, but since I’m not a coconut fan, I skipped using that one. I thought of doing a mousse as soon as I saw the chocolate/strawberry bar – what a great compliment in flavors! I combined the strawberry bar with the milk chocolate one in the mousse and topped each serving with a healthy grating of the dark chocolate. I plated a couple different ways to showcase the mousse in various portion sizes and appearance.

Ingredients:

  • 1 100g Sugarpova Milk Chocolate bar and 1 100g Sugarpova Milk Chocolate Strawberry bar, chopped into small pieces (could also use 200g semisweet chocolate chips)
  • 1/3 cup plus 1 Tbsp. granulated sugar, divided
  • 2 cups heavy cream
  • 4 large egg yolks
  • 1-ounce piece of Sugarpova Dark Chocolate, optional

Directions:

  1. Place the chopped chocolate in a microwave-safe bowl and microwave on medium power for 30 seconds. Stir and continue to cook for another 30 seconds. Allow to cool while proceeding with the following steps.
  2. In the bowl of an electric mixer, add the tablespoon of sugar to the cream. Beat for 2-3 minutes or until soft peaks form. Set aside.
  3. In a metal or heat-resistant glass bowl placed over a saucepan of barely simmering water, combine the remaining sugar and the egg yolks. Whisk the mixture for 3 minutes until smooth, fluffy and doubled in volume.
  4. Using a rubber spatula, combine the melted and cooled chocolate with the yolk mixture until no eggy streaks are left.
  5. Gently fold half the whipped cream into the chocolate mixture. Once fully combined, add the remaining whipped cream and again, gently fold in. Don’t overmix, you want this light and fluffy – a few darker chocolate streaks are okay.
  6. Pipe or spoon the mousse into single-serving size dishes or glasses and refrigerate until set, at least 2 hours. The mixture will feel a bit runny but that’s okay, the mousse will stiffen after chilling.
  7. Grate the dark chocolate over the individual mousse cups and serve.

About Sugarpova: Sugarpova continues to have double-digit growth year after year since its launch. Currently, the brand has retail penetration in 22 countries all over the world and is sold in a variety of retail partners and online. The founder and international tennis sensation is Maria Sharapova, whose sweet tooth and love for little indulgences, motivated her to create a candy company specializing in gummies and sweets of quality and craftsmanship. For more information, visit http://www.sugarpova.com.

Cheers,

Veronique

Nut Goodie Bars

Nut Goodie Bars

Nut Goodie
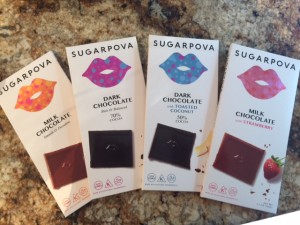
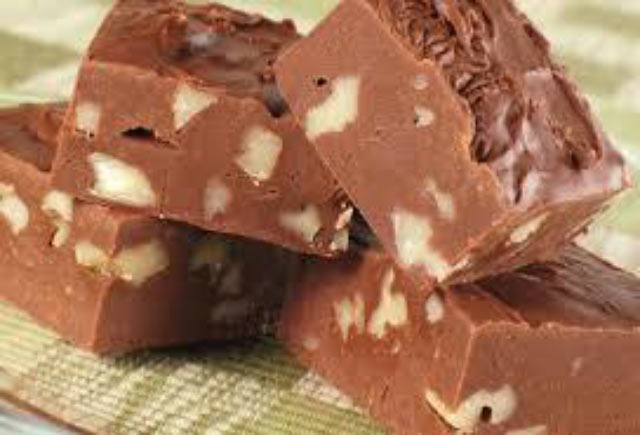
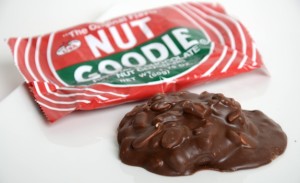
Nut Goodie is a candy bar that has been manufactured by Saint Paul, Minnesota’s
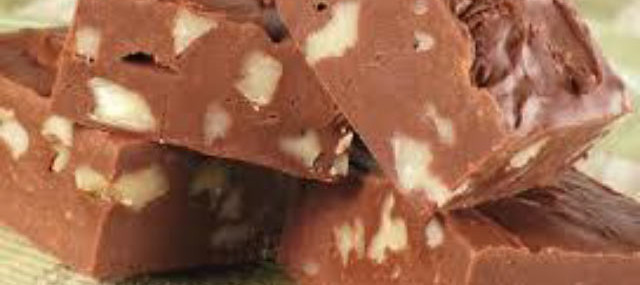
 Pearson’s Candy Company for over 100 years. The popular Midwest candy bar is a blend of chocolate, maple and peanuts and is decadent and purely delicious.

I’d never heard of this candy bar until my friend and colleague, Pam, brought bags of them to a conference our company exhibited at a couple years ago. Our midwest-based clients went nuts (pun intended) over the treats and we heard many stories of how they loved the bars as kids.

I was able to get the recipe for the tasty, chewy bites from Pam and sharing it with you.

Ingredients:

  • 12 ounces chocolate chips
  • 12 ounces butterscotch chips
  • 2 cups peanut butter (smooth or chunky)
  • 1 cup butter, softened
  • ½ cup evaporated milk
  • ¼ cup powdered vanilla pudding (not instant)
  • 2 pounds confectioners’ sugar
  • 1 tsp. maple extract
  • 16-ounce jar of dry-roasted peanuts

Directions:

  1. Butter or coat in cooking spray a 12×16 pan.
  2. In a metal bowl over a pan of simmering water (don’t let the bowl touch the water), melt the chocolate and butterscotch chips and peanut butter, mix well to combine. Pour half the mixture into the buttered pan and refrigerate.
  3. In a large saucepan over medium-high heat, combine the butter, evaporated milk and vanilla pudding mix. Bring to a boil, cook for a minute and remove the pan from the heat.
  4. Add the confectioners’ sugar to the bowl of an electric mixer. Add the hot butter mixture to the confectioners’ sugar and mix until well-combined. Add the maple extract and mix for another 30 seconds, until mixture is smooth.
  5. Pour/spread the butter/confectioners’ sugar mixture over the refrigerated chocolate base in the pan. Put the pan back in the refrigerator for 30 minutes.
  6. Add the peanuts to remaining melted chocolate mixture and spread over the chilled butter/confectioners’ sugar filling in the pan. Refrigerate for an hour then cut into squares.

Yields 24-32 squares.

Four Ingredient Fudge

Four Ingredient Fudge

Day 11 of my “12 Days of Baked Goods” series!

fudgeSeeing that I was doing a holiday baking compilation, my mom sent me her easy fudge recipe that you can make with just four ingredients (three if you don’t want to use nuts). If you like marshmallows, you could easily add ½ cup by reducing the nuts by ½ cup.

Ingredients:

  • 1 14-ounce can sweetened condensed milk
  • 2 cups semi-sweet chocolate chips
  • 1 cup chopped walnuts (or other nuts like almonds, hazelnuts, Macadamia)
  • 1 tsp. pure vanilla extract

Directions:

  1. Butter or coat with cooking spray a 9-inch baking pan.
  2. In a heavy medium saucepan over low heat, add the condensed milk and the chocolate chips. Cook, stirring frequently, until fully melted – do not allow the mixture to boil or scorch. Remove the pan from the heat, add the walnuts and the vanilla and stir well to fully combine into the chocolate.
  3. Pour the chocolate mixture into the greased baking pan and allow to fully cool. Cover with aluminum foil and refrigerate until firm, at least 2 hours. Cut the fudge into 24-28 squares, depending how large you want your pieces to be – a little goes a long way!

Yields 24-28 squares.

Cheers,

Veronique

Chocolate Silk Pie

Chocolate Silk Pie

Day 8 of my “12 Days of Baked Goods” series!

Growing up, my favorite dessert was chocolate silk pie. I loved it so much that y Grandma made it for me for my birthday instead of the typical birthday cake. Flaky, buttery pie crusts, rich, decadent chocolate and slightly sweet whipped cream topping – just what dreams are made of.

This version uses marshmallow fluff in the chocolate layer, reminding me of Fantasy Fudge a bit.

Ingredients:

  • 1 baked 8” pastry shell, homemade or store-bought
  • 1 7-ounce jar marshmallow fluff
  • 1 cup (6 ounces) semisweet chocolate chips
  • ¼ cup butter, cubed
  • 2 ounces unsweetened chocolate
  • 2 Tbsp. strong brewed coffee
  • 1 cup heavy whipping cream, whipped

Topping Ingredients:

  • 1 cup heavy whipping cream
  • 2 Tbsp. powdered sugar

Directions:

  1. Melt the marshmallow fluff, chocolate chips, butter, unsweetened chocolate and coffee in a large bowl set over a pan of simmering water, stirring until smooth, about 5 minutes. Make sure the water doesn’t touch the bottom of the bowl, risking scorching. Cool completely then fold in whipped cream. Pour into the baked crust.
  2. In the bowl of an electric mixer, beat the cream until slightly thickened, about 2 minutes. Add the powdered sugar to the cream in the bowl and continue beating until stiff peaks form, about 2 more minutes. Top the chocolate layer with the whipped cream and refrigerate at least 3 hours before serving.

Yields 6-8 servings.

Recipe from Taste of Home.

Flourless Chocolate Cake

Flourless Chocolate Cake

Day 6 of my “12 Days of Baked Goods” series!

Flourless Chocolate CakeA few weeks back, I had the pleasure of lunching at the adorable (and delicious) Choc-O-Pain French Bakery & Café in Hoboken, NJ (see my review for Jersey Bites). While there, I had the chance to sample the decadent Flourless Chocolate Cake that’s made with high-quality chocolate and creates a cake that’s both fudgy and cake-like.

I was able to get the scaled down recipe from the fine folks at Choc-O-Pain and am sharing with you. Note that I upped the chocolate to 6 ounces and it created a more fudgy than cake-like texture, which was also AMAZING. A light dusting of powdered sugar and you’ve got a perfect holiday dessert.

Ingredients:

  • 4 ounces fine-quality bittersweet chocolate chips
  • ½ cup butter
  • ¾ cup granulated sugar
  • Pinch of salt
  • 3 large eggs
  • ½ cup pure cocoa powder
  • 1 tsp. powdered sugar (optional)

Directions:

  1. Preheat oven to 300 degrees.
  2. Butter or coat in cooking spray an 8-inch round cake pan and line the bottom of the pan with a round of parchment paper.
  3. Melt chocolate and butter in a large bowl over simmering water, stirring until smooth. Make sure the water doesn’t touch the bottom of the bowl, risking scorching.
  4. In a separate larger bowl, whisk together sugar, salt and eggs. When thoroughly incorporated, carefully whisk in cocoa powder until fully incorporated. Pour melted mixture into cocoa, sugar mixture, mix thoroughly.
  5. Fill the cake pan with batter. Bake until center springs back (about 25-30 minutes). Allow to cool.
  6. Dust the cake with the powdered sugar, if using.

Yield: Makes one 8-inch cake and can easily serve 8-10.

Chocolate, Peanut and Marshmallow Squares

Chocolate, Peanut and Marshmallow Squares

Marshmallow Treats

Day 5 of my “12 Days of Baked Goods” series!

My sister is a great cook and baker. She takes after a long line of good bakers in our family, yet, she doesn’t bake often.

One of the treats she enjoys making for her family is this simple-yet-yummy recipe for squares packed with mini marshmallows and peanuts.

Ingredients:

  • 2 ½ cups semi-sweet chocolate chips
  • 2 Tbsp. butter
  • 14-ounce can condensed milk
  • 2 ½ cups roasted peanuts (not salted)
  • 3 ¾ cups mini marshmallows

Directions:

  1. Line a 13×9 pan with wax paper.
  2. In a microwave-safe bowl, melt the chocolate with the butter, stirring every 30 seconds to be sure the chocolate just melts and doesn’t overheat. Remove the bowl from the microwave and add the condensed milk, combine well.
  3. Add the peanuts and marshmallows to the chocolate mixture, stir well to fully coat in chocolate.
  4. Add the mixture to the prepared baking pan. Allow to cool completely.
  5. Cover the pan with foil and refrigerate until set, at least 2 hours. Cut into 24 squares.

Yields 24 squares.

Chocolate Éclair Squares

Chocolate Éclair Squares

Day 3 of “12 Days of Baked Goods”

Eclair CakeLast month, a group of us attended a harvest party at a winery where there was a LOT of wine being poured. When the 10 of us returned to our friends’ home, my friend Joan Gardner unpacked a dessert she’d made for the gang – chocolate éclair squares. She’s apparently seen a video of the dessert I’d shared on Facebook and made it. The recipe’s super simple to make YET, it’s decadent and a perfect ending to a boozy day.

This easy recipe would be perfect to make with the kids around the holidays!

Eclair Cake PieceIngredients:

  • 2 Instant Vanilla Pudding boxes
  • 16-ounce container of Cool Whip
  • 5-ounce box of Graham Crackers
  • 16-ounce container of dark chocolate ready-made icing

Directions:

  1. Line the bottom of a 13×9 baking dish with the Graham crackers.
  2. Prepare pudding according to package directions. Add Cool Whip to the pudding and spread half the mixture on top of crackers.
  3. Place another layer of crackers on top of the pudding mixture.
  4. Spread the other half of pudding mixture on top of crackers and top with another layer of crackers.
  5. Microwave the icing for 1 minute, stir then pour over the last cracker layer.
  6. Refrigerate for 12 hours before serving.

Yields 12 servings.

Cheers,

Veronique

Chocolate Cappuccino Cheesecake

Chocolate Cappuccino Cheesecake

Day 2 of “12 Days of Baked Goods”

Last week, I spent Thanksgiving with my friend Diane Biancamano and her family. I’m typically the person who gets assigned desserts for parties, but Diane’s a super baker and I was thrilled to be able to sample the decadent Chocolate Cappuccino Cheesecake she made. CheesecakeIngredients:

  • 1 cup chocolate cookie crumbs
  • ¼ cup butter, melted
  • 1 cup plus 2 Tbsp. granulated sugar
  • ¼ tsp. ground cinnamon
  • 3 8-ounce packages cream cheese, softened
  • 3 large eggs
  • 8 1-ounce squares semisweet chocolate
  • 2 Tbsp. whipping cream
  • 1 cup sour cream
  • ¼ tsp. salt
  • 2 tsp. instant coffee or Espresso granules dissolved in ¼ cup hot water
  • ¼ cup coffee flavored liqueur (Kahlua, Bailey’s, etc…)
  • 2 tsp. pure vanilla extract

Directions:

  1. Preheat oven to 350 degrees.
  2. Butter (or coat in cooking spray) the bottom and sides of a 9” springform pan.
  3. In a medium bowl, combine the chocolate wafer crumbs, the melted butter, 2 tablespoons granulated sugar and the cinnamon. Mix well and press all but 2 tablespoons of the crumb mixture onto the bottom of the springform pan, reserve the 2 tablespoons of crumbs for later use. Set aside.
  4. In the bowl of an electric mixer, beat the cream cheese until smooth, about 2 minutes. Gradually add the remaining 1 cup of granulated sugar, mixing until well combined. On low speed, add the eggs, one at a time until very smooth, about 2 minutes.
  5. In a medium bowl set over a pan of simmering water, melt the semisweet chocolate with the whipping cream until smooth, about 3 minutes. Don’t let the bowl touch the water!
  6. Add the melted chocolate to the cream cheese mixture and blend well. Stir in the sour cream, the salt, the coffee, the coffee liqueur and the vanilla and beat until just smooth, about 1 minute. Pour batter into the springform pan.
  7. Bake in the middle of the oven for 45 minutes. Note that the center of the cheesecake will be soft but it will firm up as it chills. Allow the cake to cool in the oven with the heat turned off and with the door ajar for 45 minutes. Remove cake from the oven and refrigerate for 12 hours.
  8. Sprinkle the reserved crumb mixture over the cheesecake before serving. 

Yields 16 servings. Recipe inspired by All Recipes. Cheers, Veronique