Blueberry Croissant French Toast Casserole

I love a recipe you can prep in advance that doesn’t require a lot of work once my guests arrive. Just love spending time with my guests vs having them speak at my back while I’m making food.

One such recipe is this Blueberry French Toast Casserole that’s prepared the evening prior to your brunch and pop in the oven to bake while you’re entertaining.

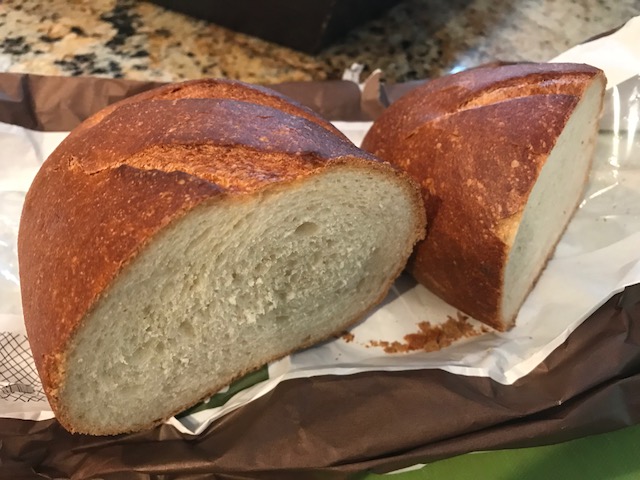
It’s blueberry season now so I’m using that berry, but this dish is also great with sliced strawberries or blackberries. I use Quebec maple syrup but use any good quality syrup. I like making this with buttery croissants, but brioche of challah bread would be great also.

Ingredients:

  • 12 cups croissants torn into bit size pieces (about 10 medium sized croissants)
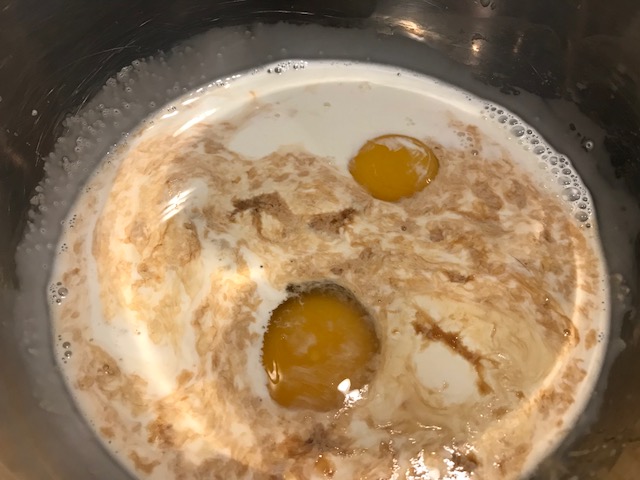
  • 10 large eggs
  • 1 cup, plus more for serving
  • 1 cup milk (not low-fat)
  • 1 Tbsp. pure vanilla extract
  • 1 tsp. ground cinnamon, optional
  • 2/3 cup light brown sugar
  • 1 1/2 cups blueberries
  • 1/2 tsp. lemon zest, optional
  • 1/2 cup maple syrup, plus more for serving
  • 2 Tbsp. confectionary sugar, optional

Directions:

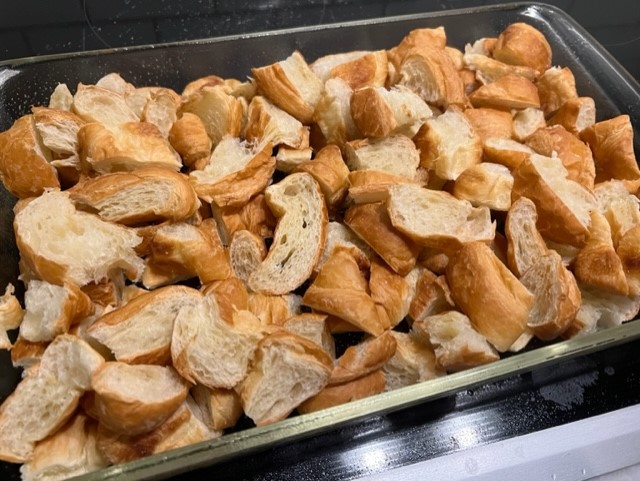
  1. Butter or coat with cooking spray a 9″x13″ baking dish. Add the croissants pieces to the casserole. It might seem like a lot of croissants, but after they soak into the custard overnight, the mixture will shrink some.
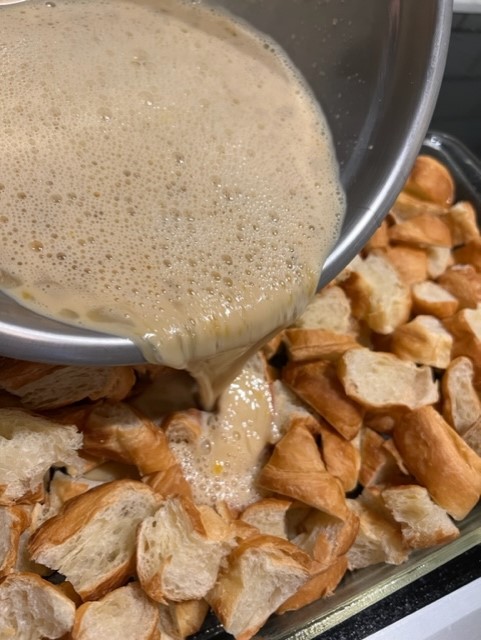
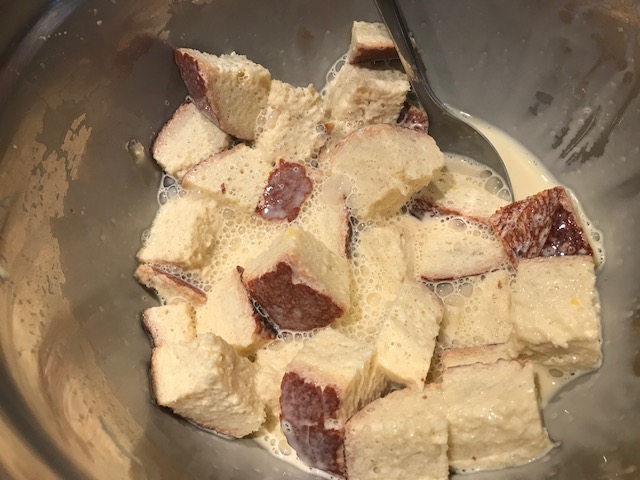
  2. In a large bowl, combine eggs, 1 cup of cream, milk, vanilla extract, cinnamon (if using), and brown sugar. Whisk the mixture until fully blended, about 1 minute. Pour the mixture over the croissant pieces and push down on the croissant with a spatula to ensure all the pieces are soaking into the custard.
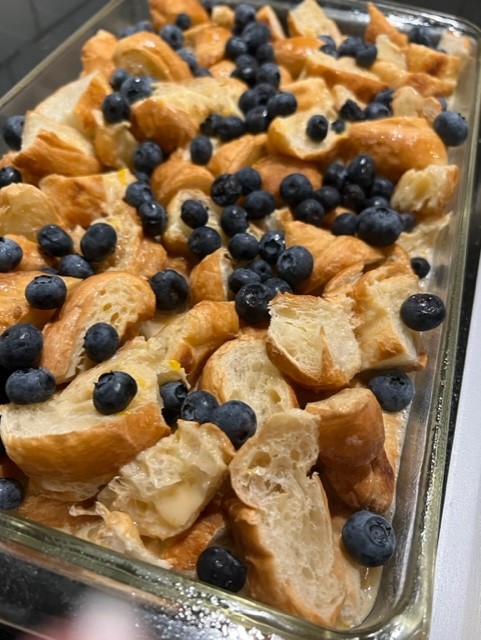
  3. Add the blueberries, lemon zest (if using) and drizzle with the maple syrup.
  4. Cover the baking dish with plastic wrap, or foil, and place in the refrigerator overnight or for at least 5 hours.
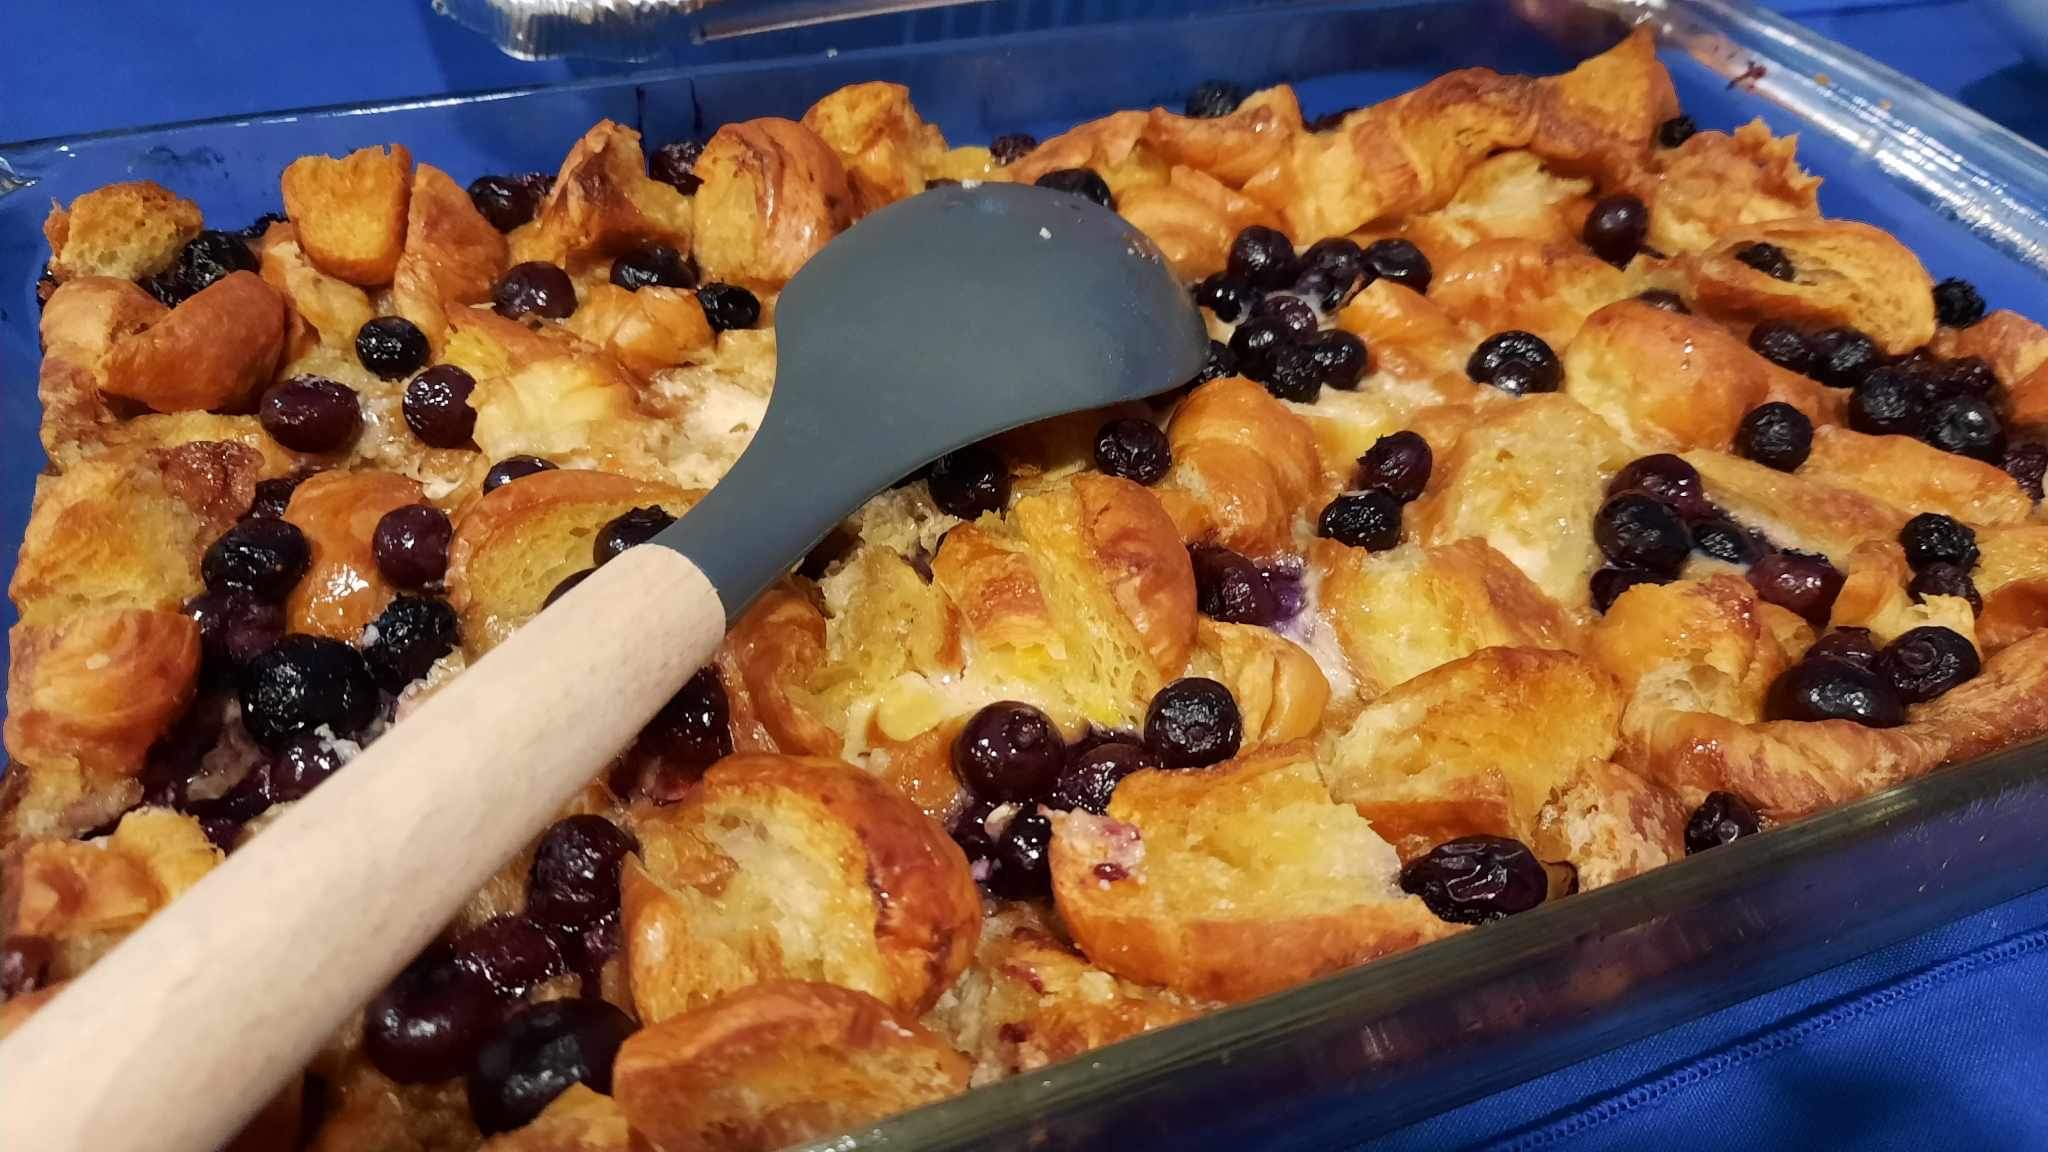
  5. When ready to bake, turn oven on to 350 degrees F, allow to preheat then place the casserole in the oven and bake for 40 minutes, or until the casserole top is golden brown (see pics for reference).
  6. Remove from the oven and allow to cool for 5-10 minutes before serving. Dust with confectionary sugar, if using.
  7. Serve with additional maple syrup and a drizzle of cream.

Makes 10 servings.

Cheers,

Veronique

Mediterranean Spinach and Feta Quiche

Mediterranean Spinach and Feta Quiche

I recently hosted a Greek-themed dinner party when I overbought a ton of ingredients (surprise surprise). With a buttery pie crust in the freezer, lots of sautéed spinach, Feta cheese, eggs and red onions on hand, I decided on a Mediterranean quiche!

Quiches are so versatile as they’re a great way to use up leftovers. This version is a vegetarian quiche but adding cooked bacon, leftover roast chicken or diced ham would also be great.

I think the crust is the most important part of a good quiche and I provide the EASY way to make a fail proof crust below where you put all the ingredients in the food processor and let it do the work – try it!

You’ll see that I added some Mozzarella for that cheesy stringy pull but replacing with all Feta would also work well.

Ingredients:

  • 1 pie crust, homemade or store-bought
  • 1 Tbsp. vegetable oil
  • ½ medium red onion, thinly sliced
  • 6 large eggs
  • 1 cup heavy cream
  • ½ tsp. each salt, freshly cracked pepper and oregano
  • Big pinch of ground nutmeg
  • 2 cups cooked spinach, squeezed dry
  • 1 cup crumbled Feta cheese
  • 1 cup shredded Mozzarella cheese

Directions:

  1. Preheat oven to 375 degrees.
  2. Add the pie crust to a 9″ pie plate and place in the freezer for 15 minutes.
  3. In a medium sauté pan over medium high heat, add the oil and sliced onion. Cook stirring frequently until the onions have softened, about 4 minutes. Take the pan off the heat and allow to cool for 10 minutes.
  4. In a large bowl, whisk together the eggs, cream and the spices for 60 seconds.
  5. Top the pie crust with the sautéed onion, then the spinach, then the Feta and then the Mozzarella. Place the pie plate on a baking sheet in case of spills. Carefully pour the egg mixture over the cheeses and place the quiche in the oven to bake for 40-45 minutes. The quiche is done when the center is no longer giggly. If the surface of the quiche browns quicker than the allotted time, cover loosely with foil.
  6. Allow to cool 15 minutes before serving. The quiche is great at room temperature.

Makes 6-8 servings.

Maple Bread Pudding Mugs for Two

Maple Bread Pudding Mugs for Two

I love bread pudding. The custardy bottom and the slightly crispy top make for a perfect dessert that can be changed up based on the season and most importantly, what’s in the house. I had leftover sourdough bread from last weekend’s party, so I used two thick slices of that for these two mugs.

Maple Bread Pudding
Maple Bread Pudding

At my home, I’m the only one who likes bread pudding….my guy calls it peasant food and he means that in a negative way! I love the comforting dish and recreated it in mugs, just enough for two people (or for one person, in a double serving).

This bread pudding variation pays homage to my Quebec roots and is made with and then topped with Quebec maple syrup. Oh yeah, and topped with maple-scented gelato also…..why not!?

Ingredients:

  • 2 thick slices of day-old bread (or 3 slices of standard cut bread)
  • 2 large eggs
  • ½ cup light cream (whole milk would also work)
  • 4 Tbsp. pure maple syrup DIVIDED
  • ½ tsp. pure vanilla extract
  • Maple-scented or vanilla gelato/ice cream, optional but not really

Directions:

  • Preheat the oven to 350 degrees.
  • Spray the inside of two 8-ounce oven-proof mugs with cooking spray (could use ramekins also).
  • Cut the bread into 1” pieces.
  • In a medium bowl, whisk together the eggs, cream, 2 tablespoons of maple syrup and vanilla.
  • Add the bread to the bowl with the egg mixture and stir until fully combined. Allow to sit for 10-15 minutes so the bread soaks up as much of the egg mixture as possible
  • Divide the bread/egg mixture between the mugs. Place the mugs on a small baking tray and bake for 30 minutes, until the tops of the bread puddings are lightly golden and the custard is set.
  • Serve each mug while warm with the remaining 2 tablespoons of maple syrup and a scoop of gelato/ice cream.

Makes 2 servings.

World Egg Day Favorite Recipes

Yep, there’s such a thing as World Egg Day and since I love eggs, I decided to play along and share some of the most ‘liked’, ‘shared’, ‘retweeted’ and Instagramed egg recipes on my blog.

Pork Belly Deviled Eggs. See the recipe.

No-Fail Hard Boiled Eggs. See the recipe.

Hash Browns Vegetable Frittata. See the recipe.

Dried Cherry Divinity. See the recipe.

Crutless Chipotle Cheesy Quiches. See the recipe.

Spaghetti Carbonara. See the recipe.

What are some of your favorite egg dishes? Who makes the best egg dishes?

Cheers,

Veronique

Dried Cherry Divinity

Dried Cherry Divinity

divinityDay 9 of my 12 Days of Christmas Baking compilation.

My mom and I were just reminiscing about Christmas earlier this week and about how her mom was such an amazing, avid baker. She loved Christmas and hosting family dinners and around Christmas, her house was filled with holiday treats. She always had her go-to recipes: fudge, peanut butter and chocolate treats, sugar pie and her famous divinity with dried cherries.

The divinity treats were my mom’s favorite and they’ve never been made since then – pure white, crisp meringues gilded with specks of red dried cherries – very festive! This year, I’m resurrecting these traditional treats with Grandma on my mind. Noe that I‘m not a fan of cherries, so mine are made using chopped pistachios.  

Ingredients:

  • 2 cups granulated sugar
  • ½ cup water
  • 1/3 cup light corn syrup
  • 2 egg whites
  • 1 tsp. pure vanilla extract
  • 1/8 tsp. salt
  • ½ cup diced candied cherries

Directions:

  1. In a heavy saucepan over medium-high heat, combine the sugar, water and corn syrup and cook, stirring frequently, until the sugar is completely dissolved and the mixture comes to a boil, about 3 minutes. After the mixture starts boiling, cook over medium heat, without stirring, until a candy thermometer reads 250 F (hard-ball stage). Remove the hot syrup from the heat, set aside.
  2. Place the egg whites in the bowl of an electric mixer and beat until stiff peaks form, 3-4 minutes. With mixer running on high speed, carefully pour hot syrup in a slow, steady stream into the beaten egg whites. Add vanilla and salt. Beat on high speed just until candy loses its gloss and holds its shape, about 10 minutes. Stir in the dried cherries.
  3. Drop the meringue by the teaspoonful onto waxed paper. Store in airtight containers.

Makes about 3 dozen treats.

Recipe by Taste of Home.

Crustless Chipotle Cheesy Quiches

Crustless Chipotle Cheesy Quiches

cooked-quichesI’m one of the ambassadors for #FoodieChats, a Monday evening Twitter chat where we socialize with thousands of foodies about all things food! Every week, we welcome a sponsor who informs us, in a fun way, about its products or services. This week, Sartori Cheese is our sponsor, and eventhough I don’t do a lot of product reviews, when Sartori Cheese offered to send me a few of their cheeses, I accepted – who doesn’t love cheese!

My really tough task, was to come up with a recipe featuring the delish cheeses sent to me. REALLY tough…not! I actually came up with two recipes, and I’m sharing the first one below. It’s a quick dish you can make on Sundays that are fast to reheat in the microwave during those busy weekday mornings.

Ingredients:

Directions:

  1. Preheat the oven to 350 degrees.
  2. Coat 6 of the cups of a 12 muffin pan with cooking spray, be generous.
  3. In a medium mixing bowl (for easy pouring, I use an 8-cup measuring cup), whisk the eggs with the water, salt and pepper until fully blended, about 1 minute.
  4. Pour an equal amount of the egg mixture into the 6 muffin cups.
  5. Sprinkle the cheese equally over the egg mixture.
  6. Place the muffin pan on a sheet tray (in case of drips) and bake for about 20 minutes, or until the egg is no longer runny – the quiches will be puffy like a soufflé.
  7. Allow the quiches to cool in the pan for about 5 minutes then unmold and let cool completely.
  8. Store the quiches in an airtight container in the fridge until ready to use – up to a week.
  9. To reheat, place two quiches on a plate, cover with a paper towel and microwave for 60-90 seconds.

Makes 3 servings (2 quiches each).

About Sartori

Sartori, a fourth-generation family owned company, has proudly produced award-winning, artisan cheese for customers worldwide since 1939. Rooted in Plymouth, Wisconsin, Sartori’s emphasis on a high-quality and handcrafted approach to cheesemaking is a timeless family tradition. For more information, please visit www.sartoricheese.com.

Cheers,

Veronique

Get to Know Slawsa Plus Easy Latkes Recipe

Get to Know Slawsa Plus Easy Latkes Recipe

Slawsa Jars
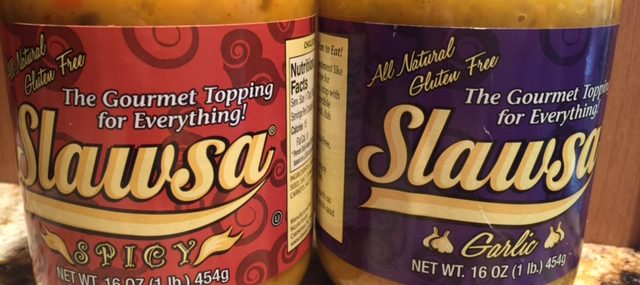
Last week, I was sent samples of a new product called Slawsa that I think are pretty fabulous so I’m sharing a bit about them and also sharing a recipe I made using the product.

About Slawsa

Slawsa breaks the mold of modern condiments and is meant to replace traditional ketchup, mustard, mayo or relish as a compliment to everyday foods.

Slawsa is a cabbage-based relish with a salsa twist. While it contains other vegetables, mustard and vinegar, the mustard and vinegar are not overwhelming, allowing it to be used in various ways.  It begins on the palate as sweet and transfers heat undertones that make it addictive atop grilling fare such as hot dogs, burgers or brats. Slawsa comes in Original, Spicy, Garlic and the new Fire.

The Flavors

Original – The classic, Slawsa Original starts a little sweet and finishes with a little heat that will quickly dissipate. The mustard and vinegar base is not overpowering and Slawsa retains a nice amount of crunch in every bite.

Spicy – The Spicy version isn’t “overly spicy” and more of a medium heat but does have a bit more kick to finish off the bite than the Original.

Fire – Slawsa Fire has a big kick of habanero and is truly for those who love the heat. But no, it’s not ghost pepper hot.

Garlic – The Garlic is truly for garlic lovers as it does have a bold garlic base.

Nutritional Facts

  • all-natural
  • fat-free
  • cholesterol-free
  • gluten-free
  • very low in sodium 
  • kosher
  • vegan

I tried the spicy and the garlic versions and both were unusual and delicious. I used both to create a mock latkes (typically a pan-fried potato pancake).

Easy Sauerkraut Latkes

Ingredients:

  • 1 cup Garlic Slawsa (could replace with sauerkraut)
  • 1 large egg
  • 1 tsp. all-purpose flour
  • ¼ tsp. each salt and pepper
  • ¼ cup vegetable oil, for frying
  • 4 tsp. Spicy Slawsa

Directions:

  1. Using a fine sieve, drain as much liquid from the Slawsa as possible. Place the drained Slawsa in a clean kitchen towel and wring as much of the remaining liquid as possible. Place the Slawsa in a small bowl and add the egg, flour and salt and pepper. Combine without over-mixing.
  2. In a heavy frying pan over high-heat, warm the oil for two minutes – pan should be sizzling hot.
  3. Drop the Slawsa mixture by the teaspoonful onto the oiled frying pan (should make 4 latkes) and cook for 2 minutes or until golden brown (see short video of this live action). Flip the latkes and cook an additional minute.
  4. Place on a double layer of paper towel to rid of excess oil and serve hot or at room temperature with the Spicy Slawsa.

Make 4 Latkes.

Slawsa is available for purchase online or at stores near you.

Cheers,

Veronique

Black Skillet Frittata by Piattino

Black Skillet Frittata by Piattino

Black Skillet Frittata
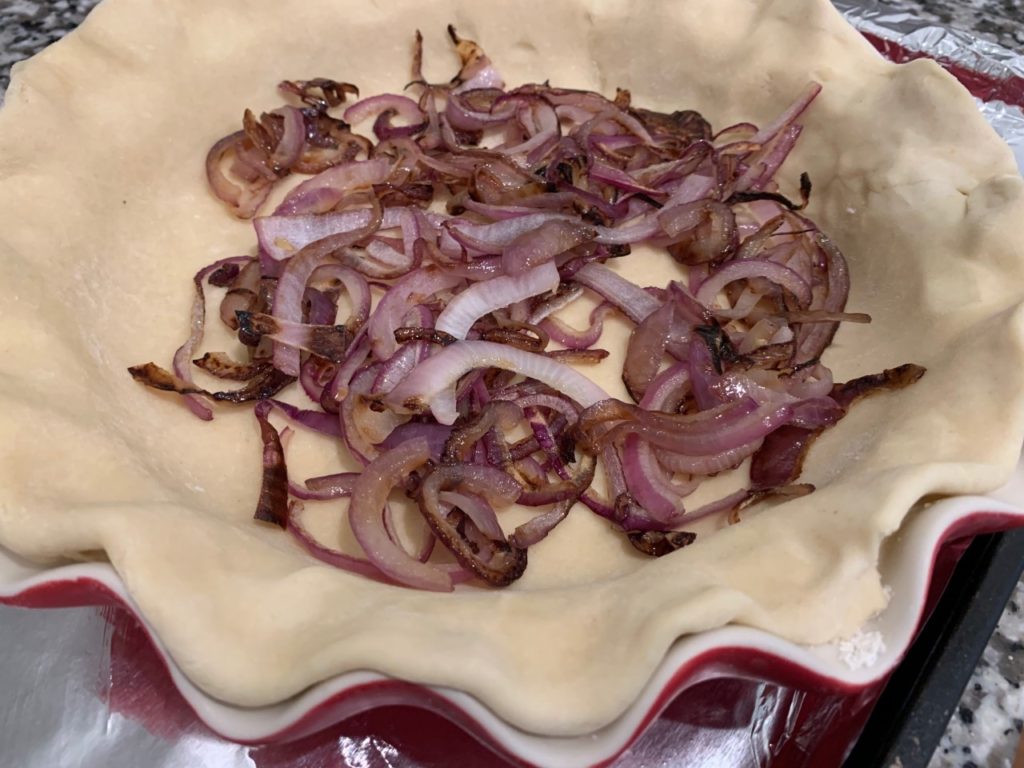
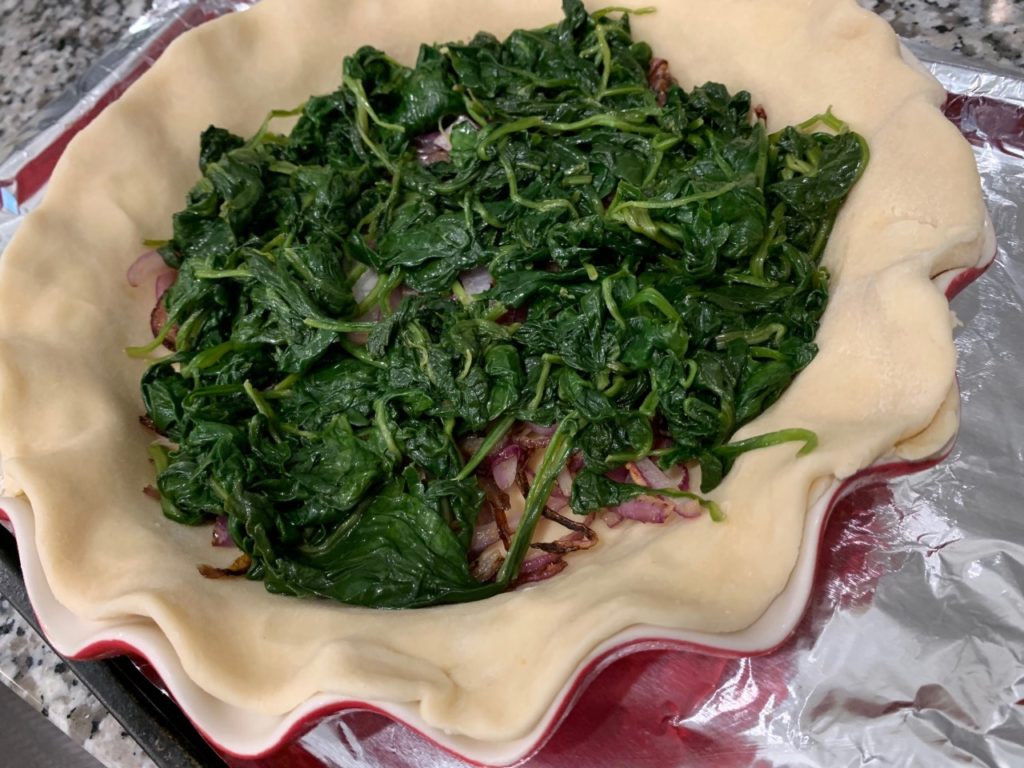
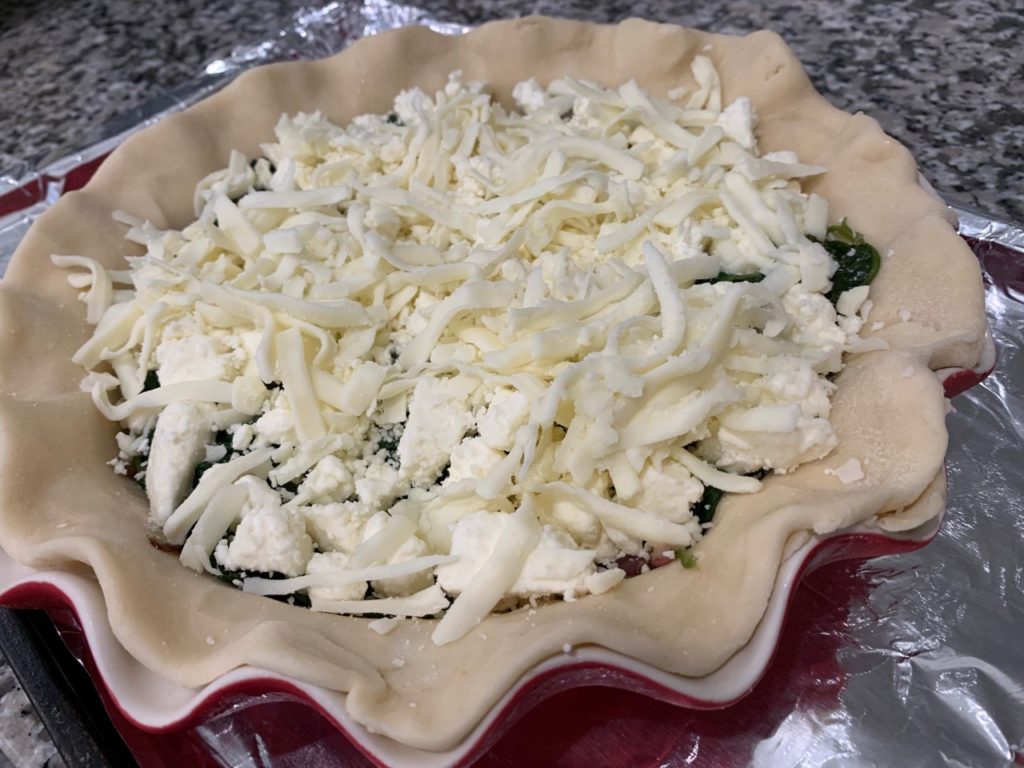
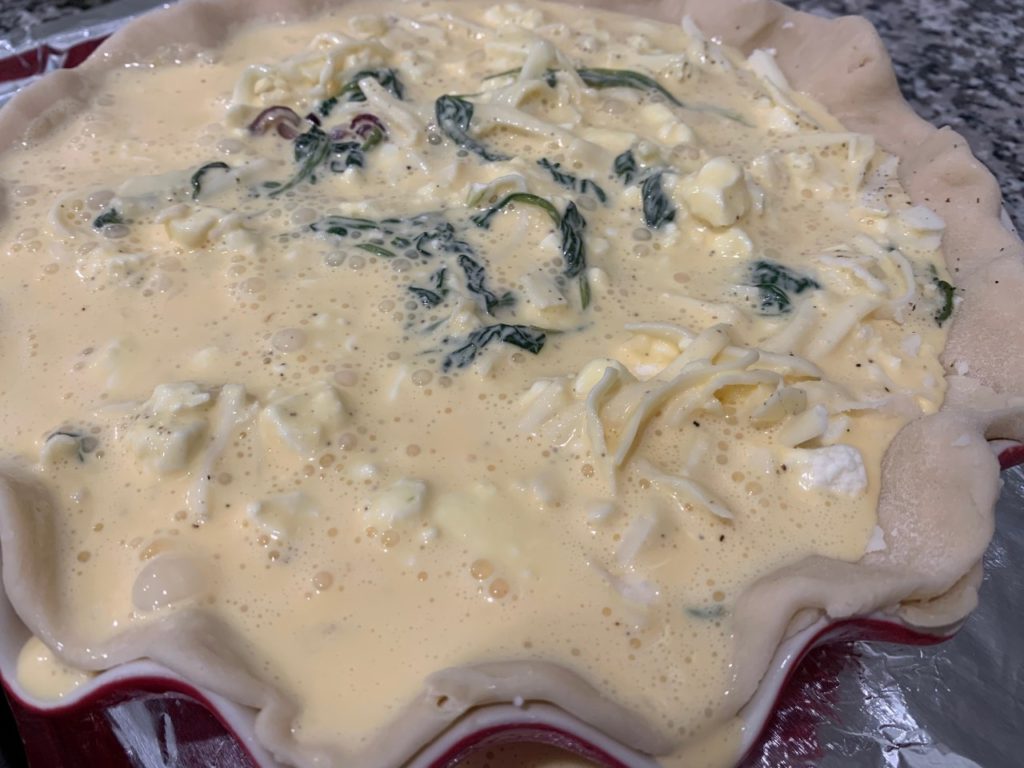
I love brunch and am always looking for creative dishes to serve at home when I host. I received this easy recipe for a meatless frittata from Piattino: A Neighborhood Bistro and wanted to share as it sounds delish.

Piattino, serving up modern twists to traditional Italian fare, is now serving an a la carte brunch menu on Saturday and Sundays from 11:00AM to 3:00PM, so locals could also go to the restaurant to try this dish!

Ingredients:

  • 2 ounces wild mushroom mix cooked
  • 2 ounces asparagus cut ½ inch long, blanched
  • 1 ounce blended oil
  • 1 tsp. chopped rosemary
  • 4 eggs cracked and beaten
  • 1 ounce prepared pesto
  • 2 ounces baby arugula
  • 1 tsp. olive oil
  • Pinch each of salt and pepper

Directions:

  1. Heat a black cast iron skillet over medium high heat on a burner. Once hot add blended oil and cooked vegetables. Stir vegetables with a wooden spoon until heated through. Add rosemary and eggs and stir again to combine the vegetables. Place the skillet in a 350 degree oven for 5-7 minutes or until eggs are semi firm to the touch.
  2. Remove skillet from oven and drizzle pesto on top of the egg. Toss arugula with olive oil, salt and pepper and place in center of the cast iron skillet, you want to create height from the arugula.

Makes one frittata.

About Piattino:

Nestled in Historic Mendham, Piattino brings its authentic, new age Italian dining experience directly to New Jersey.  Sourcing artisan ingredients from around the world and our own backyard, Piattino’s scratch-made, chef-driven menu includes a variety of mouthwatering antipasti’s, insalates, pastas and entrees. Piattino is also known locally for its delicious, hand-stretched Neapolitan style pizzas and sandizza’s (our version of a Panini) baked at 800 degrees in its imported Italian stone-fired oven using premium ingredients, ranging from truffled wild mushrooms to 24-month-aged prosciutto di Parma. The menu also features a regional food and drink specialties section celebrating the various styles served across the boot – including current items from the Aosta Valley Region – such as Charred Octopus, White Bean and Sausage soup, Mezzaluna Carbonnade artisan pizza, and much more.

88 East Main Street, Mendham, NJ – 973-543-0025.

Cheers,

Veronique

Spaghetti alla Carbonara

Spaghetti alla Carbonara

This Roman dish was created in the middle of the 20th century using simple ingredients: pasta, eggs, pork jowls (think bacon) and cheese, typically Pecorino.

I’m all about simple pasta dishes, especially during the week, so this is one of my go-to recipes. I’ve made this decadent dish using a few variations, adding peas, morel mushrooms and shrimps…it’s delicious any ways. Note that garlic isn’t authentic to pasta carbonara, but it’s so darn tasty that I include it. Don’t like garlic – omit it! I used red pepper flakes too, which aren’t authentic either…sue me purists!

While the eggs do get warmed when tossed with the hot pasta, they aren’t fully cooked. If slightly cooked eggs aren’t your thing, this is likely not the dish for you. If you can get past that, you’ll get addicted, like I am, to the creamy “sauce” created by the eggs, pasta water and cheese.

Ingredients:

  • 1 pound good quality spaghetti, I use Delverde
  • 1 Tbsp. olive oil
  • 8 ounces diced pancetta or slab bacon
  • 1 large garlic clove, finely minced
  • 3 large eggs
  • 1 cup grated Pecorino-Romano or Parmesan cheese, divided
  • ½ tsp. red pepper flakes (or black pepper if you prefer)

Directions:

  1. Bring a large pot of salted water to a boil over high heat. Add the spaghetti and cook 1 minute less than the cooking directions on the packaging recommend.
  2. While the pasta’s cooking, warm the oil in a medium skillet over medium-high heat. Add the pancetta and cook until browned, about three minutes, stirring occasionally. Add the garlic and cook for another minute. Place the pancetta/garlic and the oil they cooked in, in a large, heat-proof bowl and set aside to cool.
  3. In a medium bowl, whisk the eggs, 1/2 cup of the cheese and pepper flakes. Whisk until well blended.
  4. When the pasta’s just al dente, scoop it out of the water using a pasta fork or tongs, and into the bowl with the pancetta – don’t drain the pasta water out of the pot! Toss the pasta until coated in the oil from the pancetta.
  5. Add the egg mixture to the pasta and toss quickly to ensure the eggs don’t scramble – you might need to give this method a couple tries to get it right – it’s worth it!
  6. Add ¼ cup of pasta cooking water to the pasta then the remaining cheese. Keep tossing to create a silky, creamy sauce that coats the pasta. Serve immediately.

Serves two for dinner or four as a starter.

Easy Egg Cups

Easy Egg Cups

Breakfast, often said to be the most important meal of the day, is my favorite meal is the day. On the weekends, with more time on my hands, I have no issues making delicious, hearty breakfast, but on hectic weekday mornings…not as easy.

I’ve been making these cute and delicious egg cups on Sundays that I can have anytime during the week. They’re great for a quick breakfast with a piece of toast and even perfect for lunch with a side salad.

Ingredients:

  • 1 Tbsp. vegetable oil
  • 5 ounces baby spinach
  • 4 large eggs
  • ¼ cup water
  • ½ tsp. each salt and pepper
  • ½ cup shredded sharp cheddar cheese

Directions:

  1. Preheat the oven to 350 degrees.
  2. Generously coat two 4-ounce ramekins (or other small dishes) with cooking spray.
  3. Warm the oil in a large skillet over medium-high heat, add the spinach and sauté until fully wilted, 3-4 minutes. Set aside to cool for a few minutes.
  4. In a large mixing bowl, whisk the eggs with the water, salt and pepper until fully blended, about 1 minute. Don’t whisk less than a minute if you want fluffy, light eggs.
  5. Divide the cooked spinach in the ramekins. Divide the cheese over the spinach then pour the gg mixture over the cheese and spinach. Use a small fork to gently move the spinach and cheese around so the egg mixture gets evenly distributed to the bottom of the ramekins.
  6. Place the ramekins on a sheet tray to catch any drips and bake for about 25 minutes, or until the egg is set and not jittery.
  7. Let the egg cups cool completely then cover in plastic wrap and refrigerate until ready to use.
  8. To reheat, cover a ramekin with a paper towel and microwave for 60-90 seconds.

Makes 2 servings.