Chocolate Butterscotch Bars

Chocolate Butterscotch Bars

Chocolate Butterscotch BarsDay 7 of my 12 Days of Christmas Baking compilation.

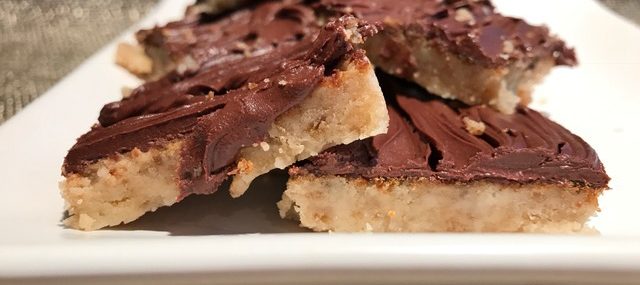
When my friend Lisa comes over, I try to make desserts that are butterscotch/caramel-based as she’s a fan (so am I). While I adore my Chocolate Crumb Bars for similar flavors, this recipe only has four ingredients that I always have on hand and it’s a breeze to make!  

Ingredients:

  • 1 cup all-purpose flour
  • ½ cup plus ¼ cup brown sugar
  • ¼ cup plus 1/3 cup butter (I use salted)
  • ½ cup semi-sweet chocolate chips

Directions:

  1. Preheat oven to 350 degrees.
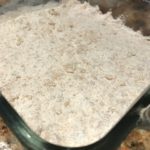
  2. Coat an 8×8 glass pan with cooking spray.
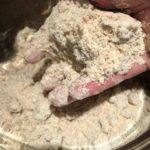
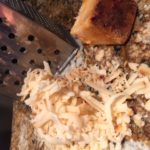
  3. In a medium bowl, combine the flour, ½ cup of brown sugar and the ¼ cup of butter. Use a pastry cutter or two better knives to combine, until mixture is crumbly and butter is the size of peas – i finish the job with my hands, working quickly not to melt all the butter. Press the mixture into bottom of the prepared pan.
  4. In a small saucepan over medium heat, melt the remaining 1/3 cup of butter. Add in the remaining ¼ cup of brown sugar and stir. Bring to a boil and cook for 1 minute. Remove from the heat and pour over the crust – this mixture will not look very caramely, but hang in there, the taste sure will!
  5. Bake in the oven for 15 minutes – don’t overbake or the caramel will harden too much.
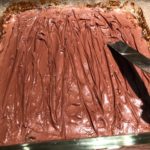
  6. Remove from oven and sprinkle the chocolate chips on top of the caramel, wait 2 minutes then spread gently with an offset spatula or a thin knife. Allow to cool completely then cut into bars.

Makes 12 to 16 bars, depending on how large you cut them. I get 16 out of this recipe as I find the bars rich, thus a smaller piece is just fine.

Hot Chocolate Cookies

hot-chocolate-cookiesDay 3 of my 12 Days of Christmas Baking compilation!

We had our first snow of the season this week and as I was sipping a cup of hot cocoa, I thought of how great a cookie with these flavors would be. Who doesn’t like mini marshmallows anyways – nobody!

Ingredients:

  • 1¼ cups/2 ½ sticks butter, softened
  • ⅔ cup brown sugar
  • 1 cup granulated sugar
  • 2 large eggs
  • 1 tsp. pure vanilla extract
  • 3 cups all-purpose flour
  • ¼ cup Dutch-processed cocoa
  • 4 – 0.73 ounce packets of milk chocolate hot cocoa mix, I used Swiss Miss Classics Milk Chocolate Hot Cocoa Mix
  • 1 ¼ tsp. baking soda
  • 1 tsp. baking powder
  • 1 cup semi-sweet chocolate chips
  • ½ cup mini marshmallows

Directions:

  1. In the bowl of an electric mixer, beat the butter, brown and granulated sugars together until light and fluffy, about 2 minutes.
  2. Add eggs and vanilla and beat an additional minute.
  3. In a medium bowl, sift together the flour, Dutch-processed cocoa, the hot cocoa mixes, the baking soda and the baking powder. Gradually add the flour mixture to the butter mixture and beat just to combine.
  4. Fold in the chocolate chips and the mini marshmallows. Chill the dough for about 30 minutes.
  5. Preheat oven to 350 degrees.
  6. Drop the dough by the tablespoonful onto greased cookie sheets, 2 inches apart.
  7. Bake for 9-10 minutes until the edges of the cookies are set. Cool on the cookie sheets for 5 minutes then place the cookies on cooling racks.

Yields 2 dozens.

Reese’s Pieces Cookies

Reese’s Pieces Cookies

reeses-pieces-cookiesDay 2 of my 12 Days of Christmas Baking.

I must admit, I’m not a huge fan of peanut butter cookies. Why did I create this recipe, you might ask? Because I’m doing a 12 days of cookies compilation and don’t want to devour dozens upon dozens of cookies…..with this recipe, I, of course, tasted my final product – but, didn’t feel like having 2 dozens…genius!  

These would be even more PB-tasting by replacing ½ cup of the chocolate chips with peanut butter chips. Up to you how PB-fanatic your entourage is.

Ingredients:

  • ½ cup/1 stick butter, softened
  • 1 cup granulated sugar
  • 1 cup brown sugar
  • ½ cup vegetable oil
  • 2 large eggs
  • 1 tsp. pure vanilla extract
  • 1 tsp. baking powder
  • 1 tsp. baking soda
  • 1 tsp. salt
  • 3 cups all-purpose flour
  • 1 ½ cups Reese’s Pieces
  • 1 cup semi-sweet chocolate chips

Directions:

  1. Add the butter to the bowl of an electric mixer and beat until light and fluffy, about 2 minutes.
  2. Add the granulated and brown sugar and beat an additional minute.
  3. Add the oil, the eggs and the vanilla and beat for another minute.
  4. In a medium bowl, sift the baking powder, the soda, the salt and the flour. Add the flour mixture to the batter and beat just enough to incorporate.
  5. Fold in the Reese’s Pieces and the chocolate chips. Refrigerate for 15 minutes.
  6. Preheat oven to 350 degrees.
  7. Drop the dough by the tablespoonful onto greased cookie sheets.
  8. Bake for 7­-8 minutes, until lightly golden brown. Cool on the cookie sheets for 5 minutes then place the cookies on cooling racks.

Yields about 2 dozen cookies.

Going Formal for the Holidays

Going Formal for the Holidays

I love really dressing up my table around the holidays. If you’re thinking of pulling out grandma’s silver or unpacking those formal dishes you received at your wedding, here’s how the table should be set for a formal meal:

place-setting

Want a very VIP dinner menu for that special meal? Here’s one I love for the holidays:

Sweet Potato Gnocchi in Sage Brown Butter.

Simple & Festive Prime Rib.

Make-Ahead Twice Baked Potatoes.

Fail-Proof Yorkshire Puddings.

Elegant Key Lime Tart.

Enjoy!

Veronique

Pouding Chomeur in a Mug

Pouding Chomeur in a Mug

in-the-mug
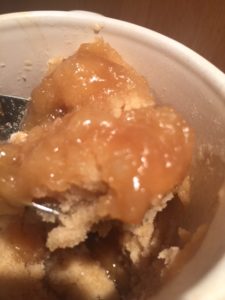
For those of you not familiar with pouding chomeur (unemployed man’s pudding in French), it’s a majorly sweet, decadent, comforting and easy-to-make dessert that originated from Quebec.

Pouding chomeur is cakey on the surface and gooey, carameley on the bottom. It became popular in Quebec during the Great Depression and was typically made in a large baking dish to feed a ton of people using stale bread.

I was craving this delish dessert last night but didn’t want to make my usual large-format recipe, so I searched for a single-serve recipe and found one for a version made in a mug (what’s not to love about that). It came out perfect! I need to reiterate that it’s beyond sweet and really should be served with vanilla ice cream.

Ingredients:

  • 3 Tbsp. all-purpose flour
  • 1 Tbsp. brown sugar
  • ¼ tsp. baking powder
  • 1 pinch of salt
  • 1 Tbsp. butter, softened
  • 2 Tbsp. whole milk
  • 3 Tbsp. maple syrup
  • 1 Tbsp. water
Flour & Butter

Flour & Butter

Directions:

  1. In a 1 ½ cup mug, add the flour, brown sugar, baking powder and salt. Stir to combine with a fork. Add the butter and stir until the batter is crumbly. Add the milk and stir until mostly smooth.
  2. In a separate small bowl, combine the syrup and water. Pour over the batter in the mug.
  3. Place the mug on a plate, in case of spills, and microwave for 1 ½ minutes. Allow to cool 5 minutes before topping with a scoop of vanilla ice cream and eating.

Makes 1 servings.

Cheers,

Veronique

Adapted from this recipe.

Copycat Broccoli Cheddar Soup

Copycat Broccoli Cheddar Soup

Broccoli Cheese Soup

Broccoli Cheese Soup

As you know, if you’ve followed this blog for a while, I’m a huge fan of soups. I’ve been known to crank down the air conditioned in the summer to make soup make sense!

One of my favorite soups is broccoli and cheddar and I think that Panera has some of the best I’ve had. Luckily for me, Pinterest is full of Panera copycat recipes so I looked at a bunch and created this version which is pretty darn perfect.

Ingredients:

  • 4 Tbsp. butter, divided
  • 1/2 Spanish onion, chopped
  • ¼ cup all-purpose flour
  • 2 cups chicken broth, could use vegetable broth for meatless version
  • 2 cups half and half
  • 2 large bunches broccoli, cut/torn in small florets (gave me about 4 cups of small florets)
  • 2 carrots, julienned into small sticks or 4 ounces of a 10-ounce bag of shredded carrots (what I use)
  • ¼ tsp. ground nutmeg
  • ½ tsp. each salt and pepper
  • 8 ounces shredded sharp Cheddar cheese

Directions:

  1. In a heavy skillet over medium heat, cook the onion in a tablespoon of butter until softened, stirring occasionally, about 4 minutes. Set aside for later use.
  2. In a large saucepan over medium heat, melt the remaining butter then incorporate the flour. Cook, whisking often, for 5 minutes – this is called a roux.
  3. Add the broth and the half and half to the roux and whisk to fully combine. Simmer for 20 minutes, stirring often.
  4. Add the cooked onions, the broccoli and the carrots to the soup and cook for 25 minutes over low heat, partially covered.
  5. Add the nutmeg, salt, pepper and the cheddar. Stir until fully-combined then add half the soup to a blender. Purée for 2 minutes then return to the pot. The goal is to have a smooth soup with some florets intact. If you prefer a completely smooth soup – purée the whole thing, in batches.
  6. I add about a tablespoon of grated cheese on my as “garnish”.

Serves 6.


Broccoli Cheese Soup
Serves 6
Panera Broccoli Cheese Soup Copycat Recipe
Write a review
Print
Prep Time
15 min
Cook Time
45 min
Total Time
1 hr
Prep Time
15 min
Cook Time
45 min
Total Time
1 hr
Ingredients
  1. • 4 Tbsp. butter, divided
  2. • 1/2 Spanish onion, chopped
  3. • ¼ cup all-purpose flour
  4. • 2 cups chicken broth
  5. • 2 cups half and half
  6. • 2 large bunches broccoli, cut/torn in small florets (gave me about 4 cups of small florets)
  7. • 2 carrots, julienned into small sticks or 4 ounces of a 10-ounce bag of shredded carrots (what I use)
  8. • ¼ tsp. ground nutmeg
  9. • ½ tsp. each salt and pepper
  10. • 8 ounces shredded sharp Cheddar cheese
Instructions
  1. 1. In a heavy skillet over medium heat, cook the onion in a tablespoon of butter until softened, stirring occasionally, about 4 minutes. Set aside for later use.
  2. 2. In a large saucepan over medium heat, melt the remaining butter then incorporate the flour. Cook, whisking often, for 5 minutes – this is called a roux.
  3. 3. Add the broth and the half and half to the roux and whisk to fully combine. Simmer for 20 minutes, stirring often.
  4. 4. Add the cooked onions, the broccoli and the carrots to the soup and cook for 25 minutes over low heat, partially covered.
  5. 5. Add the nutmeg, salt, pepper and the cheddar. Stir until fully-combined then add half the soup to a blender. Purée for 2 minutes then return to the pot. The goal is to have a smooth soup with some florets intact. If you prefer a completely smooth soup – purée the whole thing, in batches.
  6. 6. I add about a tablespoon of grated cheese on my as “garnish”.
Food & Wine Chickie Insider https://www.foodandwinechickie.com/
Cheers,

Veronique

Carrot & Butternut Squash Bisque

Carrot & Butternut Squash Bisque

carrot-and-butternut-squash-bisque
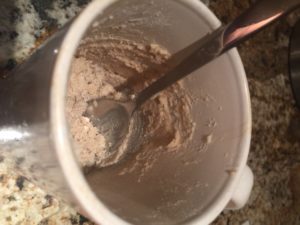
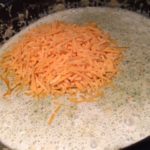
Simmering soups on my stovetop on Sundays are back! This week, I had some carrots leftover and thought that could pair well with the butternut squash I’d just gotten at the market – orange on orange!

This soup is made with vegetable both but could be made with chicken broth also for a non-vegetarian version. Don’t worry about the size of the chop on your vegetables, all these ingredients, once cooked, will be put through the blender.

This soup would rock at your Thanksgiving table as it can’t be done the day prior, refrigerated then reheated on Turkey Day.

Ingredients:

  • 2 Tbsp. vegetable oil
  • 1 medium Spanish onion, chopped
  • 3 carrots, chopped
  • 1 medium butternut squash, chopped
  • 1 tsp. each salt & pepper
  • ½ tsp. dry sage
  • 4 cups vegetable broth
  • 2 bay leaves
  • ½ cup heavy cream, optional

Directions:

  1. In a heavy saucepan over medium-high heat, sauté the onion, carrots and squash for 15 minutes in the oil, stirring occasionally.
  2. Lower the heat to medium-low and add the seasonings, broth and bay leaves. Simmer, partially covered, for 45 minutes.
  3. Purée with an immersion blender until completely smooth, about 3 minutes. Alternatively, add the soup to a blender and puree until smooth, about 1 minute. Return the puréed soup to a clean saucepan and gently heat for 2 minutes.
  4. Add the cream, if using, and warm for 2 minutes.
  5. Serve in warm bowls with a teaspoon of cream, optional.

Serves 6 as a starter or 4 as a main course.

Baked Penne Parmesan

baked-pastaI love recipes that take me all of 10 minutes to prepare and that will serve a few meals during the week. This beyond-easy pasta dish is one of those recipes that I make on Sundays and portion for lunches during the week.

Ingredients:

Directions:

  1. Preheat oven to 400 degrees.
  2. Cook pasta 1 minute short of indicated on the packaging.
  3. Toss the drained pasta into the marinara sauce.
  4. Add the Mozzarella to the pasta and stir to distribute evenly.
  5. Pour the pasta into a medium baking dish.
  6. Top with the shaved cheese.
  7. Place the dish on a baking sheet to prevent oven drips and bake for 25 minutes.

Makes 2 generous entrée-size servings.

Note: I received a sample container of Sartori Cheese that I will now add to my grocery list.

Crustless Chipotle Cheesy Quiches

Crustless Chipotle Cheesy Quiches

cooked-quichesI’m one of the ambassadors for #FoodieChats, a Monday evening Twitter chat where we socialize with thousands of foodies about all things food! Every week, we welcome a sponsor who informs us, in a fun way, about its products or services. This week, Sartori Cheese is our sponsor, and eventhough I don’t do a lot of product reviews, when Sartori Cheese offered to send me a few of their cheeses, I accepted – who doesn’t love cheese!

My really tough task, was to come up with a recipe featuring the delish cheeses sent to me. REALLY tough…not! I actually came up with two recipes, and I’m sharing the first one below. It’s a quick dish you can make on Sundays that are fast to reheat in the microwave during those busy weekday mornings.

Ingredients:

Directions:

  1. Preheat the oven to 350 degrees.
  2. Coat 6 of the cups of a 12 muffin pan with cooking spray, be generous.
  3. In a medium mixing bowl (for easy pouring, I use an 8-cup measuring cup), whisk the eggs with the water, salt and pepper until fully blended, about 1 minute.
  4. Pour an equal amount of the egg mixture into the 6 muffin cups.
  5. Sprinkle the cheese equally over the egg mixture.
  6. Place the muffin pan on a sheet tray (in case of drips) and bake for about 20 minutes, or until the egg is no longer runny – the quiches will be puffy like a soufflé.
  7. Allow the quiches to cool in the pan for about 5 minutes then unmold and let cool completely.
  8. Store the quiches in an airtight container in the fridge until ready to use – up to a week.
  9. To reheat, place two quiches on a plate, cover with a paper towel and microwave for 60-90 seconds.

Makes 3 servings (2 quiches each).

About Sartori

Sartori, a fourth-generation family owned company, has proudly produced award-winning, artisan cheese for customers worldwide since 1939. Rooted in Plymouth, Wisconsin, Sartori’s emphasis on a high-quality and handcrafted approach to cheesemaking is a timeless family tradition. For more information, please visit www.sartoricheese.com.

Cheers,

Veronique

Get to Know Slawsa Plus Easy Latkes Recipe

Get to Know Slawsa Plus Easy Latkes Recipe

Slawsa JarsLast week, I was sent samples of a new product called Slawsa that I think are pretty fabulous so I’m sharing a bit about them and also sharing a recipe I made using the product.

About Slawsa

Slawsa breaks the mold of modern condiments and is meant to replace traditional ketchup, mustard, mayo or relish as a compliment to everyday foods.

Slawsa is a cabbage-based relish with a salsa twist. While it contains other vegetables, mustard and vinegar, the mustard and vinegar are not overwhelming, allowing it to be used in various ways.  It begins on the palate as sweet and transfers heat undertones that make it addictive atop grilling fare such as hot dogs, burgers or brats. Slawsa comes in Original, Spicy, Garlic and the new Fire.

The Flavors

Original – The classic, Slawsa Original starts a little sweet and finishes with a little heat that will quickly dissipate. The mustard and vinegar base is not overpowering and Slawsa retains a nice amount of crunch in every bite.

Spicy – The Spicy version isn’t “overly spicy” and more of a medium heat but does have a bit more kick to finish off the bite than the Original.

Fire – Slawsa Fire has a big kick of habanero and is truly for those who love the heat. But no, it’s not ghost pepper hot.

Garlic – The Garlic is truly for garlic lovers as it does have a bold garlic base.

Nutritional Facts

  • all-natural
  • fat-free
  • cholesterol-free
  • gluten-free
  • very low in sodium 
  • kosher
  • vegan

I tried the spicy and the garlic versions and both were unusual and delicious. I used both to create a mock latkes (typically a pan-fried potato pancake).

Easy Sauerkraut Latkes

Ingredients:

  • 1 cup Garlic Slawsa (could replace with sauerkraut)
  • 1 large egg
  • 1 tsp. all-purpose flour
  • ¼ tsp. each salt and pepper
  • ¼ cup vegetable oil, for frying
  • 4 tsp. Spicy Slawsa

Directions:

  1. Using a fine sieve, drain as much liquid from the Slawsa as possible. Place the drained Slawsa in a clean kitchen towel and wring as much of the remaining liquid as possible. Place the Slawsa in a small bowl and add the egg, flour and salt and pepper. Combine without over-mixing.
  2. In a heavy frying pan over high-heat, warm the oil for two minutes – pan should be sizzling hot.
  3. Drop the Slawsa mixture by the teaspoonful onto the oiled frying pan (should make 4 latkes) and cook for 2 minutes or until golden brown (see short video of this live action). Flip the latkes and cook an additional minute.
  4. Place on a double layer of paper towel to rid of excess oil and serve hot or at room temperature with the Spicy Slawsa.

Make 4 Latkes.

Slawsa is available for purchase online or at stores near you.

Cheers,

Veronique