Easy Garlic Confit

Easy Garlic Confit

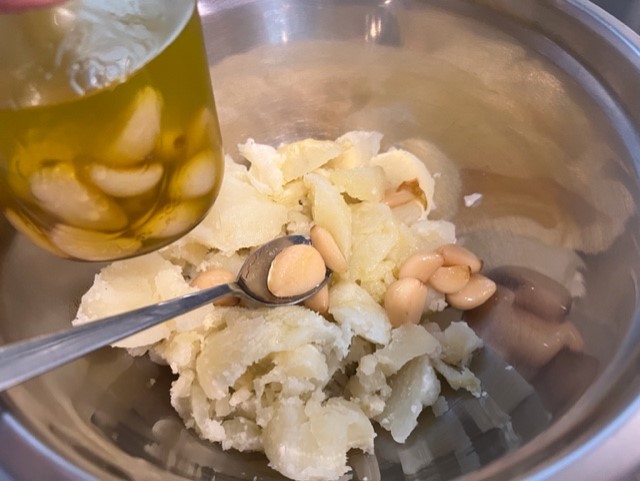
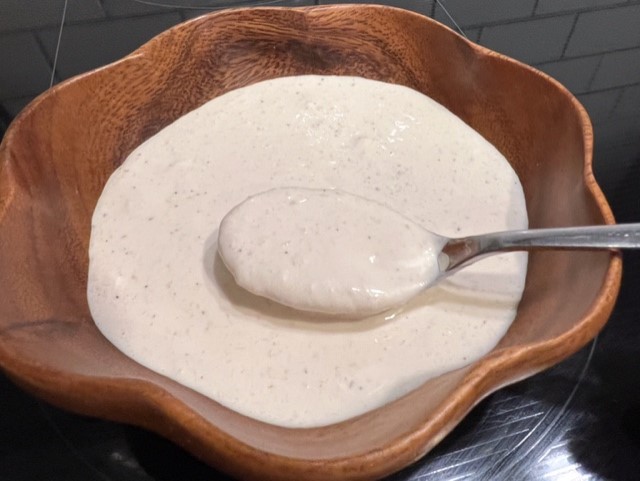
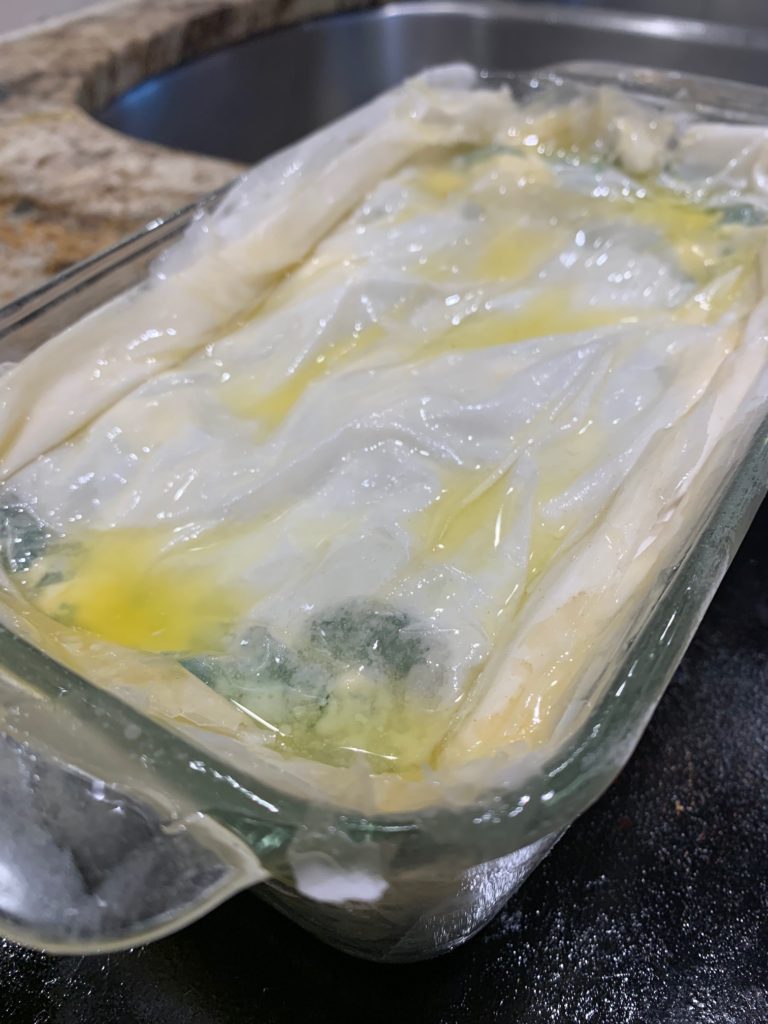
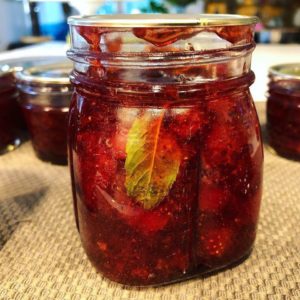
I have a jar of this fantastic concoction in the fridge at all times. I typically make it every couple of weeks and use the oil and the cloves in a variety of things ranging from adding to potatoes I’m mashing (see picture below) to simple crostini with smacked cloves and a drizzle of oil to adding to a tomato sauce for subtle sweet garlic taste.

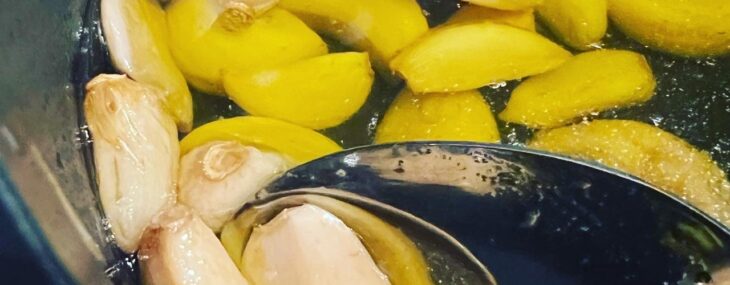
There’s not an actual recipe, add whole cloves to olive oil in a small pot and cook slowly. Couldn’t be easier!

Ingredients:

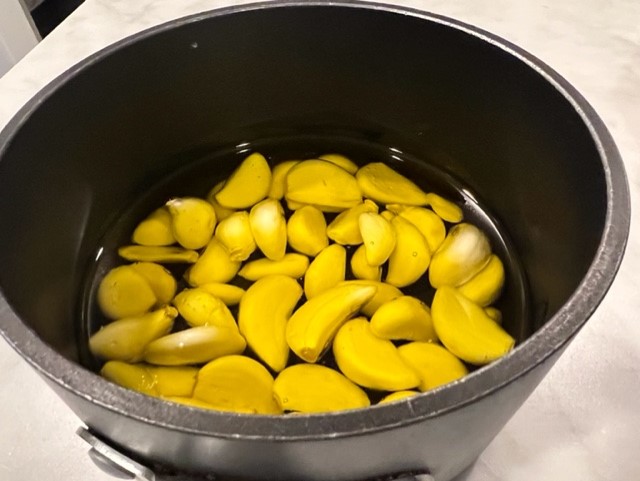
1 1/2 cups olive oil

Whole garlic cloves, I use about 40 for this quantity of oil, but lower the count for less oil

Adding cooked cloves to mashed potatoes

Directions:

Heat oil on low in a small saucepan, add the garlic and cook for 45 – 60 minutes until the cloves are soft.

Store in a glass container in the fridge for up to 10 days. I use a mason jar.

Enjoy!

Veronique

Horseradish Cream

Horseradish Cream

Horseradish cream is fantastic and you need it in your life. That’s all this post should really say. It’s a condiment that’s put together in a couple minutes and goes amazingly well with some many things, including my Reverse Seared Prime Rib.

Whip this up the day prior to using it as it develops its flavors over time, just cover your bowl in cling wrap and refrigerate.

Regarding the horseradish I use, I like the Silver Spring Horseradish brand as it’s fresh and hot. Make sure whatever brand you get, it’s the horseradish that’s refrigerated often referred to as “fresh”, “prepared” or “coarse”. I don’t recommend the kind found on grocery shelves store at room temperature for this preparation.

Ingredients:

  • 5 Tbsp. fresh prepared horseradish, drained
  • 1 cup sour cream
  • 6 Tbsp. mayonnaise (I use Duke’s)
  • 2 tsp. Worcestershire sauce
  • 2 tsp. freshly squeezed lemon juice (could use lime juice also)
  • ½ tsp. each salt and freshly-ground pepper

Directions:

  1. Combine and whisk all the ingredients together
  2. Refrigerate until ready to serve, up to a day ahead of serving

Yields 1 ½ cups cream.

Cheers, Veronique

Easy Zucchini Orzo

Easy Zucchini Orzo

This orzo was in last week’s Blue Apron box and it was delicious so I thought I’d share the easy recipe with you. This side dish was served with grilled chicken but it would be great with seafood and fish also.

Zucchini Orzo with Grilled Chicken

This zucchini orzo is a breeze to prepare and a great way to use up garden zucchini which can be plentiful this time of year. This recipe makes enough for two servings, but is easy to double or triple if you have guests.

Ingredients:

  • 4 ounces orzo
  • 2 scallions
  • 2 cloves garlic
  • 1 medium zucchini
  • 4 tsp. olive oil
  • 1 Tbsp. verjus blanc (or white wine vinegar)
  • 2 Tbsp. Mascarpone cheese
  • 1½ Tbsp. golden raisins
  • 1 Tbsp Weeknight Hero Spice Blend (Onion Powder, Garlic Powder, Smoked Paprika & Whole Dried Parsley)
  • ¼ tsp Crushed Red Pepper Flakes
  • 1 Tbsp. Capers

Directions:

  1. Over high heat, place a medium pot ¾ of the way full with salted water and bring to a boil.
  2. Small dice the zucchini. Peel and roughly chop the garlic. Thinly slice the scallions, separating the white bottoms and hollow green tops.
  3. Add the orzo to the pot of boiling water. Cook, stirring occasionally, 7 to 9 minutes, or until tender. Turn off the heat. Drain thoroughly and return to the pot. Cover to keep warm.
  4. In a large sauté pan, heat 2 teaspoons of olive oil on medium-high until hot. Add the diced zucchini in an even layer. Cook, without stirring, 2 to 3 minutes, or until lightly browned. Add the chopped garlic and sliced white bottoms of the scallions and season with a pinch of salt and pepper. Cook, stirring occasionally, 2 to 3 minutes, or until softened. Add the verjus (or the white wine vinegar) and cook, stirring constantly, 30 seconds. Transfer to the pot of cooked orzo, drizzle with the remaining olive oil and stir to combine.
  5. To the pot of cooked pasta and zucchini, add the mascarpone, raisins, and capers and stir to combine. Taste, then season with salt and pepper if needed.

Makes 2 side servings.

Easy Potato Latkes for Beginners

Easy Potato Latkes for Beginners

A couple of weeks ago, I was “challenged” by the team at Yarden Wines to make latkes that could be paired with some of their fantastic wines. If you’re not yet familiar with Yarden Wines, it encompasses Golan Heights Winery and Galil Mountain Winery, located in the Golan Heights and Galilee regions of Israel. Keep an eye out for more posts about wines from Israel.

What are latkes? According to Chabad.org Latke is Yiddish for “pancake.” On Chanukah, it is traditional to serve potato latkes fried in oil to celebrate the Chanukah miracle.

While I’ve made latkes once many years ago, I’m certainly no pro at making them so I turned to Pinterest for a good recipe and easy directions. The recipe I selected is by Sue from The View from Great Island (great blog by the way and amazing photography). Sue’s recipe, HOW TO MAKE PERFECT LATKES, was so easy to follow and featured lots of photos to help me along the way.

The results, if I may say so myself, were some of the best latkes I’ve ever eaten. Crunchy, crisp on the outside, moist and tender on the inside.

Here’s a link to the recipe and below are modifications I made:

  • Used two large Russet potatoes
  • Added a pinch of nutmeg
  • Used a ¼ cup scoop to measure out the latke ‘batter’ for each portion in my cast iron pan. I like the latkes a bit bigger and a little rounder in the middle to ensure a moist inside.
  • Replace the more typical chives with green onion.
  • Skipped the apple sauce since I’m not a fan and served the latkes with sour cream.
  • Grated the potatoes and onion by hand on a box grater. While more work, I actually like doing that step by hand.
  • Gave the lakes a nice sprinkling of salt after frying when I placed them on the paper towel.

I paired the latkes with the 2019 Gilgal Chardonnay by Yarden Wines and it was terrific match. This wine retails for around $15 a bottle and a great addition to your collection.

Don’t hesitate to try this latkes recipe, it’s super great and it’ll wow your friends and family.

Happy cooking,

Veronique

Spanakopita (Spinach Pie) for Two

Spanakopita (Spinach Pie) for Two

I love Greek food and one of my favorite Greek dishes is Spanakopita, spinach pie. The pie is made using Feta cheese (another favorite) and spinach layered between sheets of Phyllo dough. Velvety on the inside, crunchy on the outside – it’s a perfect dish.

Just want to pick a piece of that crunch Phyllo!

Typically (and true of many dishes I make), I make enough spinach pie for an army although it’s just two of us at home. For Easter, I committed to only making enough spinach pie for two and I was almost successful! This is probably enough for four as a side, but a generous portion for two as an entrée. I made this in a loaf pan and it worked great.

There are tons of variations of this dish, but when I learned to make it as a teen, my teacher put layers of Phyllo between layers of filling, like what one would do for a lasagna. Some prefer to only top the pie with Phyllo…. there is no ‘right’ way…do what you like!  

I use fresh spinach but frozen and thawed works well too.

Ingredients:

  • 4 Tbsp. butter, melted
  • 2 Tbsp. olive oil, divided
  • ¼ cup finely chopped onion
  • 2 garlic cloves finely minced
  • 2 pounds fresh baby spinach, chopped
  • 1 large egg
  • 1 Tbsp. chopped fresh flat leaf parsley
  • 2 tsp. dried dill
  • ¼ tsp. each salt and pepper
  • 5 ounces Feta cheese, crumbled (I use Dodoni brand)
  • Half a 16-ounce package of phyllo dough, thawed

Directions:

  1. Preheat the oven to 350 degrees F. Butter a 9” x 5” loaf pan.
  2. In a large sauté pan or skillet over medium heat, add 1 Tbsp. olive oil and the finely chopped onion and cook for 3 minutes or until the onion is lightly browned.
  3. Add the garlic and cook an additional minute. Place the cooked onion/garlic in a medium bowl and set aside to cool.
  4. Add the remaining 1 Tbsp. olive oil to the pan and once warmed, add the spinach and cook for 3-4 minutes until it’s fully wilted and starting to color. Remove from the heat and allow to cool. Squeeze as much moisture from the cooked spinach as possible using cheesecloth or paper towels.
  5. In the bowl with the cooled onion/garlic mixture, add the egg, parsley, dill, salt, pepper and Feta cheese. Stir to combine then add in the cooled spinach and stir to fully incorporate.
  6. Unroll the phyllo dough, take out two sheets and wrap the remaining sheets in a slightly damp kitchen towel to avoid brittle, dry dough.
  7. Place one phyllo sheet into the buttered pan, lengthwise, and brush melted butter over it then place a second sheet on top of the first and butter again. Sheets will have overhang and that’s fine for now.
  8. Add 1/3 of the spinach filling on top of the two phyllo sheets.
  9. Add one phyllo over the spinach, butter and top with a second sheet and butter.
  10. Add 1/3 of the spinach filling on top of the two phyllo sheets.
  11. Add one phyllo over the spinach, butter and top with a second sheet and butter.
  12. Add 1/3 of the spinach filling on top of the two phyllo sheets.
  13. Top the dish with four more phyllo sheets, buttering between each sheet.
  14. Using scissors, cut the overhang but leave about an inch of phyllo that gets folded over the top of the dish. Brush the top phyllo with butter.
  15. Using a sharp knife, cut the phyllo across the short end of the pan to create two pieces of the same size (see photo). It’s easier to precut the top phyllo prior to baking.
  16. Place the pan on a cookie sheet (in case of spills) and bake for 40 minutes or until the top is golden brown and crispy.

Yields two large entrée size portions or 4 side dish sized portions.

Easy Cilantro Rice

This easy cilantro rice is so easy to prepare but so tasty. It pairs beautifully with a variety of proteins like grilled chicken, steak, pork chop or fish and the bonus is that you’ll have leftover chimichurri sauce leftover for other meals!

Ingredients:

Directions:

  1. In a medium pot, combine the rice, a big pinch of salt, and 1 cup of water. Heat to boiling on high then reduce the heat to low, cover and cook, without stirring, for 12 to 14 minutes, or until the water has been absorbed, and the rice is tender. Turn off the heat and fluff with a fork. Cover to keep warm.
  2. Halve, peel, and thinly slice the onion. Cut off and discard the stem of the pepper; remove the core, then thinly slice lengthwise. Combine in a bowl. Thoroughly wash your hands immediately after handling the pepper.
  3. In a large sauté pan, heat the olive oil on medium-high until hot. Add the sliced onion and pepper; season with a pinch of salt and pepper. Cook, stirring occasionally, 5 to 7 minutes, or until softened. Add 2 tablespoons of water (carefully, as the liquid may splatter). Cook, stirring, 30 seconds. Transfer to the pot of cooked rice; add the cilantro sauce and stir to combine. Taste, then season with salt and pepper if desired.

Makes 2 servings of rice.

Shrimp, Avocado and Freekeh Bowl

Shrimp, Avocado and Freekeh Bowl

With all my traveling for work, I don’t always have time to grocery shop for weekday lunches. I haven’t posted one of my beloved “there’s nothing to eat in this house” recipes in a while, so he’s a good one that uses mostly pantry items that won’t require a trip to the grocery store.

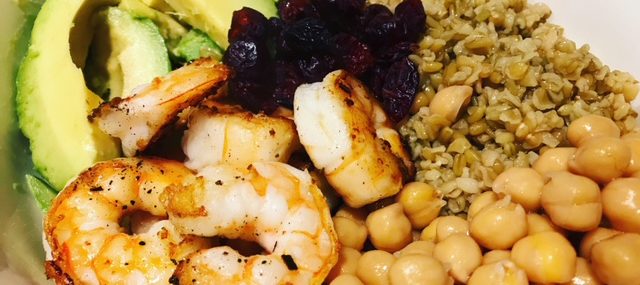
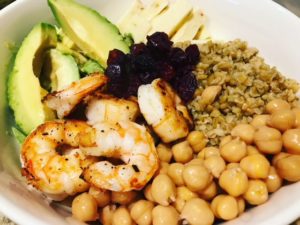
These types of bowls are all the rave right now and for good reason – they’re delicious and so versatile! I like the start with a grain or pasta, this time I’m using freekeh, and add whatever staples you have on hand. Here’s I’m using sliced avocado, canned chickpeas (don’t hate), leftover pepper jack cheese, cranberries and shrimp I thawed from the freezer that I used blackening spices on. Drizzle my favorite dressing and I was good to go in the time it took to cook the freekeh!

For those not familiar with freekeh, it’s an ancient grain that’s long been recognized as a main ingredient in Middle Eastern and Mediterranean cooking. It’s nutty and has great texture and it’s perfect for grain bowls.

Ingredients:
• ½ cup cooked chickpeas
• 1 avocado, sliced
• ¾ cup of cooked freekeh, cooled
• 2 Tbsp. dried cranberries
• 6-8 large shrimp, sprinkled with blackening or Cajun seasoning and cooked for 4-5 minutes then cooled
• 2 ounces pepper jack cheese, cut into bit size pieces
• 4 Tbsp. Easy Greek Vinaigrette (or similar store-bought)

Directions:
Place all the items in a large bowl and coat with the dressing – enjoy!

Serves one very generously or two in more appropriate servings :).

Cheers,
Veronique

Eat with Dan Easy Strawberry Jam

Eat with Dan Easy Strawberry Jam

Oh how I want to make my own strawberry jam. I’ve taken classes on canning and I’m still uncomfortable with the whole process. Will my jars be airtight? Did I sanitize the jars long enough? Will I poison everyone around me with contaminated canned food? All questions that I ask myself when I’m tempted to try canning.

Photo by Danny Chin

Last week, I took my foodie brother Danny Chin, of Eat with Dan, to brunch and he surprised me on HIS birthday with homemade strawberry jam. What a guy! He told me the process of making the jam is simple and I shouldn’t be intimidated. The key to success to good strawberry jam according to Danny? “Pick ripe strawberries that have that bright strawberry flavor”. We both pick our berries at the amazing Donaldson Farms in Hackettstown, NJ – the place is gorgeous and its produce is outstanding.

This delicious jam is bursting with strawberry flavors and isn’t too sweet. It requires no candy thermometer or expensive equipment. It’s perfect on a hot English muffin.

Connect with Eat with Dan

Have I mentioned that Danny’s a very talented photographer specializing in fashion and food? For amazing, drool-worthy food photography, do yourself a favor and follow Danny on Facebook, on Twitter and on Instagram.

Ingredients:

  • 2 quarts ripe strawberries
  • 1 1.75-ounce box SURE-JELL Fruit Pectin
  • ½ tsp. butter
  • 7 cups granulated sugar, measured into separate bowl

Directions:

  1. Bring large pot/canner half full of water to a boil over high heat.
  2. Wash jars and screw bands in hot soapy water; rinse with warm water. Pour boiling water over flat lids in saucepan on the heat. Let stand in hot water until ready to use. Drain well before filling.
  3. Destem and crush strawberries thoroughly. Place exactly 5 cups of crushed strawberries into 6- or 8-quart pot. Add the pectin to the berries in pot and stir to combine. Add butter to reduce foaming. Bring mixture to full rolling boil on high heat, stirring constantly. Stir in sugar. Return to full rolling boil and boil exactly 1 min., stirring constantly. Remove from heat. Skim any foam with metal spoon. 

    English Muffin with Jam

  4. Immediately ladle the mixture into prepared jars, filling to within ¼ inch of tops. Wipe jar rims and threads. Cover with two-piece lids. Screw bands tightly. Carefully lower jars into the pot of boiling water or canner. Important: Water must cover jars by 1 to 2 inches – add boiling water to the pot if needed. Cover the pot and bring water to gentle boil. Process 10 min. Remove jars and place upright on a towel to cool completely.
  5. After jars cool, check seals by pressing middle of lids with finger – If the lids spring back, lids are not sealed and refrigeration is necessary (up to a month).

Note: you can expect properly-sealed jars of jam to last about two years when stored in a cool, dry place. Once opened, keep your homemade jam in the refrigerator for up to a month.

Yields about eight (1-cup) jars.

Recipe based on this.

Garlic Miso Cremini Mushrooms

Garlic Miso Cremini Mushrooms

It’s prime grilling season and, unlike other times of the year, we find ourselves gravitating to the meat counter at our local butcher shop for steaks. If you’re a carnivore, there’s nothing better than a medium-rare ribeye seared to perfection and served with a carb-loaded side.

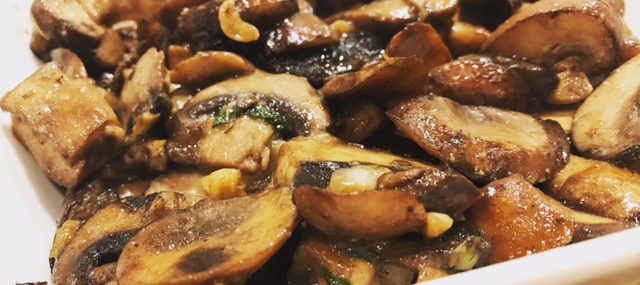
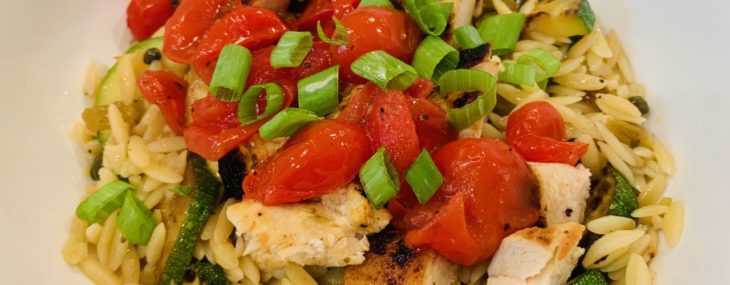
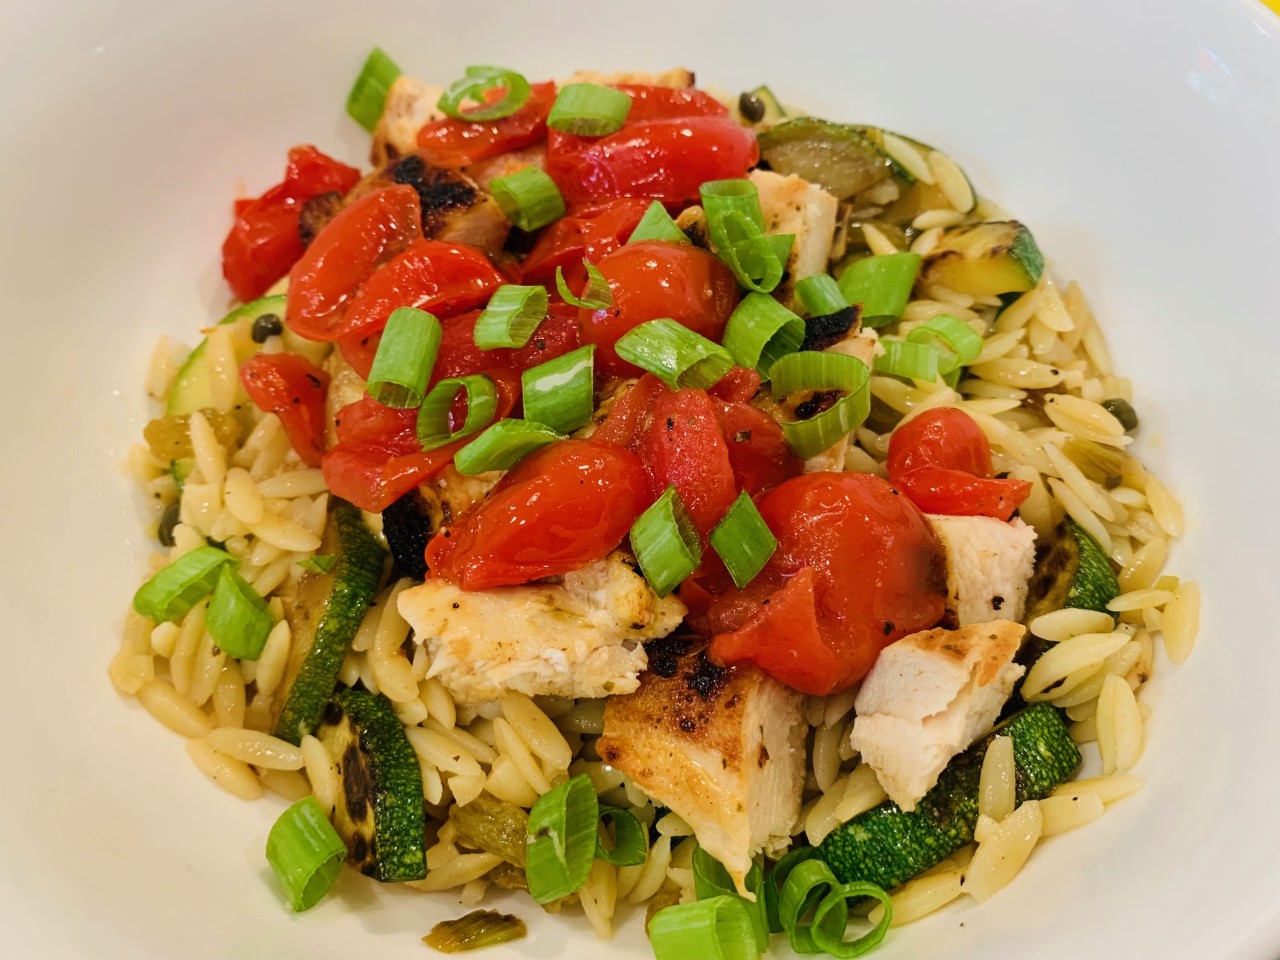
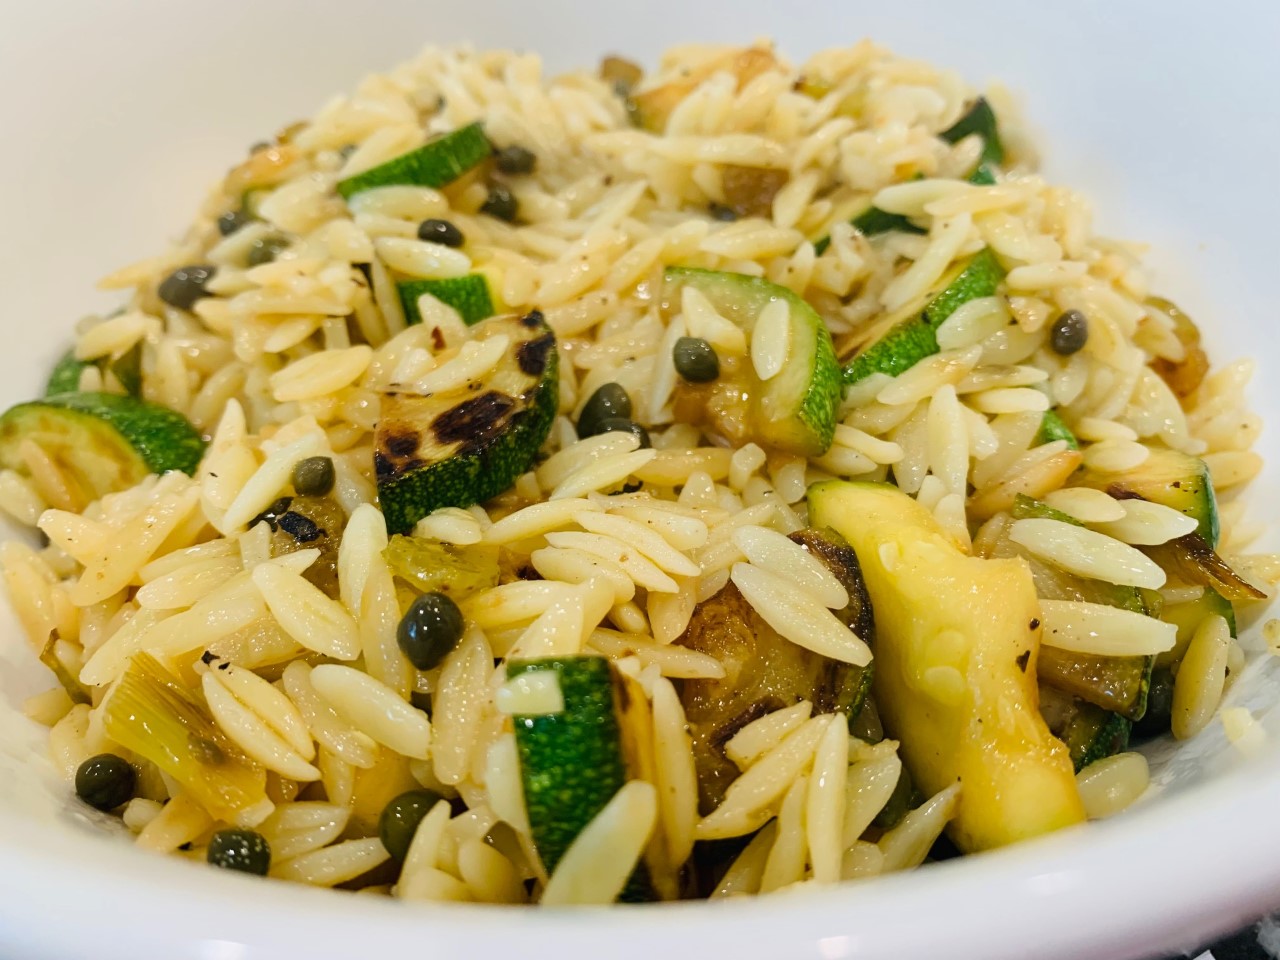
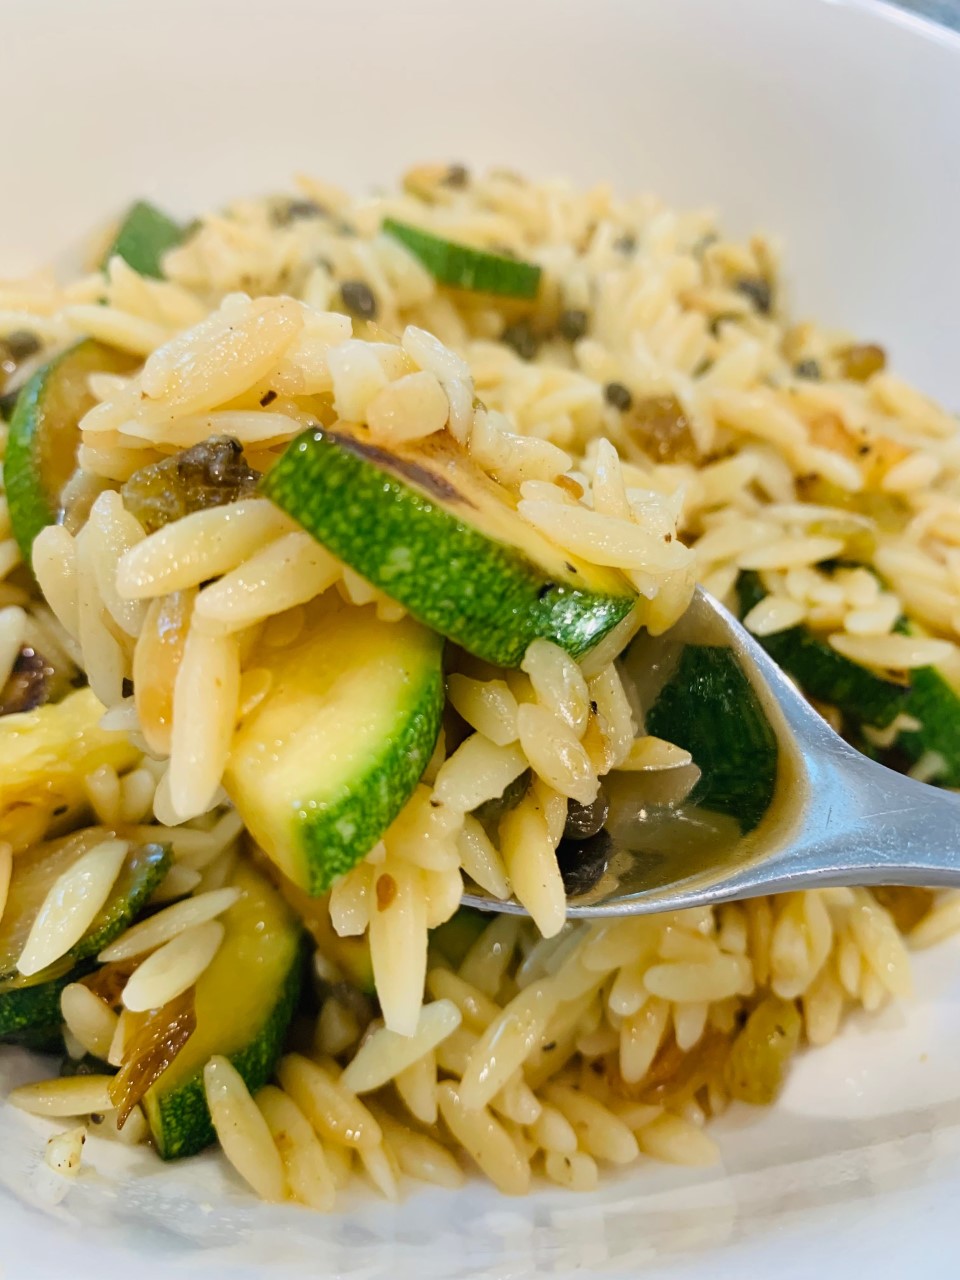
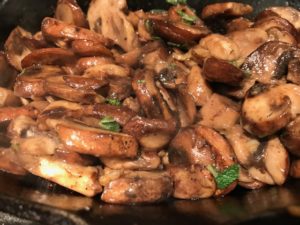
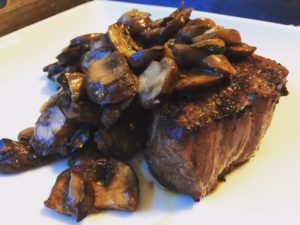
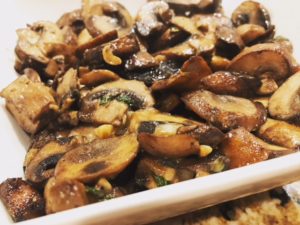
In an effort to cut down on carbs, we often forego the typical baked potatoes and corn in favor of grilled vegetables. Asparagus, zucchini and squash are veggies we like, but, our very favorites are mushrooms. We enjoy all kinds of mushrooms cooked many different ways.

One of those ways is to sauté mushrooms in garlic brown butter and finish with white miso and sage – yum!! Miso is a traditional Japanese seasoning produced by fermenting mashed soybeans (could also use rice or barley) with salt and a mold called Koji. After fermenting for anywhere from a few months to a few years, the miso turns into a thick paste that can be used in many ways to season things like soups and marinades. White miso paste, which is milder in flavor and lighter in color than its dark/red miso kin, can be found in the refrigerated section of the grocery store or at Asian markets.

These Garlic Miso Cremini Mushrooms are also great on burgers and served with grilled salmon or pork chops.

Ingredients:

  • 4 Tbsp. butter
  • 2 garlic cloves, minced
  • 16-ounces sliced Cremini mushrooms (can use button or other mushrooms too)
  • ½ tsp. each salt and pepper
  • 1 Tbsp. white miso paste (this is the one I use)
  • 1 Tbsp. chopped fresh sage

Directions:

  1. Place a large skillet over high heat and add butter. Once the butter is slightly browned, after about 1 minute, add the garlic and cook for 30 seconds, until fragrant. Add the mushrooms and toss to coat in garlic butter then cook for about 5 minutes over medium heat, stirring occasionally, until soften and slightly golden.
  2. Add the salt and pepper and stir to combine.
  3. Add the miso paste and stir into the mushroom mixture until it’s fully dissolved, about 1 minute.
  4. Add the sage and stir to combine for about 30 seconds.

Makes 2 large side servings.

Maple Dijon Heirloom Carrots

Maple Dijon Heirloom Carrots

This Maple Dijon Heirloom Carrots dish is such a simple recipe that pairs so well with a variety of proteins. I served these over the weekend with a juicy ribeye steak, but we have them often with grilled fish. Tasty, easy-to-make and pretty too!

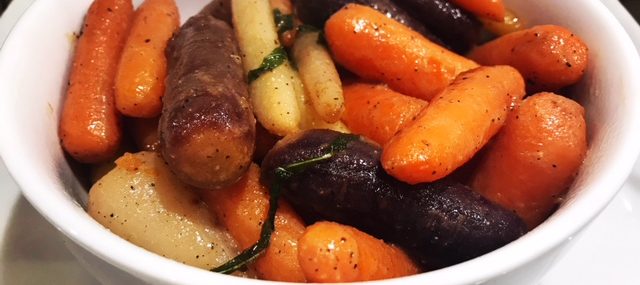
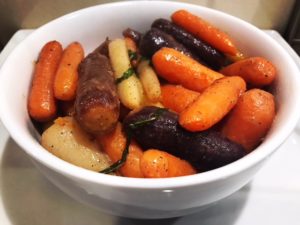
If you can’t find multi-colored carrots at your market, simply use regular orange-colored ones. It won’t affect the taste at all.

Ingredients:

  • 16-ounces baby carrots
  • 4 Tbsp. butter
  • 2 Tbsp. Dijon mustard
  • 2 Tbsp. pure maple syrup
  • 2 Tbsp. chopped fresh sage
  • Big pinch of salt and pepper

Directions:

  1. Over high heat, bring a medium saucepan of water to a boil. Turn the heat to medium-high and cook the carrots until fork tender, about 5 minutes. Strain the carrots in a colander and shake to ensure the carrots are as dry as possible.
  2. Return the saucepan to the stove and melt the butter over medium-high heat. Add the mustard and maple syrup and stir to combine and create a sauce. Add the carrots to the saucepan and stir gently to coat them with the glaze. Turn the heat to low, cover the pot and cook for 2-3 minutes, shaking the pot from time to time.
  3. Uncover, add the sage, salt and pepper and toss to combine.

Makes 4 servings.