Chive Sour Cream Salad Dressing

Chive Sour Cream Salad Dressing

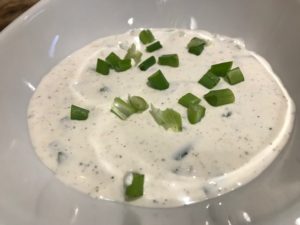
This Chive Sour Cream Salad Dressing was something we used on fresh green lettuce during the summer months in Quebec when I was growing up when the days were warm and eating outside was de rigueur.

It’s a really simple, tangy dressing that you can make a day in advance if kept in a container with a tight-fitting lid. I use canning jars for this as it’s easy to shake up the ingredients before pouring over the greens.

I typically use chives in this salad dressing, but use whatever fresh herbs you have on hand. Cilantro and basil are particularly delicious. Serve the dressing cold on cold lettuce for extra freshness.

Ingredients:

  • ½ cup sour cream
  • ½ cup heavy cream (could use half-and-half)
  • ½ tsp. each salt and pepper
  • 1 Tbsp. finely chopped chives
  • 1 Tbsp. chopped green onion
  • Zest of half a lemon
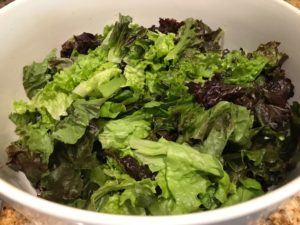
  • One large head of Freshly-washed lettuce greens, torn in bit size pieces

Directions:

  1. Combine all the ingredients except the lettuce greens in a medium canning jar and shake well until all the ingredients are fully combined (could use a bowl and whisk also).
  2. Pour the dressing over the greens, toss to coat well and check for seasoning. I typically add a couple big pinches of salt and re-toss.

Serves 4 guests.

Tangy Carrot and Celery Slaw

Tangy Carrot and Celery Slaw

In the summertime, I’m always looking for easy and tasty recipes for side dishes to serve at outdoor parties. While I love my mom’s potato salad is always a hit, I was looking for a tangy, vinegary slaw to serve. I found the perfect slaw in this week’s Blue Apron box! It’s made with sweet carrots and crunchy celery with a bit of heat from the sweet piquante peppers.

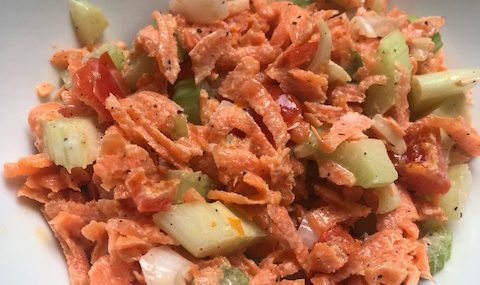
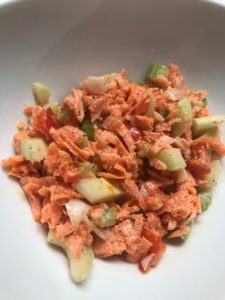
Sweet piquante peppers are found typically jarred and are also known as peppadew peppers. They’re great on sandwiches, in salads and in this easy slaw recipe. 

The recipe can easily be doubled or quadrupled based on the number of guests being fed. I even scooped this slaw on tacos and it added great crunch and tang.

Ingredients:

  • 2 Tbsp. mayonnaise
  • 2 stalks of celery, sliced
  • White part of 2 scallions, diced
  • 2 medium sized carrots, peeled and grated on the large whole side of a box grater
  • ½ ounce sweet piquante peppers (about two peppers), roughly chopped
  • 1 Tbsp. red wine vinegar
  • 2 Tbsp. olive oil
  • Pinch each of salt and pepper

Directions:

  1. In a medium bowl, combine the mayonnaise, sliced celery, scallions, grated carrots, chopped piquante peppers and vinegar.
  2. Drizzle with olive oil and season with salt and pepper. Set aside to marinate, stirring occasionally, at least 10 minutes, but no more than an hour.

Makes two side servings.

Easy Wedge Salad with Blue Cheese Dressing

Easy Wedge Salad with Blue Cheese Dressing

Every summer, I try to reinvent the wheel when I host outdoor parties when it comes to food. What do I serve that’s tasty, different, can be made in advance and that my guests will enjoy? Another challenge is to find a side or starter that’s refreshing in contrast to the heavier food served at grilling parties. My answer, the mighty wedge salad.   

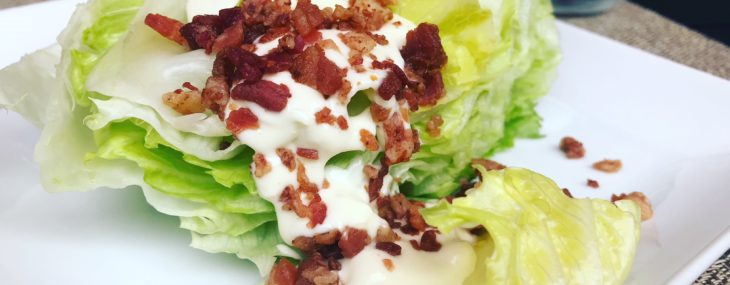
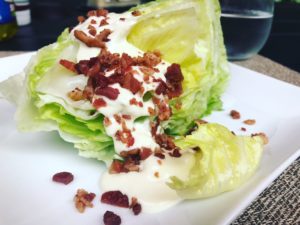
It’s not innovative but it’s pretty close to perfect on hot summer days with its crisp, cold lettuce, decadent blue cheese dressing and fun toppings that can be customized to please your guests.

Another perk of this easy side dish or starter is that it’s very affordable. You can easily get four servings out of a head of iceberg lettuce and I oftentimes get six servings out of a larger head.

A fun way to serve a wedge salad is by serving the toppings on the side so that each guest can add or omit whatever toppings he/she likes…..think salad bar!  

Ingredients:

  • 1 large head of iceberg lettuce, cut into four or six wedges
  • About 2 cups chunky blue cheese dressing, homemade or store-bought
  • 1 cup crumbled blue cheese (optional)
  • 1 cup cooked bacon, crumbled (optional)
  • 1 cup cherry/grape tomatoes, chopped (optional)
  • 3 scallions, chopped (optional)

Directions:

  • Place a wedge of lettuce each on cold salad plate.
  • Drizzle a few tablespoons of blue cheese dressing on each wedge.
  • Optional: Top with crumbled blue cheese, crumbled bacon, tomatoes and scallions.

Serves 4-6 guests.

Easy Wedge Salad with Blue Cheese Dressing
Serves 4
An easy and tasty salad for summer parties that guests will love.
Write a review
Print
Prep Time
10 min
Total Time
10 min
Prep Time
10 min
Total Time
10 min
Ingredients
  1. • 1 large head of iceberg lettuce, cut into four or six wedges
  2. • About 2 cups chunky blue cheese dressing, homemade or store-bought
  3. • 1 cup crumbled blue cheese (optional)
  4. • 1 cup cooked bacon, crumbled (optional)
  5. • 1 cup cherry/grape tomatoes, chopped (optional)
  6. • 3 scallions, chopped (optional)
Instructions
  1. • Place a wedge of lettuce each on cold salad plates.
  2. • Drizzle a few tablespoons of blue cheese dressing on each wedge.
  3. • Optional: Top with crumbled blue cheese, crumbled bacon, tomatoes and scallions.
Notes
  1. A fun way to serve the wedge salad is by serving the toppings on the side so that each guest can add or omit whatever toppings he/she likes…..think salad bar!
Food & Wine Chickie Insider https://www.foodandwinechickie.com/
Strawberry Maple Butter

Strawberry Maple Butter

Every late spring, I make it my mission to go strawberry picking at Donaldson Farms, and amazing local farm. My love for picking berries started a long time ago when my grandma would take me to pick wild/wood strawberries in Quebec as a toddler. She’s sit me in the field with a pail and tell me to pick berries around me. Of course, that ended up with me eating the strawberries around me, but it’s a very fond memory nonetheless.

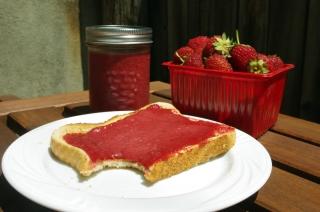
Cultivated strawberries are so easy to pick as farmers have rows and rows of plants with an abundant amount of berries on them. Within a few minutes, I have more strawberries that I know what to do with!

One way I like to use up my fresh berries is by making a very simple butter using maple syrup from back home in Quebec. This butter can be used on toasts, waffles, pancakes/crepes and in a multitude of ways. It keeps a couple of weeks in the fridge and it’s delicious!

Hope you make it out to a u-pick-it berry farm near you, it’s a fun and tasty activity for the whole family.

Ingredients:

  • 6 cups of fresh, chopped strawberries
  • 2/3 cups maple syrup
  • 1 ½ cups unsalted butter, cut into pieces
  • 1 Tbsp. pure vanilla extract
  • Pinch of salt

Directions:

  1. In a large saucepan over medium-high heat, add the chopped berries, the maple syrup and the butter. Bring to a boil then lower heat to medium-low and cook for 30 minutes, stirring occasionally.
  2. Turn the heat off, add the vanilla and salt and stir to combine.
  3. Puree the berry mixture in a blender or food processor until smooth, 30 seconds or so. You may need to puree in batches if your food processor/blender is on the small side.
  4. Pour the strawberry maple butter in small glass jars and refrigerate until ready to serve.

Makes 6 small canning jars.

Cheers,

Veronique

Cheese Stuffed Poblano Peppers

Cheese Stuffed Poblano Peppers

Poblanos are mild chili peppers with lots of great flavor and just a bit of spice. The peppers originated in Puebla, Mexico and can also be found dried, where they’re known as ancho chile.

Cheese Stuffed Poblano

I’m always looking for low-carb side dishes to serve when we grill meats. That’s not easy as we often go to carby sides when we grill…potato salad, mac & cheese, pasta.

Last weekend, I’d made some of my fresh salsa (chopped tomatoes, cilantro, lime juice, jalapeno and minced onion) for another meal and thought…what if I used this tasty salsa to top a stuffed poblano!? This was a well-received and easy-to-make side dish that we served alongside grilled pork chops. One other thing I loved was that I was able to make these in the toaster oven so I didn’t have to heat up the whole kitchen with my standard oven – winning!

You can make these peppers in advance, cool them then reheat them for a few minutes in a 425 degree oven – party perfect!

Ingredients

  • 2 large poblano peppers
  • 1 Tbsp. vegetable oil
  • Pinch of sales and pepper.
  • 4 ounces grated Cheddar/Jack cheese mix
  • Homemade or store-bought salsa
  • 2 Tbsp. Crema Mexicana or sour cream
  • ½ lime

Poblano Cheese Stuffing

Directions:

  1. Preheat oven to 375 degrees.
  2. Find a flat spot on the poblano and lay it on your work surface. With a sharp paring knife, cut the top of the pepper (leaving the end and stem intact) to make an opening for the cheese to go into.
  3. Rub the oil over the peppers then salt and pepper the interior.
  4. Divide the grated cheese between the two peppers, note that you may have too much cheese depending on the size of your peppers.
  5. Place the stuffed peppers on a baking sheet and cook for about 20 minutes, until cheese is melted and beginning to brown.
  6. Top each pepper with fresh salsa and a drizzle of Crema Mexicana (or sour cream). Squeeze the lime over the peppers.

Makes two side dishes.

Baked Ditali Pasta and Creamy Tomato Sauce

Baked Ditali Pasta and Creamy Tomato Sauce

pasta and creamy tomato sauce
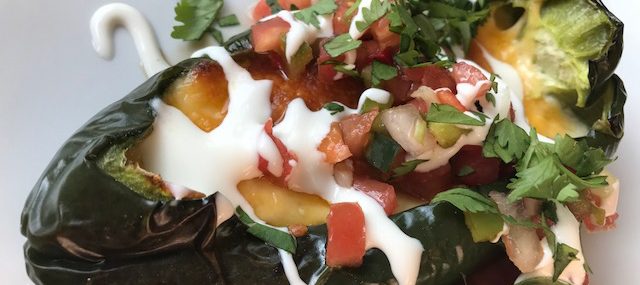
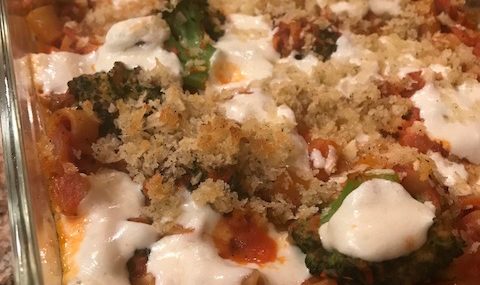
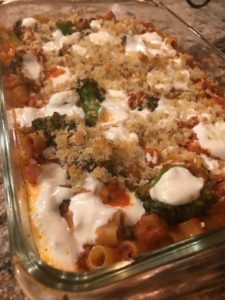
This baked ditali pasta and creamy tomato sauce casserole is delicious and simple to make. This is a Blue Apron pasta recipe that was a huge hit at our home for its taste, ease of preparing and for its cheesy, comforting qualities.

I love that the broccoli and pasta are cooked at the same time in one pot – how fab is that!? The garlic/breadcrumb topping is packed with bold flavors and provides a nice crunch.

Ingredients:

  • 6 ounces ditali (also called ditalini) pasta (or other small tubular pasta)
  • ½ pound broccoli, cut into small florets
  • 1 yellow onion, small diced
  • 1 Tbsp. Italian seasoning (mix of basil, sage, oregano, savory, rosemary, thyme and marjoram)
  • ¼ tsp. crushed red pepper flakes
  • 1 15-ounce can crushed tomatoes
  • ¼ cup heavy cream
  • 1 cloves garlic, finely chopped then smashed into a paste
  • ¼ cup panko breadcrumbs
  • 1 Tbsp. olive oil
  • 1 Tbsp. capers
  • 4 ounces fresh Mozzarella cheese, torn into small pieces

Pasta and Broccoli Directions:

  1. Preheat oven to 475°F.
  2. Heat a large pot of salted water to boiling on high.
  3. Add the pasta and broccoli pieces to the pot of boiling water. Cook, stirring occasionally, 8-9 minutes (or two minutes less than package directions), or until the broccoli is bright green and the pasta is al dente (still slightly firm to the bite). Turn off the heat. Reserving 1/4 cup of the cooking water, drain thoroughly and return to the pot.

Sauce Directions:

  1. While the pasta and broccoli cook, in a large pan, heat a drizzle of olive oil on medium-high until hot. Add the diced onion, Italian seasoning and as much of the red pepper flakes as you’d like, depending on how spicy you’d like the dish to be; season with salt and pepper. Cook, stirring frequently, 2 to 3 minutes, or until slightly softened.
  2. Add the tomatoes (carefully, as the liquid may splatter); season with a pinch of salt and pepper. Cook, stirring occasionally, 3 to 4 minutes, or until slightly thickened.
  3. Add the heavy cream and cook, stirring frequently, 30 seconds to 1 minute, or until thoroughly combined. Turn off the heat and season with salt and pepper to taste.

Casserole Assembly Directions:

  1. Place the garlic paste in a bowl and add the breadcrumbs, olive oil and a pinch each of salt and pepper. Stir to combine and set aside.
  2. To the pot of cooked pasta and broccoli, add the sauce, capers and the reserved cooking water. Season with salt and pepper to taste.
  3. Transfer the pasta mixture to a baking dish (9×9 or 11×7). Evenly top with the cheese and seasoned breadcrumbs.
  4. Bake the casserole 8 to 10 minutes, or until lightly browned and bubbly around the edges. Remove from the oven and immediately drizzle with olive oil. Let stand for at least 2 minutes before serving.

Makes 2 generous entrée-sized portions or 4 side dish portions.

Cheers,

Veronique

Prosciutto Wrapped Maple Sweet Potatoes

Prosciutto Wrapped Maple Sweet Potatoes

Sweet Potato Fries

Prosciutto Wrapped Maple Sweet Potatoes – come on, that sounds so good!

I’m from Quebec so my side dishes often feature maple syrup. It’s just a perfect ingredient, that’s great in both sweet and savory dishes and I use it frequently.

When I was asked to bring a Thanksgiving side dish recently, I wanted to do sweet potatoes, but not the traditional oversweet version with marshmallow topping that very few people actually like (in my circle anyways). This recipe is perfect as it still features the traditional sweet potatoes but they’re in finger food size in fries wrapped in salty prosciutto then glazed with maple syrup. There’s nothing to NOT like here folks.

The sweet potatoes will be in various size so aim to get to around 24 ‘fries’. If that means less than four potatoes, do less or add more prosciutto and do more fries!

Cooking for a crowd, double the recipe!

Ingredients:

  • 4 long medium-size sweet potatoes, peeled and cut into 24 fries/wedges
  • 1 Tbsp. vegetable oil
  • Sprinkling of salt and pepper
  • 6-8 ounces thinly-sliced Prosciutto
  • ¼ cup maple syrup
  • 1 tsp. ground cinnamon
  • ¼ tsp. cayenne pepper
Sweet Potato Fries

Unbaked Sweet Potato Fries

Directions:

  1. Preheat the oven to 425 degrees F. Line two large rimmed baking sheets with parchment paper.
  2. Place the sweet potato fries in a large bowl and drizzle them with oil. Sprinkle generously with salt and pepper, then toss to coat.
  3. Cut the Prosciutto pieces into two long strips. Wrap one Prosciutto strip around each potato fry, tucking the ends under the bottom. Bake for 20 minutes.
  4. In a small bowl, whisk together the maple syrup, cinnamon and cayenne pepper. Set aside.
  5. Brush the maple syrup mixture over the potato fries and bake an additional 5 minutes. Serve warm, or at room temperature.

Inspired from this recipe.

Easy Sesame Zucchini – Not Really a Recipe

Easy Sesame Zucchini – Not Really a Recipe

This is the fourth post in my new series called “Not Really a Recipe”. These will be non-recipe posts that just give ideas on how to fix meals that are tasty and require very little work.

I make zucchini as a side dish all the time. I like how fast zucchini cooks and that it has good texture when the outer skin isn’t removed.

One of my favorite way to make a fast side dish to pair with my lunches is a quick sauté of diced zucchini. This helps me get my extra serving of vegetables in and it’d darn tasty.

Simple dice a zucchini, sauté it in a teaspoon of vegetable oil either in a screaming hot wok, a frying pan or a cast iron pan with a healthy pinch of salt and pepper for about 3 minutes, stirring or shaking the pan to avoid burning. Once cook, add a teaspoon of sesame oil and a half teaspoon of black sesame seeds and toss to coat. I sometimes also make this on the grill using a grill pan!

As the title of this post says, this isn’t really a recipe, it’s just a tasty way to change up the way you cook this inexpensive and tasty veggie.

Cheers,

Veronique     

Easy Cheesy White Grits

Easy Cheesy White Grits

Easy Cheesy Grits

I make creamy polenta all the time, but for some reason, I don’t make southern-style cheesy grits that often. Some would say that polenta and white corn grits are the same thing, but for me, polenta is made using fine to medium ground yellow or white corn and southern-style grits are simply coarsely ground bits of white corn. In my polenta, I like to add Parmesan cheese. In my grits, I use sharp Cheddar.

This recipe yields four side dishes or two entrée portions of grits. You can eat them on their own of top them with sautéed shrimps and hot sauce.

Ingredients:

  • 3 cups water
  • 1 cup white corn grits 
  • ½ tsp. sea salt
  • Pinch of black pepper
  • 4 Tbsp. softened butter
  • 1 cup shredded sharp Cheddar cheese
  • 4 tsp. softened butter, optional

Grits Cooking

Directions:

  • In a deep saucepan, bring the water to a boil over high heat. Lower the heat to medium-low and add the grits in a slow, steady stream. Whisk to break up any lumps then add the salt and pepper. Cook for 5 minutes, stirring often to prevent scorching, then cover the pan and allow the grits to rest with the heat off for 5 more minutes.
  • Add the 4 tablespoons of butter and the cheese to the grits and stir until fully incorporated and creamy.
  • Top each of four servings with a teaspoon of soften butter, or each of two servings with 2 teaspoons, if using.

Cheers,

Veronique

Creamy Soft Polenta

Creamy Soft Polenta

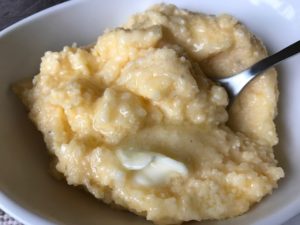
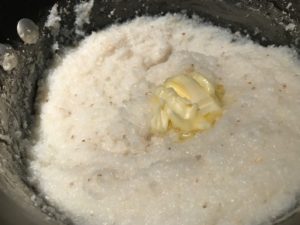
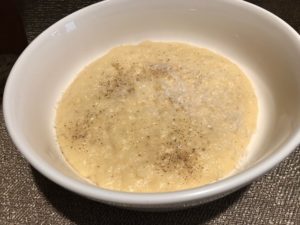
Polenta is comfort in a bowl and ultra-easy to make. It’s a perfect complement for hearty toppings like short ribs, boeuf Bourguignon or sautéed mixed mushrooms. It’s also delicious served on its own with an extra grating of Parmesan.

This week, I served my polenta with rich, delectable boeuf Bourguignon (beef in Burgundy sauce) and it was fabulous. Since it was just two of us, I simply halved the below recipe. The polenta will congeal into the shape of the dish it’s stored in so I often make the recipe below and store the leftovers in a square container in the fridge then ‘unmold’, cut into squares and pan fry slabs of cheesy deliciousness to serve with grilled Portobello mushrooms.

I use a combination of medium and finely-ground corn meal for smoothness with just a bit of texture but you can use a cup of either one instead. No need to buy two kinds of corn meal if you don’t want to.

Ingredients:

  • 4 cups water
  • 1 tsp. salt
  • ½ cup medium stone ground corn meal
  • ½ cup fine stone ground corn meal   
  • 4 Tbsp. butter
  • ½ cup grated Parmesan cheese plus 1 Tbsp. for garnish
  • 1 cup white cheddar (optional but best)
  • Freshly ground black pepper

Polenta on Beef Burgundy

Directions:

  1. Over medium-high heat in a heavy saucepan, bring the water to a boil. Add the salt and reduce heat to medium. While whisking, add the corn meal in a slow, steady stream. Whisk vigorously for a minute, until thickened a bit. Lower heat to medium-low and cook covered for 15 minutes, stirring every minute or so in order to prevent scorching on the bottom of the pan.
  2. Add the butter and stir until fully incorporated.
  3. Add the Parmesan and stir until fully incorporated.
  4. Add the cheddar (if using) and stir until fully incorporated.
  5. Serve immediately with a dusting of pepper and the reserved Parmesan.

Makes 4 servings.

Easy Creamy Polenta
Serves 4
A delicious, easy-to-make polenta recipe to pair with saucy, hearty dishes or served on its creamy, delectable own.
Write a review
Print
Prep Time
5 min
Cook Time
15 min
Total Time
15 min
Prep Time
5 min
Cook Time
15 min
Total Time
15 min
Ingredients
  1. • 4 cups water
  2. • 1 tsp. salt
  3. • ½ cup medium stone ground corn meal
  4. • ½ cup fine stone ground corn meal
  5. • 4 Tbsp. butter
  6. • ½ cup grated Parmesan cheese plus 1 Tbsp. for garnish
  7. • 1 cup white cheddar (optional but best)
  8. • Freshly ground black pepper
Instructions
  1. 1. Over medium-high heat in a heavy saucepan, bring the water to a boil. Add the salt and reduce heat to medium. While whisking, add the corn meal in a slow, steady stream. Whisk vigorously for a minute, until thickened a bit. Lower heat to medium-low and cook covered for 10 minutes, stirring every minute or so in order to prevent scorching on the bottom of the pan.
  2. 2. Add the butter and stir until fully incorporated.
  3. 3. Add the Parmesan and stir until fully incorporated.
  4. 4. Add the cheddar (if using) and stir until fully incorporated.
  5. 5. Serve immediately with a dusting of pepper.
Food & Wine Chickie Insider https://www.foodandwinechickie.com/