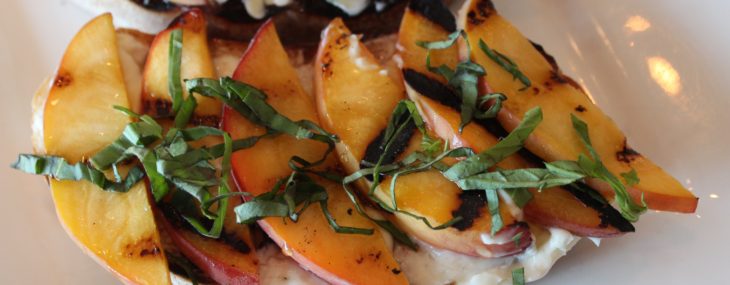
Double Avocado Toast – Not Really a Recipe

Double Avocado Toast – Not Really a Recipe

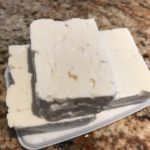
This is the second post in my new series called “Not Really a Recipe”. These will be non-recipe posts that just give ideas on how to fix meals that are tasty and require very little work.

This dish is perfect for lunch, brunch or cut into slices for an appetizer. The dish is made using grain-filled bread that’s buttered and lightly toasted then topped with my Zesty Guacamole recipe, slices of avocado, cilantro leaves and edamame. Right before serving, I squeeze some lime juice on. Simple to make and boasting big, perfect flavors.

Let me know if you try this!

Cheers,

Veronique

Baked Pepperoni Pizza Dip

Baked Pepperoni Pizza Dip

Baked Pepperoni Pizza Dip
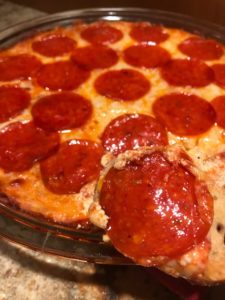
We were just going to order pizza while watching the “big game” since it was just the two of us, but then I decided to make the next best thing – pepperoni pizza dip!!

The dip would be great with potato chips but I served it with toasted baguette slices. You’ll want a sturdy vessel to run through all the layers of gooey yumminess (see what I mean by gooey and perfect).  

Ingredients:

  • 8-ounce block of cream cheese, softened
  • ½ cup sour cream
  • ½ cup grated Parmesan cheese
  • 1 tsp. dried oregano
  • ¼ tsp. ground black pepper
  • 1 cup pizza sauce
  • 1 ½ cups shredded mozzarella cheese, or Italian blend cheeses
  • 20 slices pepperoni
  • Toasted baguette slices.

Directions:

  1. Preheat oven to 375 degrees.
  2. In a medium bowl, combine the cream cheese, sour cream, Parmesan cheese, oregano and black pepper. Spread the cream cheese mixture on the bottom of 9″ round pie plate or other baking dish.
  3. Top cheese mixture with the pizza sauce.
  4. Top the sauce layer with the mozzarella cheese.
  5. Top the Mozzarella cheese with the pepperoni slices.
  6. Bake the dip for 25 minutes, until the cheese is melted and the dip is bubbly.
  7. Serve warm with toasted baguette slices.

Yields 8 appetizer portions.


Adapted from this recipe.

Baked Feta Cheese Dip

Baked Feta Cheese Dip

Baked Fetal Cheese DipI love any type of baked cheese dip. I’d been fortunate enough to find Dodoni brand Feta cheese at my local grocery store a couple weeks ago and really enjoyed it as part of a Greek salad, but I had a lot left that I wanted to be sure to use.

Since the “big game” was coming up and I’d be doing a bunch of appetizers to munch on during the game, I opted for a baked Feta dip that was out of this world. Note that the cheese gets marinated for 12 hours, so remember to start the day before you want to serve this dish.

The dip would be great with baked pita chips but I served it with toasted baguette slices. You’ll want a sturdy vessel to run through the flavored oil created from the marinade and the gooey cheese (video: see what I mean by gooey and perfect).  

Ingredients:

  • 1/3 cup extra virgin olive oil
  • 1 tsp. grated lemon zest
  • ½ tsp. red pepper flakes
  • 2 tsp. minced garlic
  • ¼ tsp. black pepper
  • 2 tsp. dried oregano
  • 8 ounces Feta cheese in a block, rinsed (I highly-recommend Dodoni brand if available)

Directions:

  1. In a small bowl, whisk together olive oil, lemon zest, red pepper flakes, garlic, black pepper and dried oregano.
  2. Place Feta cheese in a resealable bag. Pour the marinade over the Feta and allow to marinate overnight, or at least 12 hours, in the refrigerator.
  3. Preheat oven to 375F.
  4. Place the Feta and its marinade in a small baking dish. Bake for 20 minutes, until the Feta is melty and bubbling.
  5. Serve with sliced baguette or baked pita chips.

Yields 6 appetizer portions.


Adapted from this recipe.

Buffalo Shrimp – Hooters Copycat

Buffalo Shrimp – Hooters Copycat

Buffalo Shrimp
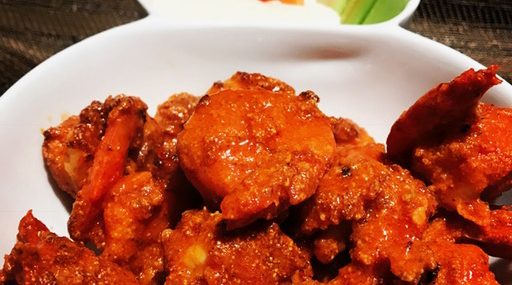
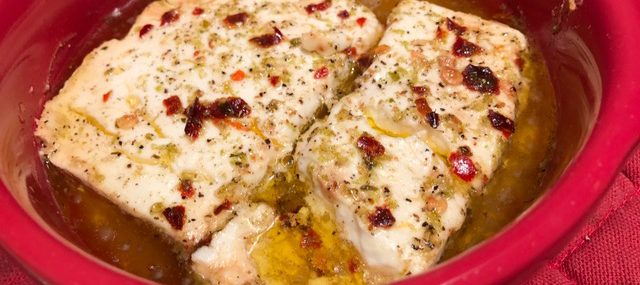
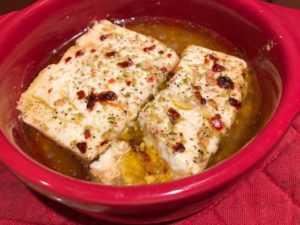
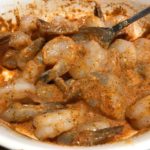
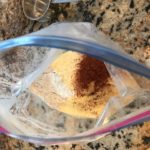
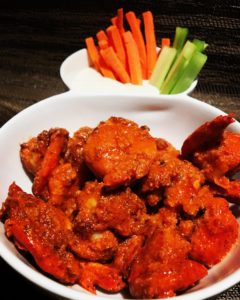
The “big game” is next weekend and I’ve been trying to come up with a couple appetizers to make while we watch the game. Chicken wings are always a winner, but my all-time favorite Buffalo anything is by far Buffalo shrimp. I know I’m not supposed to like chain restaurants as a discerning foodie, but the Buffalo shrimp at Hooters at the greatest. I’ve used the breading and Buffalo sauce that my sister’s come up with in terms of Hooters wings copycat but simply used large shrimp in place of the chicken.

These are absolutely fabulous with the right amount of heat – tangy but not scorching. Pair these with the typical carrot and celery sticks and a pool of chunky blue cheese dressing.

Don’t like seafood? Use chicken tenders! Don’t like a heavy saucing like I do (see image below)? Add half the sauce!

Shrimp Marinade Ingredients:

  • Vegetable oil for frying
  • 1 large egg, beaten
  • 1 Tbsp. yellow mustard
  • 2 tsp. each creole seasoning, garlic powder, onion powder and black pepper
  • 1 pound large deveined peeled shrimp (I used 21-25 count)

Buffalo Sauce Ingredients:

  • ¼ pound butter (1 stick)
  • 1 cup hot sauce (I use Frank’s)
  • 1 tsp. garlic powder
  • 2 Tbsp. lemon juice

Coating Ingredients:

  • 1 cup all-purpose flour
  • 1 cup yellow cornmeal
  • 2 tsp. creole seasoning
  • 1 tsp. black pepper

Marinade Directions:

  1. Heat the vegetal oil in a large, heavy saucepan (or use an electric fryer) until deep-fry thermometer reaches 350 degrees.
  2. In a medium bowl, whisk together the egg, mustard and spices to create a thick marinade. Toss the shrimp in the marinade to fully coat and set aside for about 15 minutes.

Buffalo Sauce Directions:

  1. Melt the butter in a small saucepan over high heat. Add the hot sauce, garlic powder and lemon juice – whisk to combine. Pour the hot liquid to a heat-proof bowl.

Coating Directions:

  1. Add all the ingredients to a large ziptop bag, shake well.
  2. Toss the shrimp in the corn flour in the bag to coat well.
  3. Working in batches (I did three batches), shake the excess corn flour coating off the shrimp and carefully place in the hot oil. Cook each batch of shrimp for 4 minutes then drain on paper towels.
  4. Immediately toss shrimp in buffalo sauce.

Serves 4 as appetizer portions.

Vegetarian Black Bean and Butternut Squash Chili

Vegetarian Black Bean and Butternut Squash Chili

Chili Cooking
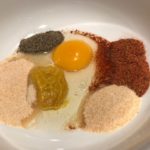
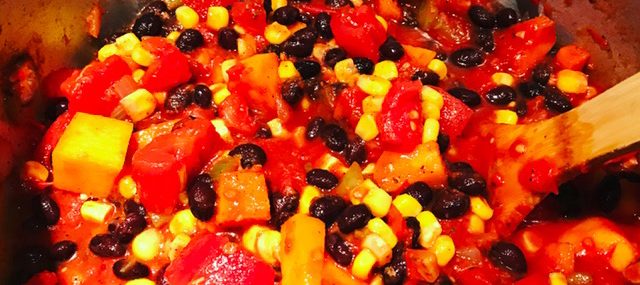
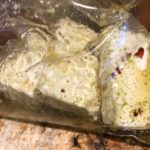
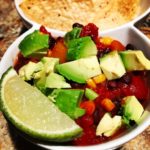
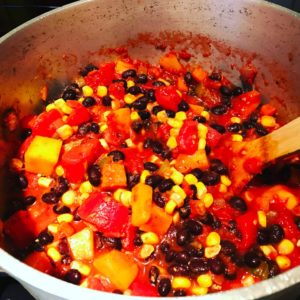
While winter’s been mild here so far in New Jersey, I’m still craving hearty, comforting food. In my continued effort to ‘prep Sunday – eat throughout the week’, this week, I’ve made a meatless chili that was uber satisfying and can be used in various ways during the week. I used it as dip for chips during the football game and topped a baked sweet potato with it for lunch (see photos).

This chili can be made in the slow cooker too – just throw all the ingredients in the crockpot (except for the toppings) and cook on low for 4-5 hours.

Ingredients:

  • 2 Tbsp. olive oil
  • 1 medium Spanish onion, chopped
  • 1 red bell pepper, cored and diced
  • 4 cloves garlic, minced
  • 1 butternut squash, peeled and cut into small cubes
  • ½ tsp. each salt and pepper
  • 2 Tbsp. chili powder
  • 1 tsp. ground cumin
  • ½ tsp. cayenne pepper
  • 1 cup vegetable broth, then more if the chili gets too thick
  • 1 28-ounce can of diced tomatoes
  • 1 28-ounce can of crushed totatoes
  • 1 cup corn kernels
  • 1 28-ounce can black beans, drained and rinsed
  • Toppings (optional) – fresh cilantro, lime wedges, diced avocado, sour cream and cheddar/jack cheese

Directions:

  1. In a large heavy Dutch oven, heat olive oil over medium-high heat.
  2. Add onion and bell pepper and cook for 4 minutes, stirring frequently.
  3. Add garlic and sauté 1 additional minute.
  4. Add the butternut squash, the salt and pepper, the chili powder, cumin and cayenne pepper. Cook for 5 minutes, stirring frequently.
  5. Add the vegetable broth, tomatoes, corn and black beans.
  6. Bring to a light boil then reduce heat to low, cover and allow to simmer for 45 minutes, or until the butternut squash is completely tender.
  7. Thin with an additional broth if needed.
  8. Serve with desired toppings, if using.

Serves 8.

Get to Know Slawsa Plus Easy Latkes Recipe

Get to Know Slawsa Plus Easy Latkes Recipe

Slawsa Jars
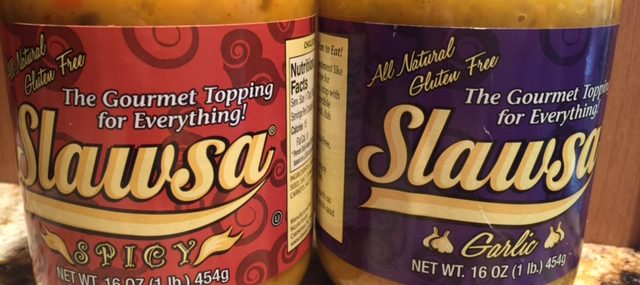
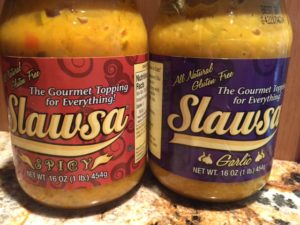
Last week, I was sent samples of a new product called
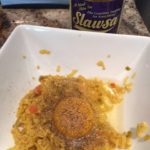
 Slawsa that I think are pretty fabulous so I’m sharing a bit about them and also sharing a recipe I made using the product.

About Slawsa

Slawsa breaks the mold of modern condiments and is meant to replace traditional ketchup, mustard, mayo or relish as a compliment to everyday foods.

Slawsa is a cabbage-based relish with a salsa twist. While it contains other vegetables, mustard and vinegar, the mustard and vinegar are not overwhelming, allowing it to be used in various ways.  It begins on the palate as sweet and transfers heat undertones that make it addictive atop grilling fare such as hot dogs, burgers or brats. Slawsa comes in Original, Spicy, Garlic and the new Fire.

The Flavors

Original – The classic, Slawsa Original starts a little sweet and finishes with a little heat that will quickly dissipate. The mustard and vinegar base is not overpowering and Slawsa retains a nice amount of crunch in every bite.

Spicy – The Spicy version isn’t “overly spicy” and more of a medium heat but does have a bit more kick to finish off the bite than the Original.

Fire – Slawsa Fire has a big kick of habanero and is truly for those who love the heat. But no, it’s not ghost pepper hot.

Garlic – The Garlic is truly for garlic lovers as it does have a bold garlic base.

Nutritional Facts

  • all-natural
  • fat-free
  • cholesterol-free
  • gluten-free
  • very low in sodium 
  • kosher
  • vegan

I tried the spicy and the garlic versions and both were unusual and delicious. I used both to create a mock latkes (typically a pan-fried potato pancake).

Easy Sauerkraut Latkes

Ingredients:

  • 1 cup Garlic Slawsa (could replace with sauerkraut)
  • 1 large egg
  • 1 tsp. all-purpose flour
  • ¼ tsp. each salt and pepper
  • ¼ cup vegetable oil, for frying
  • 4 tsp. Spicy Slawsa

Directions:

  1. Using a fine sieve, drain as much liquid from the Slawsa as possible. Place the drained Slawsa in a clean kitchen towel and wring as much of the remaining liquid as possible. Place the Slawsa in a small bowl and add the egg, flour and salt and pepper. Combine without over-mixing.
  2. In a heavy frying pan over high-heat, warm the oil for two minutes – pan should be sizzling hot.
  3. Drop the Slawsa mixture by the teaspoonful onto the oiled frying pan (should make 4 latkes) and cook for 2 minutes or until golden brown (see short video of this live action). Flip the latkes and cook an additional minute.
  4. Place on a double layer of paper towel to rid of excess oil and serve hot or at room temperature with the Spicy Slawsa.

Make 4 Latkes.

Slawsa is available for purchase online or at stores near you.

Cheers,

Veronique

Ants on a Log

Ants on a Log

Ants-On-A-LogToday’s National Ants of a Log Day. Yes, “they” even have a national day for this. Growing up in Canada, I never heard of this snack until we moved to the States when I was 12 years old. By then, I wasn’t really into the concept, so it never caught on at my home.

According to Wikipedia, “Ants on a log is a snack made by spreading cream cheese or peanut butter on celery and placing raisins on top. The snack name was first used in the 1950s”.

Curious to see how it would taste, I spread Peter Pan Peanut Butter (don’t hate, I know it’s commercial and not organic) on some celery I had left then topped with the required raisins and…it was actually pretty tasty!

Did you grow up eating this popular snack? Do you like it?

Best,

Veronique