Easy Recipe for Two Cookies

Easy Recipe for Two Cookies

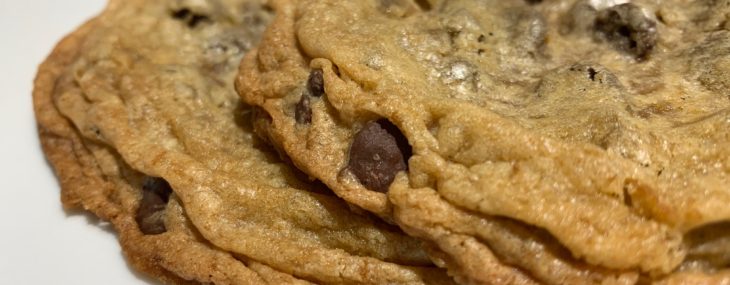
Having a sweets craving but don’t want to be at home with a normal batch of cookies in fear you might have more than a couple? Here’s a super simple chocolate and butterscotch chip cookies that makes just two large cookies!

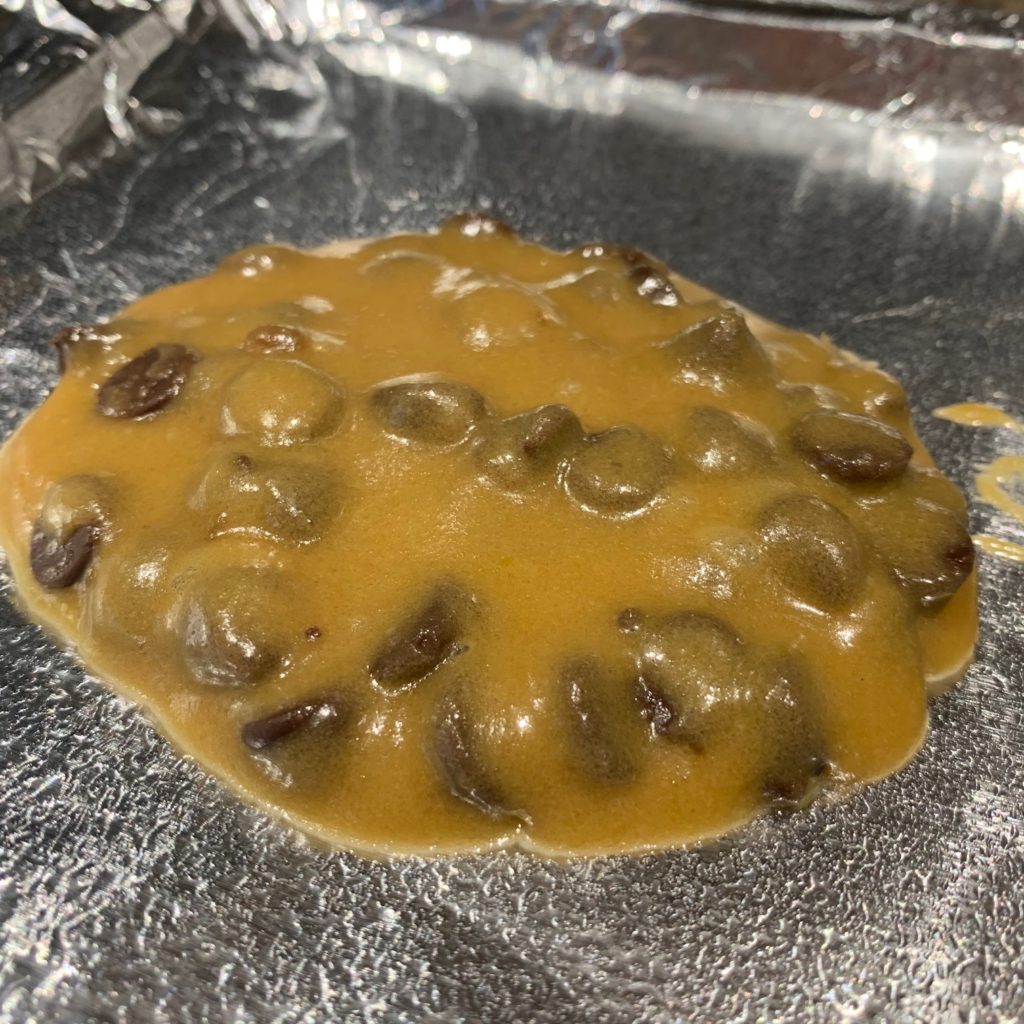
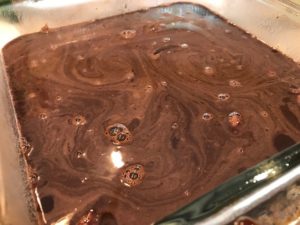
These will seems a bit strange as they’re more liquid (see photo below) than what we’re used to where cookie batter can be balled up and placed on a cookie sheet. Because the ‘batter’ is more liquid, be sure to space out the cookies on your cookie sheets as they get super large (and awesome) when they bake.

This time I used both chocolate and butterscotch chips, but you could easily use all chocolate chips.

Ingredients:

  • 2 Tbsp. butter
  • 1 Tbsp. granulated sugar
  • 2 Tbsp. brown sugar
  • Pinch of salt
  • 1/2 tsp. pure vanilla extract
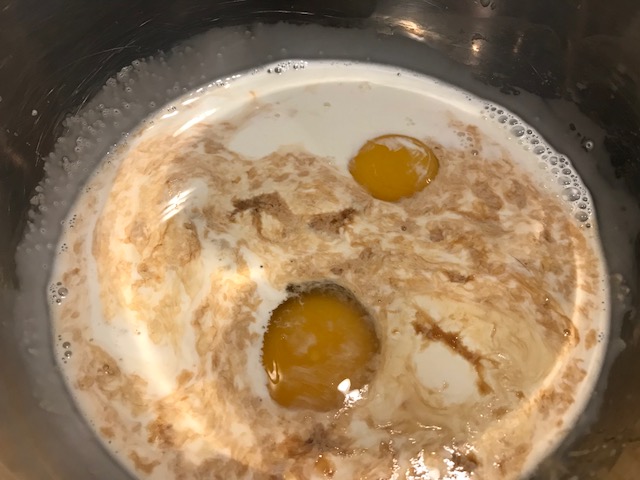
  • 1 egg yolk
  • 1/4 cup of all-purpose flour
  • 1/4 tsp. baking soda
  • 2 Tbsp. semisweet chocolate chips
  • 1 Tbsp. butterscotch chips

Instructions

  1. Preheat oven to 350 degrees.
  2. Line a baking sheet with foil or parchment paper. If using foil, coat with cooking spray.
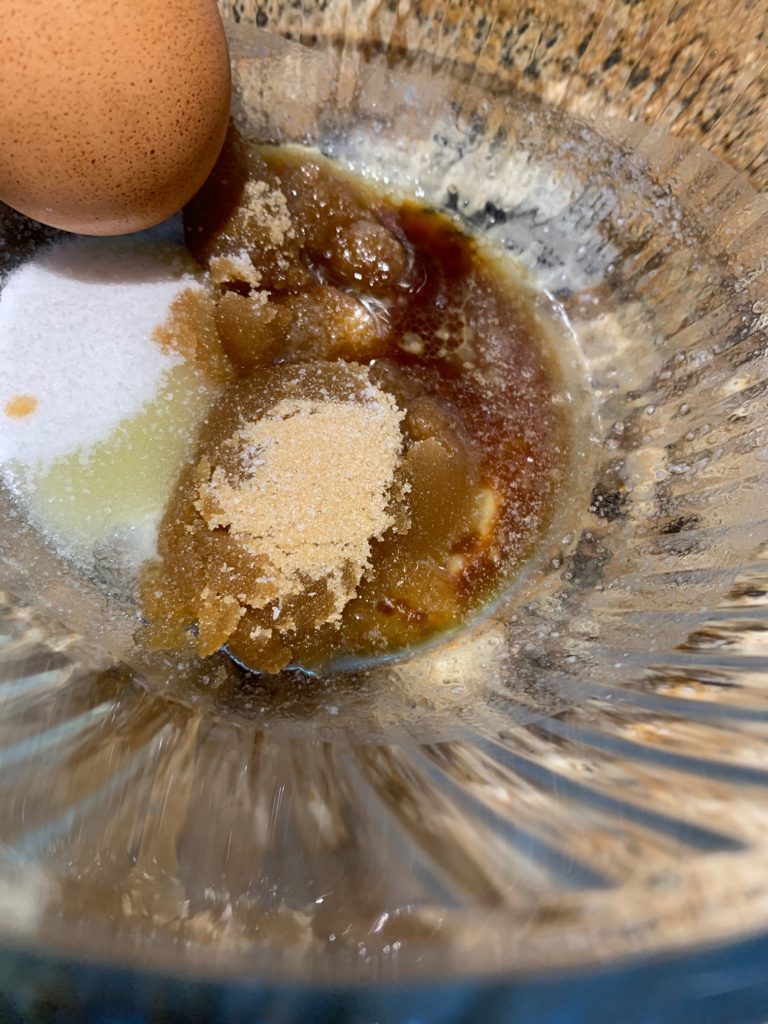
  3. Heat the butter in the microwave until it just starts to melt and is softened – don’t let it bubble up.
  4. Add the white and brown sugars, the salt and the vanilla and blend well.
  5. Add the egg yolk and stir until well-incorporated.
  6. Add the flour and the baking soda and stir until just combined.
  7. Add the chips and stir until just incorporated.
  8. Scoup batter onto the baking sheets into two cookies.
  9. Bake for approximately 9 minutes, or until edges are golden brown.

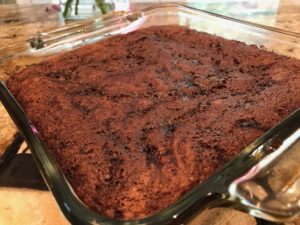
Makes two large cookies.

Strawberry Bread Pudding by Redz Restaurant

Strawberry Bread Pudding by Redz Restaurant

Bread pudding is a dessert popular in many countries and typically made with bread, milk or cream and generally containing eggs and butter. The dish can be sweet or savory depending on where in the world it’s served.

Redz Restaurant (https://redzrestaurant.com) stays true to the American inspired fare it serves. Chef Roeloff DeGroot prepares it as it’s enjoyed in the United States, traditionally sweet, and utilizes the freshest seasonal fruit.

Photo by Redz restaurant

Ingredients:

  • 1 cup whole milk
  • 1 egg, beaten
  • 1 Tbsp. butter (plus more for greasing ramekins)
  • Pinch salt
  • 4 croissants, or half a loaf of sweet bread such as a Challah or brioche (cubed)
  • ½ cup granulated sugar
  • 1 tsp. pure vanilla extract
  • 1 Tbsp. lemon zest
  • 1 cup strawberries, quartered
  • Powdered sugar, optional

Method:

  1. Heat oven to 350 degrees.
  2. In a small saucepan over low heat, warm milk, egg, butter, vanilla, sugar, strawberries, lemon zest and salt. Cook just until butter melts; cool.
  3. Meanwhile, butter a 4 ramekins and fill with cubed bread
  4. Place Ramekins in a sheet pan with water and place in oven for 45 minutes
  5. Garnish with powdered sugar, if using

(Serves 4)

About Redz Restaurant

Located at DoubleTree Suites by Hilton, Redz Restaurant & Bar in Mt. Laurel, NJ serves authentic specialties from all over the country. Known for its carefully chosen and locally sourced in-season ingredients with an imaginative approach to many of the foods you know and love—as well as many others you’ll be delighted to discover.

Peanut Butter and Potato Treats (Bonbons Aux Patates)

Peanut Butter and Potato Treats (Bonbons Aux Patates)

Yes, I agree that dessert treats made using mashed potatoes are a bit weird, but it’s an old fashion recipe from Quebec where I grew up that’s really popular, especially around the holidays.

It’s a great way to use those leftover mashed potatoes too…as long as they weren’t made using pepper!

Ingredients:

  • 2 pounds plus 3 Tbsp. confectionary sugar
  • ½ cup leftover mashed potatoes (not made using pepper)
  • 1 ½ Tbsp. softened butter
  • 1 Tbsp. pure vanilla extract
  • 16-ounce jar of creamy peanut butter, warmed in the microwave for about 15 seconds

Directions:

  1. In the bowl of an electric mixer, add the 2 pounds of confectionary sugar, the potatoes, the butter and the vanilla. Mix until the mixture forms a ball. Wrap the dough ball in plastic wrap and refrigerate 30 minutes.
  2. Place a large piece of wax paper on a work surface. Sprinkle the additional confectionary sugar over the paper. Roll out the dough into a rectangle about ¼ inch thick. Spread the warmed peanut butter over the dough and roll up jelly roll-style into a tight log, peanut butter in and dough out. Wrap the log in plastic wrap and chill for 2 hours. Remove the plastic wrap and cut into ½ inch thick slices.

Makes 24 treats.

Easy Maple Rice Pudding

Easy Maple Rice Pudding

This creamy rice pudding is flavored with maple syrup and is the perfect comfort food. Ideally, this recipe is made using Arborio rice (same rice used to make risotto), but other short grain white rice could also work.

Maple Rice PuddingIngredients:

  • ½ cup Arborio rice, uncooked
  • 4 cups whole milk
  • ½ cup maple syrup
  • 1 tsp. pure vanilla extract
  • Pinch of cinnamon
  • ½ cup powdered milk

Directions:

  1. Place the rice in a sieve or colander and run cold water over it for 30 seconds while shaking the sieve/colander. This removes a bit of the outer starch which can cause your rice to clump while cooking. Shake to remove as much of the water as possible.
  2. In a medium saucepan over medium-high heat, combine all the ingredients except the powered milk, stir well to combine. Bring to a simmer, then turn the heat down to medium-low and cook for 40 minutes, stirring frequently. After 35 minutes, if the rice mixture is VERY thick and the rice rains feel tender, turn off the heat. Depending on the rice you use and how hot your stove runs, 35 minutes might be enough.
  3. Remove the pan from the heat and add the powdered milk. Stir to fully combine.
  4. Allow to cool to lukewarm to serve.

Note: This pudding can also be served cold with a drizzle of maple syrup, granola and berries.

Yields six servings.

One Minute Brownie in a Cup

One Minute Brownie in a Cup

This is a perfect little one minute brownie recipe for when you have sugar cravings but don’t want to wait 45 minutes to satisfy your sweet tooth.

Ingredients:

  • 1 Tbsp. all-purpose flour
  • 2 Tbsp. powdered milk
  • 2 Tbsp. granulated sugar
  • 1 Tbsp. cocoa powder
  • 2 Tbsp. whole milk

Directions:

  1. In a small bowl, combine all the ingredients. Pour mixture in a microwaveable-safe mug and microwave for one minute.

Serves one.

Chocolate Pudding Cobbler

Chocolate Pudding Cobbler

I’m Canadian and one of our very typical home-style desserts is the beloved chocolate pudding cobbler. Think cakey cake and warm gooey chocolate pudding in one – divine! Kind of like a lava cake but in a pan that’s fail-proof and serves 6-8 people!

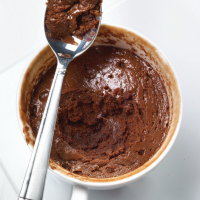
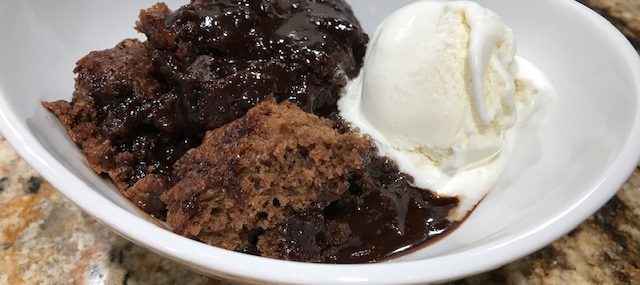
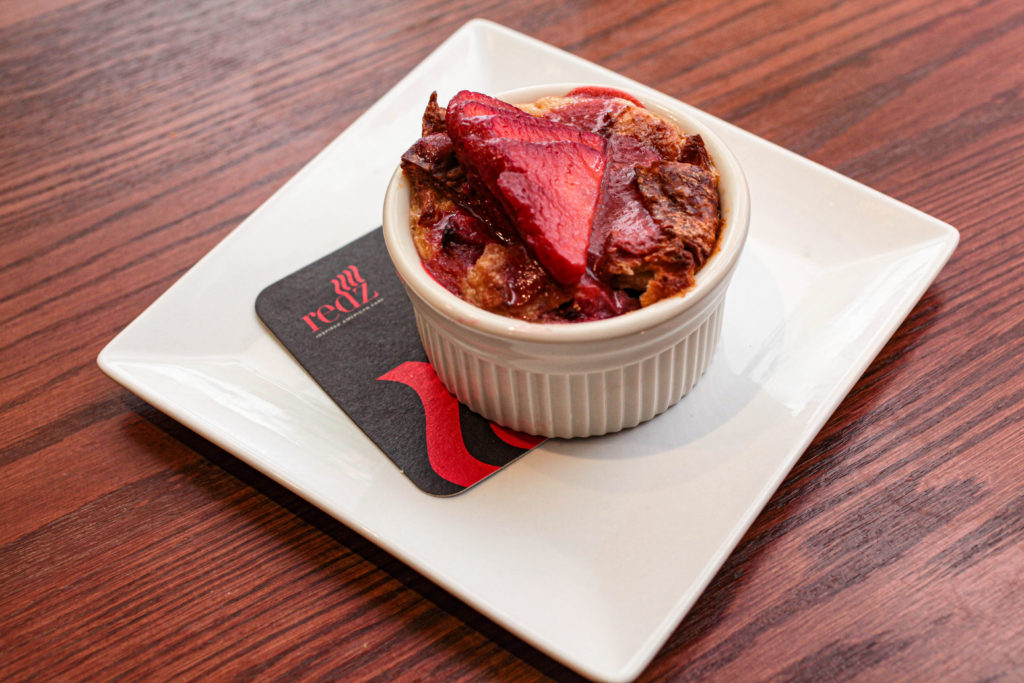
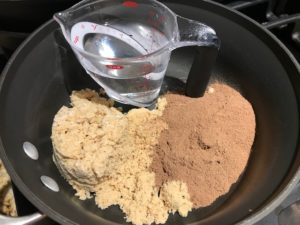
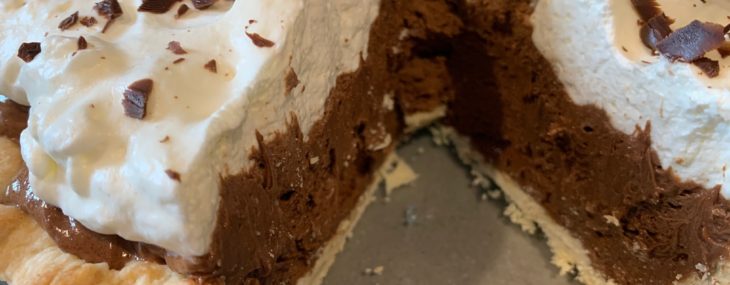
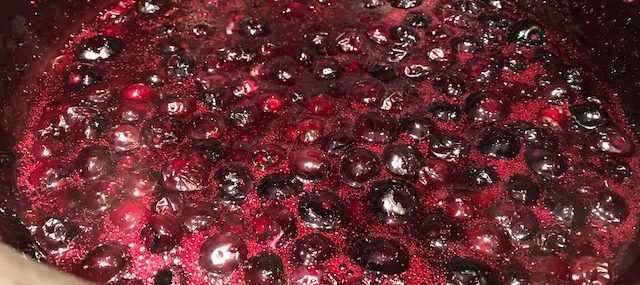
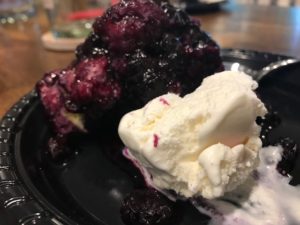
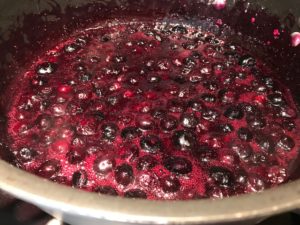
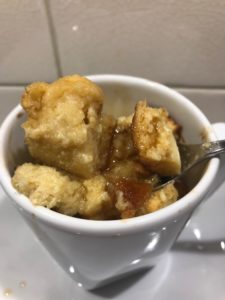
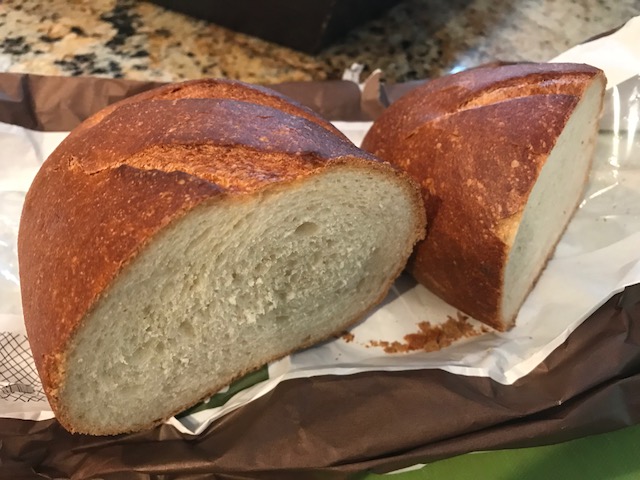
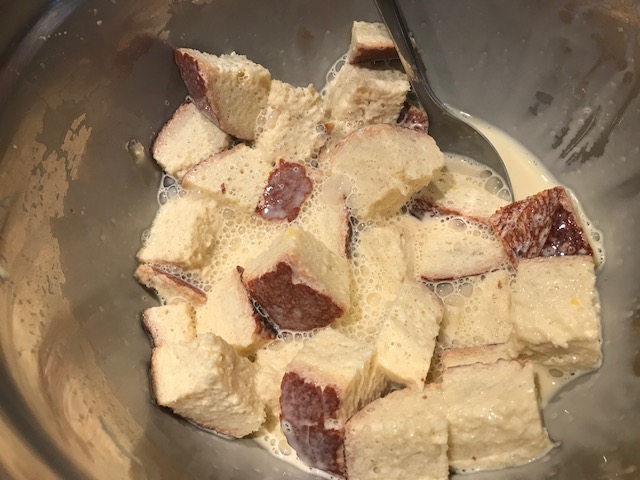
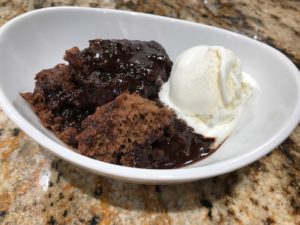
This recipe comes together super quickly and it’s best served with good quality vanilla ice cream which kind of melts into the pudding – decadent and comforting.

Cake Ingredients:

  • 1 cup all-purpose flour
  • ½ tsp. salt
  • 2 Tbsp. cocoa powder
  • 2 Tbsp. butter, melted and cooled
  • 2 tsp. baking powder
  • 2/3 cup granulated sugar
  • ½ cup whole milk
  • 1 tsp. pure vanilla extract

Chocolate Pudding Ingredients:

  • 1 cup brown sugar
  • 1 cup water
  • 4 tbsp. cocoa powder

Cake Directions:

  1. In a medium bowl, combine the flour, salt, cocoa powder, baking powder and sugar. Add the milk, melted butter and vanilla and whisk to combine.

Chocolate Pudding Directions:

  1. Preheat oven to 350 degrees.
  2. Grease or coat in cooking spray am 8” x 8” baking pan. Add the cake batter.
  3. In a medium saucepan over medium-high heat, combine then bring to a boil the brown sugar, water and cocoa powder. Whisk to ensure a hot sauce, then gently pour over the cake batter.
  4. Bake for 30 minutes and serve warm with vanilla ice cream.

Cheers,

Veronique

Eat with Dan Easy Strawberry Jam

Eat with Dan Easy Strawberry Jam

Oh how I want to make my own strawberry jam. I’ve taken classes on canning and I’m still uncomfortable with the whole process. Will my jars be airtight? Did I sanitize the jars long enough? Will I poison everyone around me with contaminated canned food? All questions that I ask myself when I’m tempted to try canning.

Photo by Danny Chin

Last week, I took my foodie brother Danny Chin, of Eat with Dan, to brunch and he surprised me on HIS birthday with homemade strawberry jam. What a guy! He told me the process of making the jam is simple and I shouldn’t be intimidated. The key to success to good strawberry jam according to Danny? “Pick ripe strawberries that have that bright strawberry flavor”. We both pick our berries at the amazing Donaldson Farms in Hackettstown, NJ – the place is gorgeous and its produce is outstanding.

This delicious jam is bursting with strawberry flavors and isn’t too sweet. It requires no candy thermometer or expensive equipment. It’s perfect on a hot English muffin.

Connect with Eat with Dan

Have I mentioned that Danny’s a very talented photographer specializing in fashion and food? For amazing, drool-worthy food photography, do yourself a favor and follow Danny on Facebook, on Twitter and on Instagram.

Ingredients:

  • 2 quarts ripe strawberries
  • 1 1.75-ounce box SURE-JELL Fruit Pectin
  • ½ tsp. butter
  • 7 cups granulated sugar, measured into separate bowl

Directions:

  1. Bring large pot/canner half full of water to a boil over high heat.
  2. Wash jars and screw bands in hot soapy water; rinse with warm water. Pour boiling water over flat lids in saucepan on the heat. Let stand in hot water until ready to use. Drain well before filling.
  3. Destem and crush strawberries thoroughly. Place exactly 5 cups of crushed strawberries into 6- or 8-quart pot. Add the pectin to the berries in pot and stir to combine. Add butter to reduce foaming. Bring mixture to full rolling boil on high heat, stirring constantly. Stir in sugar. Return to full rolling boil and boil exactly 1 min., stirring constantly. Remove from heat. Skim any foam with metal spoon. 

    English Muffin with Jam

  4. Immediately ladle the mixture into prepared jars, filling to within ¼ inch of tops. Wipe jar rims and threads. Cover with two-piece lids. Screw bands tightly. Carefully lower jars into the pot of boiling water or canner. Important: Water must cover jars by 1 to 2 inches – add boiling water to the pot if needed. Cover the pot and bring water to gentle boil. Process 10 min. Remove jars and place upright on a towel to cool completely.
  5. After jars cool, check seals by pressing middle of lids with finger – If the lids spring back, lids are not sealed and refrigeration is necessary (up to a month).

Note: you can expect properly-sealed jars of jam to last about two years when stored in a cool, dry place. Once opened, keep your homemade jam in the refrigerator for up to a month.

Yields about eight (1-cup) jars.

Recipe based on this.

Chocolate French Silk Pie

Chocolate French Silk Pie

Growing up, I’d always ask for chocolate silk pie for my birthday. I much preferred it over cakes and my love for pie started around that time. My grandma made the best super tall chocolate silk pie and I wish I could have a slice of it just one more time.

I have my old standard Mile High Chocolate Cream Pie recipe (https://www.foodandwinechickie.com/2012/01/16/mile-high-chocolate-cream-pie) that produces this light and velvety pie but I thought I’d go a different route to see if I could get a better result and tried the below. It was really creamy and light with big chocolate flavors boosted by the espresso powder.

If you want to go with a store-bought pie crust, that’s perfectly fine. The recipe below yields two 9” pie crusts that freeze well, so I typically use one and freeze one.

INGREDIENTS:

For the Filling

  • 1 cup butter, soften
  • 1 ½ cups granulated sugar
  • 4 ounces unsweetened chocolate, melted and slightly cooled
  • 2 tsp. pure vanilla extract
  • ¼ tsp. instant espresso/coffee powder
  • 2 Tbsp. Dutch-processed cocoa powder
  • 4 large eggs
  • 2 cups heavy cream, whipped
  • Chocolate shavings or curls (optional)

DIRECTIONS:

  1. Preheat oven to 400F.
  2. Place a pie crust in a 9” pie plate, embellish the edges and dock the dough by piercing with a fork several times around the bottom and sides to prevent the crust from bubbling or puffing up while baking. Add a piece of parchment paper over the crust and fill with dried beans/pie weights (I use beans that I cool after baking and store in a zip top baggies for the next pie). Bake in the bottom third of the oven for 15 minutes. Remove the parchment/dried beans and return to the oven for 10 more minutes, or until the crust is lightly golden. Let the crust cool completely on a wire rack before adding the filling – don’t be tempted to add the filling until the crust is cooled, it’ll be a mess and won’t work or set correctly.
  3. In the bowl of an electric mixer fitted with the paddle attachment, cream the butter and sugar until light and fluffy, scraping the bowl with a rubber spatula a couple of times to ensure all is well-incorporated.
  4. With the mixer running at low speed, pour the cooled melted chocolate into the butter mixture. Add the vanilla, the espresso powder and the cocoa powder. Scrape down the bowl again to fully combine.
  5. Add the eggs one at a time, beating for 3 minutes after each addition (12 minutes total) at a high speed. Mixing for 12 minutes is crucial to getting a light and silky texture.
  6. Add the filling to the cooled crust and allow to set in the refrigerator for at least 4 hours and up to 2 days prior to serving.
  7. Top the pie with whipped cream and chocolate shavings or curls (if using).

RECIPE NOTES:

Consuming raw or undercooked eggs may increase your risk of food borne illness, especially if you have a medical condition.

Serves 8.

Inspired by this recipe.

New Jersey Blueberry Dumplings

New Jersey Blueberry Dumplings

It’s blueberry season in New Jersey where I live and, while I love them fresh with Greek yogurt, I also like them in baked goods.

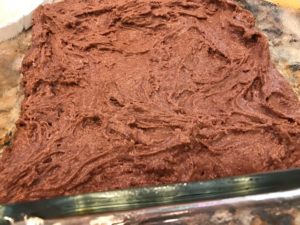
I was going to a potluck where I offered to bring dessert and thought….why not do something different than my usual
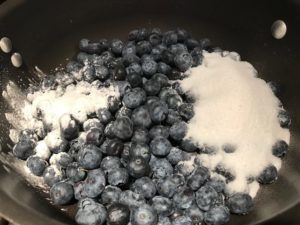
 Very Berry Cobbler and steam some of my Great-Aunt Eva Rose’s dumpling batter over bubbly, jammy blueberries? I made the dumpling batter the morning of the party and kept it refrigerated then I made the “jam” and cooled it then brought both items with me to the party and just steamed the dumplings when we were ready to eat dessert. Easy peasy!

I list the vanilla ice cream as optional, but come on, it’s sort of required on a hot berry dessert. You can skip it, but I don’t recommend it.

Dumpling ingredients:

  • 1 cup all-purpose flour
  • 1 tsp. baking powder
  • 1 pinch of salt
  • 1 large egg
  • 2 tsp. melted butter, cooled
  • ¼ cup whole milk

Blueberry “jam” ingredients:

  • 2 cups fresh blueberries (or you can use thawed frozen)
  • 1 Tbsp. cornstarch
  • ½ cup granulated sugar
  • 1/2 cup water
  • Zest of ½ lemon
  • Vanilla ice cream, optional

Dumpling directions:

  1. In a medium bowl, combine flour, baking powder and salt.
  2. Add egg, butter and milk to the flour mixture and mix to incorporate. Do not overmix. Dumpling batter will be lumpy.
  3. Refrigerate for at least 30 minutes or up to 8 hours.

Blueberry “jam” directions:

  1. In a large saucepan with a lid, add all the ‘jam’ ingredients and bring to a boil over medium-high heat. Lower the heat to medium-low and simmer for about 15 minutes, until the “jam” is thick, stirring and mashing the berries a little as the mixture cooks. This can be done a couple hours before ready to make the dumplings.
  2. When ready to cook the dumplings, heat the berries over medium heat. Lower heat to medium-low and drop cold batter by the spoonful over the berry “jam” so that there’s batter over most of the surface of the “jam”. Cover with a lid and cook for 10 minutes.
  3. Serve with ice cream.

Makes 6 servings.

Maple Bread Pudding Mugs for Two

Maple Bread Pudding Mugs for Two

I love bread pudding. The custardy bottom and the slightly crispy top make for a perfect dessert that can be changed up based on the season and most importantly, what’s in the house. I had leftover sourdough bread from last weekend’s party, so I used two thick slices of that for these two mugs.

Maple Bread Pudding
Maple Bread Pudding

At my home, I’m the only one who likes bread pudding….my guy calls it peasant food and he means that in a negative way! I love the comforting dish and recreated it in mugs, just enough for two people (or for one person, in a double serving).

This bread pudding variation pays homage to my Quebec roots and is made with and then topped with Quebec maple syrup. Oh yeah, and topped with maple-scented gelato also…..why not!?

Ingredients:

  • 2 thick slices of day-old bread (or 3 slices of standard cut bread)
  • 2 large eggs
  • ½ cup light cream (whole milk would also work)
  • 4 Tbsp. pure maple syrup DIVIDED
  • ½ tsp. pure vanilla extract
  • Maple-scented or vanilla gelato/ice cream, optional but not really

Directions:

  • Preheat the oven to 350 degrees.
  • Spray the inside of two 8-ounce oven-proof mugs with cooking spray (could use ramekins also).
  • Cut the bread into 1” pieces.
  • In a medium bowl, whisk together the eggs, cream, 2 tablespoons of maple syrup and vanilla.
  • Add the bread to the bowl with the egg mixture and stir until fully combined. Allow to sit for 10-15 minutes so the bread soaks up as much of the egg mixture as possible
  • Divide the bread/egg mixture between the mugs. Place the mugs on a small baking tray and bake for 30 minutes, until the tops of the bread puddings are lightly golden and the custard is set.
  • Serve each mug while warm with the remaining 2 tablespoons of maple syrup and a scoop of gelato/ice cream.

Makes 2 servings.