Chocolate Marshmallow Frosting

Chocolate Marshmallow Frosting

Marshmallow FrostingOne of the best frostings I’ve ever tasted was at a kids’ birthday party when I was around 8 years old. My friend’s mom made a light and fluffy marshmallow frosting over confetti cake so delicious I remember it vividly to this day.

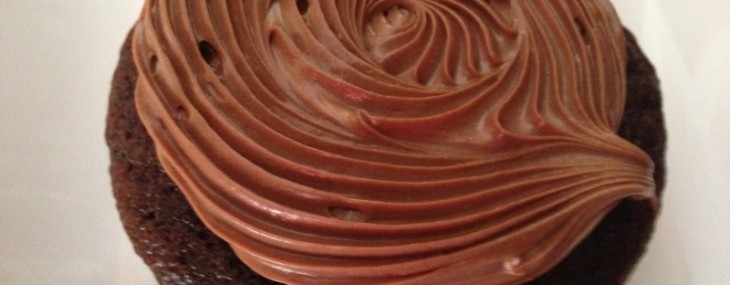
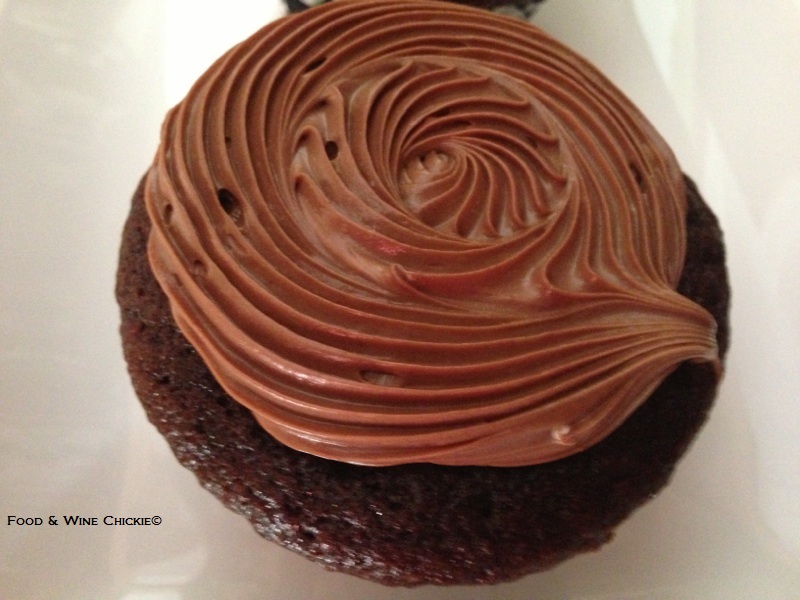
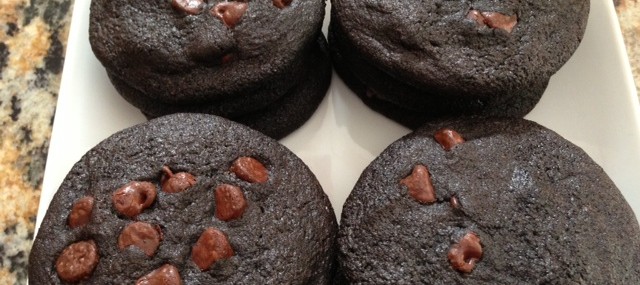
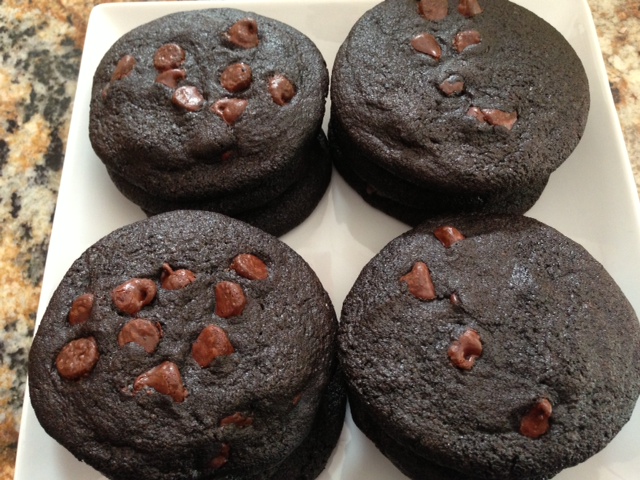
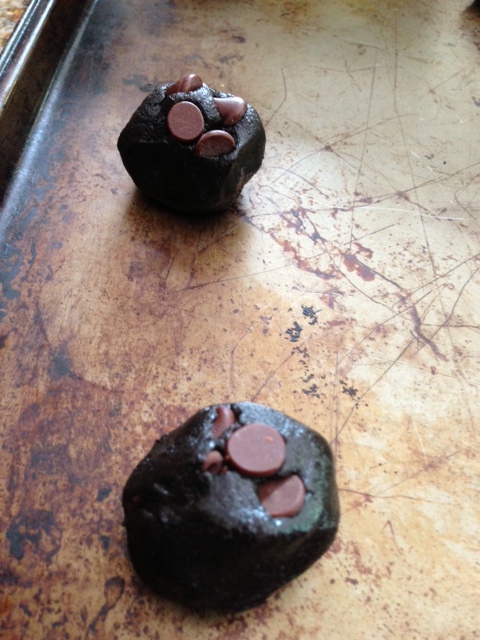
Since I’m a serious chocolate fanatic, I decided to try a chocolate version of marshmallow frosting. The results were hugely popular with my co-workers who tasted the frosting over Chocolate Cupcakes with Ganache Centers.

Ingredients:

  • 2 sticks butter, softened
  • 1 tsp. pure vanilla extract
  • 4 Tbsp. milk
  • 3 cups confectioner sugar
  • ¼ cup Dutch-processed cocoa powder
  • 7-ounce jar marshmallow crème

Directions:

  1. In the bowl of an electric mixer on medium speed, cream the butter, vanilla and milk until smooth, about 2 minutes.
  2. With the mixer on low, add the confectioner sugar and the cocoa powder and beat until just combined, then beat on medium speed for about 2 minutes.
  3. With a rubber spatula, gently fold the marshmallow crème into the frosting mixture until most of the white streaks are gone.
  4. Use right away or refrigerate for up to 2 days. Bring to room temperature if previously refrigerated.

Makes enough frosting for a dozen cupcakes or a 8” double layer cake.

Fiori Di Zucchine – Fried Zucchini Blossoms

Fiori Di Zucchine – Fried Zucchini Blossoms

Zucchini blossoms

Fresh Blossoms

Saturday night, I had the pleasure of dining at The Orange Squirrel in Bloomfield, NJ again. It had been several months since I had eaten Chef Francesco Palmieri’s inventive and flavorful creations and once again, it was a great meal.

zucchini blossoms

Blossom Dredging

I absolutely adore zucchini blossoms and was thrilled to also see them served up as an amuse-bouche paired with a roasted plum topped with a hazelnut and Gorgonzola Dolce. It was a simply-presented dish yet it was complex in texture and flavor. When Chef Palmieri came out of the kitchen to present the amuse, I am certain he could see my enthusiasm for the blossoms and gave me a box of fresh blooms to take home when I left. What an amazing treat! The blossoms, much like most of the produce at The Orange Squirrel, are sourced from the Palmieri garden just a few blocks away from the restaurant.

zucchini blossoms

Blossom Frying

I left with my box of blooms like a kid leaving a candy store and I knew I would need to create something special with such a precious present. I opted for Fried Zucchini Blossoms – perhaps the most amazing fried food item ever.

Ingredients:

  • Any neutral-flavor vegetable oil (I use canola)
  • 1 cup all-purpose flour
  • 1 tsp. kosher salt
  • 12 ounces club soda, chilled
  • 12-24 zucchini blossoms
  • Sea salt
zucchini blossoms

Fried Blossoms

Directions:

  1. In a deep, heavy pot, bring about 2″ of oil to 350 degrees (use a candy/deep fry thermometer).
  2. In a medium bowl, stir together the flour and the salt. Add the club soda to the flour mixture, whisking until just incorporated with a few lumps. Over-whisking is not your friend here.
  3. Remove the stamens from the blossoms then dip each one in the batter, making sure to allow any excess batter to drip off. The goal is a thin coating.
  4. Place a few blossoms in the hot oil, ensuring the pot is not over-crowded causing the temperature to drop. Cool oil = greasy fried foods. Cook the blossoms for 3 minutes, turning them once, then remove them to a paper towel-lined place. Immediately sprinkle sea salt on the blossoms as they come out of the oil.

Batter is enough for up to 24 blossoms.

Cabot Creamery Seriously Sharp Cheddar Mac N Cheese

Cabot Creamery Seriously Sharp Cheddar Mac N Cheese

Mac n CheeseI make macaroni and cheese using various cheeses and featuring other decadent ingredients (see Porcini and Lobster Macaroni and Cheese) but for cook outs and casual get-togethers, I love the flavor of Cabot Creamery’s Seriously Sharp Cheddar. Crusted with a Panko topping, this mac n cheese gets rave reviews every time.

Ingredients:

  • ½ stick (4 Tbsp.) butter
  • 4 Tbsp. all-purpose flour
  • ½ tsp. each, ground nutmeg, salt and pepper
  • 4 cups whole milk or light cream
  • 1 cup heavy cream
  • 4 cups freshly grated Cabot Seriously Sharp Cheddar
  • 1 ½ pounds tubular pasta (I use Barilla Cellentani) cooked 2 minutes less than recommended on package directions, drained

Topping Ingredients:

  • 1 stick butter
  • 1 cup Panko bread crumbs
  • ½ tsp. cayenne pepper

Mac n Cheese MakingPasta Directions:

  1. Preheat oven to 400 degrees.
  2. Place butter in a large saucepan and melt over medium heat. Add flour and cook for 2 minutes, whisking constantly. Season with nutmeg, salt and pepper.
  3. Stir the milk (or light cream) and the heavy cream into the butter/flour mixture and bring to a simmer. Reduce heat to medium-low and cook for 5 minutes, whisking often.
  4. Slowly add the cheeses, a handful at a time, and stir until fully incorporated.
  5. Add the drained pasta to the cheese sauce and mix well.
  6. Add cheesy pasta to a 13×9 baking dish.

Topping Directions:

  1. Microwave butter in a small dish for 45 seconds. Add Panko and cayenne pepper and stir to incorporate the butter and create a crumbly mixture.
  2. Sprinkle Panko mixture over pasta in an even layer.
  3. Bake pasta for 15 minutes until Panko topping has lightly browned. Serve at once.

Makes 8 servings.

Rosemary and Lemon Compound Butter

Rosemary and Lemon Compound Butter

Compound Butter DisksI just love having compound butter on hand for summer grill outs. Compound butter is made by whipping softened butter with herbs or other condiments to boost flavor in food. I’ve played around with add-ons like minced garlic, chopped anchovies (great on grilled romaine lettuce) and various herbs.

This version of compound butter uses lemon zest and chopped rosemary as the flavor enhancers and it’s delicious over grilled steaks.

Ingredients:

  • 2 sticks of butter, softened
  • Zest of one lemon
  • 1 Tbsp. dried rosemary, chopped
  • ½ tsp. each salt and pepper

Compound ButterDirections:

  1. In a small bowl, whip the butter using a fork. Add the zest and the spices and whip some more to fully incorporate the aromatics into the butter.
  2. Lay two 12-inch sheets of wax paper or plastic wrap on a work surface. Divide the butter mixture between the two sheets and start to wrap the butter to form logs (think sushi roll or jelly roll).
  3. Place the two rolls in the refrigerator for at least four hours (if using within a couple days) or the freezer (if using at a later time).
  4. To use, unwrap the wax paper or plastic wrap and slice the butter in ½” slabs.

Makes about 30 butter slices.

Red, White and Blue Cake

Red, White and Blue Cake

Red Velvet CutI love red velvet cake, well, the cream cheese frosting actually, so when I was looking for a dessert to make for my 4th of July party, I opted for a red and blue velvet cake.

I love that this cake turned out not…fussy and perfect for a casual outdoor party that involved grilling a whole beef tenderloin.

I made my life easier by baking the four cakes the night before my party so they’d be completely cooled by the time I got around to frosting them with the decadent cream cheese frosting.

Red Velvet AngleThe recipe below is for two red velvet cakes. Make those than make the exact recipe but with 2 ounces of royal blue paste food coloring (I use Wilton). I dipped some strawberries in chocolate for an additional festive touch.

Red Velvet Cake Ingredients:

  • 2 ½ cups cake flour
  • 1 tsp. salt
  • 1 tsp. baking powder
  • 2 Tbsp. unsweetened cocoa powder
  • 2 ounces red food coloring
  • 1 1/2 cups granulated sugar
  • ½ cup (1 stick) butter, at room temperature
  • 2 large eggs, at room temperature
  • 1 tsp. pure vanilla extract
  • 1 cup buttermilk
  • 1 tsp. white vinegar
  • 1 tsp. baking soda

Cream Cheese Frosting Ingredients (enough to cover the whole 4-layer cake):

  • ½ cup (1 stick) butter, at room temperature
  • 2 8-ounce packages cream cheese, at room temperature
  • 1 tsp. pure vanilla extract
  • 3 cups powdered sugar, sifted

Red Velvet Red ClothRed Velvet Cake Directions:

  1. Preheat oven to 350 degrees. Using cooking spray or a bit of softened butter, coat two 9-inch round cake pans.
  2. In a medium bowl, combine the flour, salt and baking powder.
  3. In a small bowl, blend the cocoa powder and the food coloring with a teaspoon to create a smooth mixture.
  4. In the bowl of an electric mixer, cream the sugar and the butter until light and fluffy, about three minutes, scraping down the sides of the bowl with a rubber spatula every minute.
  5. Add the eggs to the butter mixture, one at a time, mixing well after each one.
  6. Add the food coloring mixture and mix well, about 1 minute, scraping down the sides of the bowl with a rubber spatula.
  7. Add half of the flour mixture to the creamed butter mixture, then, add half of the buttermilk. Add the rest of flour mixture, then the rest of the buttermilk. Be sure to scrape down the sides of the bowl with a rubber spatula to ensure the batter in completely blended without white streaks of batter.
  8. In a small bowl, combine the vinegar and the baking soda with a teaspoon to form a bubbly mixture.  Add the mixture to the cake batter and stir gently until just combined.
  9. Divide the batter evenly in each cake pans and place them in the preheated oven. Bake for 25-30 minutes.
  10. Cool the cakes in their pans for 10 minutes then remove the cakes from the pans and allow to cool completely on wire racks.

Red Velvet SliceFrosting Directions:

  1. In the bowl of an electric mixer, cream the butter and cream cheese until light and fluffy, about 3 minutes, scraping down the sides of the bowl with a rubber spatula every minute. Incorporate the vanilla.
  2. Turn off the mixer and add the powdered sugar. Turn mixer on low and blend until the powdered sugar has been incorporated, about 2 minutes, again scraping down the sides of the bowl with a rubber spatula.
  3. Use the frosting right away or refrigerate, covered, until ready to use. To use refrigerated frosting, bring to room temperature then stir thoroughly using a wooden spoon.
  4. Place a red cake on a large platter or cake stand. Cover with a thin layer of cream cheese frosting using an offset spatula or butter knife. Top the red cake with a blue one, ice it, then, repeat the process with the remaining cakes, ensuring that the top layer is the flattest slice – this will ensure a smooth surface for the finished cake.
  5. Crumb coat the entire cake with a thin layer of frosting and refrigerate for 30-60 minutes. Finish icing the cake with the rest of the frosting then refrigerate. Serve within a day at room temperature.

Serves 12.

Pork Belly Deviled Eggs

Pork Belly Deviled Eggs

Pork Belly Deviled EggsI love deviled eggs and think they have a place at most parties whether upscale (think caviar-topped eggs) to casual (served plain) to quirky, which I’d consider this pork belly version.

Directions:

  1. Slice the eggs in half horizontally, carefully remove the yolks and place in a small bowl. Add the mustard, Mayonnaise, Paprika, Sriracha, salt and pepper to the yolks. Mash the mixture using a fork until smooth.
  2. Fill the egg white cavities with the egg yolk mixture (can use a pastry bag and tip to make the presentation fancier).
  3. Top each egg half with a piece of pork belly.

Makes 12 deviled egg halves.

Crispy Pork Belly

Crispy Pork Belly

Belly in Water

Belly in Water

This pork belly recipe can be used in many ways, so feel free to experiment. I especially enjoy it in a slider, in a bowl of ramen noodle soup or on deviled eggs.

Simmering Broth

Simmering Broth

Ingredients:

  • 2-pound pork belly
  • 1/3 cup brown sugar
  • 1/3 cup dry Sherry
  • 2-inch piece of fresh ginger, peeled and sliced in in a few pieces
  • ½ tsp. each ground clove and ground cinnamon
  • ½ cup soy sauce
  • 1 Tbsp. Sriracha
  • 1 can of coca cola
  • 4 cups of water
Boiled Belly

Boiled Belly

Directions:

  1. Fill a large pot or Dutch oven to half full with water then bring to a boil over high heat. Reduce heat to medium and place the pork belly in the pot. Cook for 5 minutes then remove to a plate, drain the pot and clean it.
  2. To the same pot, add the brown sugar, Sherry, ginger, spices, soy sauce, Sriracha, cola and water. Bring the broth to a simmer. Cut the par-boiled pork belly in 2-inch pieces and add to the broth. Turn the heat to low, cover the pot and cook for 3 hours, gently stirring occasionally.
  3. Turn the oven to the broil. Line a couple baking sheets with foil.
  4. Using thongs, carefully remove the pork belly pieces letting them drain off the thongs a few seconds. Reserve the broth.
  5. Place the belly on the foil-lined baking sheets and place under the broiler for 5 minutes, or until golden brown. Remove from the oven and spoon a teaspoon of the broth on each piece.
  6. Use as desired or eat right away.
Chocolate Decadence Chip Cookies

Chocolate Decadence Chip Cookies

Chocolate CookiesI made these decadent cookies as take-home gifts for my guests at my recent Food & Wine Chickie Lobsterfest, but the excess of adult libations “made me” forget to actually give them out at the end of the evening – boo!

I sort of redeemed myself by bringing them to work where they received some pretty big kudos from my colleagues.

You might question how old my baking sheets are – and they are! They’re my Grand-Mother’s sheets and although not new and shiny, I love thinking of her as I bake.

Ingredients:

  • ½ cup unsweetened Dutch-process cocoa
  • 1 cup all-purpose flour
  • ½ tsp. baking soda
  • ½ tsp. Kosher salt
  • 8 ounces semisweet chocolate chips
  • 8 Tbsp. butter
  • 1 ½ cups granulated sugar
  • 2 large eggs
  • 1 tsp. pure vanilla extract

Chocolate Cookie DoughDirections:

  1. Preheat oven to 325°F. Line baking sheets with parchment paper or coat with cooking spray.
  2. Whisk together cocoa, flour, baking soda, and salt in a medium bowl. Reserve for later use.
  3. Warm half the chocolate chips in the microwave for 30 seconds and stir. If not fully melted, microwave in 15 second increments until they are.
  4. Place the melted chocolate in the bowl of an electric mixer fitted with the paddle attachment. Add the sugar, the eggs and the vanilla. Blend together on medium speed until fully combined, about 1 minute. With the mixer on low speed, add the flour mixture, one tablespoon at a time until combined. Using a wooden spoon, add the remaining chocolate chips to the dough.
  5. Form dough into 1 ½-inch balls. Place the dough balls 2” apart on the parchment-lined baking sheets and bake for 15 minutes. Allow to cool on the baking sheets for 2-3 minutes, then transfer to wire racks to completely cool (if you can wait that long).

Makes 3 dozen cookies

Source: Adapted from Martha Stewart Living, June 2005

Jumpin’ Turkey Swiss Burgers by Chef Ariane Duarte

Jumpin’ Turkey Swiss Burgers by Chef Ariane Duarte

Jumpin Turkey Swiss BurgerI’m always on the lookout for a good burger recipe that uses proteins other than beef. I was sent the following recipe for a turkey burger with a kick, and since it’s by Ariane Duarte, Executive Chef of award-winning CulinAriane restaurant in Montclair, NJ and finalist on Bravo’s Top Chef, I knew I wouldn’t be disappointed. Chef Duarte has the following tip for this burger: “I created this recipe using Finlandia cheese due to the incredible robust flavor and great melting quality”.

Ingredients:

  • 2 pounds ground turkey
  • 1 or 2 jalapeño peppers, small dice (depending on how much heat you like)
  • ½ cup chopped cilantro
  • 1 Tbsp. ground cumin
  • 1 tsp. chopped garlic
  • 1 small onion, diced
  • Salt & pepper
  • 12 slices Finlandia Swiss or Light Swiss Cheese
  • 6 burger buns of your choice

Directions:

  1. In a bowl, combine all ingredients. Divide equally into 6 balls. Form into patties.
  2. Grill on high heat for four minutes on one side, then flip and cook three to four minutes on the second sider.
  3. Add two slices of Finlandia Swiss and allow to melt.
  4. Place the cheesy patties on then bun and serve with preferred condiments.

Serves 6.

Finlandia cheeses are available in the deli department of local supermarket chains and at high-quality neighborhood delis.

Ingredient Spotlight – Spaghetti Squash

Ingredient Spotlight – Spaghetti Squash

Spaghetti Squash

Spaghetti Squash

I’ve been on a low carbohydrate diet for a few weeks and one of the things I miss most is a big bowl of spaghetti Bolognese. I’ve been reluctant to try making this dish with spaghetti squash instead, but was pleasantly surprised when I finally caved and did just that over the weekend.

Remove Seeds

Remove Seeds

About Spaghetti Squash (Cucurbita Pepo):

  • Although it’s harvested in the fall, spaghetti squash can keep for up to 6 months in a cool place. That’s how we find it at the market year-around.
  • When cooked, the spaghetti squash’s flesh becomes strand-like much like spaghetti, hence its name.
  • Spaghetti squash seeds can be roasted just like pumpkin seeds.
  • Spaghetti squash is full of folic acid, vitamin A, potassium and beta carotene (especially in orange varieties).
  • It’s low in calories at about 40 calories per cup.
Pull Strings with Fork

Pull Strings with Fork

Here’s a fail-proof way of cooking spaghetti squash:

  1. Pierce through the flesh of the squash in about 10 places with a sharp, thin blade knife.
  2. Place a double layer of paper towel in the microwave and place the squash on them.
  3. Microwave for 12 minutes (for medium-sized squash), rotating every few minutes if your oven doesn’t have a rotating plate. Allow to cool for 5 minutes before attempting to handle.
  4. Cut the squash long ways.
  5. Using a spoon, remove the seeds and save them for roasting.
  6. Using a fork, pull strings of squash flesh away from the outer skin. Place the “spaghetti” in a bowl for intended use.
Spaghetti Squash with Meat Sauce

Spaghetti Squash with Meat Sauce

Since I had a major craving for meat sauce, I topped my squash spaghetti with traditional Quebec Meat Sauce I’d defrosted. YUM!!!!!!!

Have you had this fruit and if so, what’s your favorite way to enjoy it?

Veronique