Blueberry Croissant French Toast Casserole

I love a recipe you can prep in advance that doesn’t require a lot of work once my guests arrive. Just love spending time with my guests vs having them speak at my back while I’m making food.

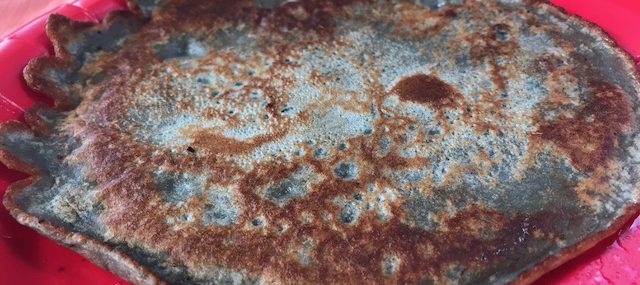
One such recipe is this Blueberry French Toast Casserole that’s prepared the evening prior to your brunch and pop in the oven to bake while you’re entertaining.

It’s blueberry season now so I’m using that berry, but this dish is also great with sliced strawberries or blackberries. I use Quebec maple syrup but use any good quality syrup. I like making this with buttery croissants, but brioche of challah bread would be great also.

Ingredients:

  • 12 cups croissants torn into bit size pieces (about 10 medium sized croissants)
  • 10 large eggs
  • 1 cup, plus more for serving
  • 1 cup milk (not low-fat)
  • 1 Tbsp. pure vanilla extract
  • 1 tsp. ground cinnamon, optional
  • 2/3 cup light brown sugar
  • 1 1/2 cups blueberries
  • 1/2 tsp. lemon zest, optional
  • 1/2 cup maple syrup, plus more for serving
  • 2 Tbsp. confectionary sugar, optional

Directions:

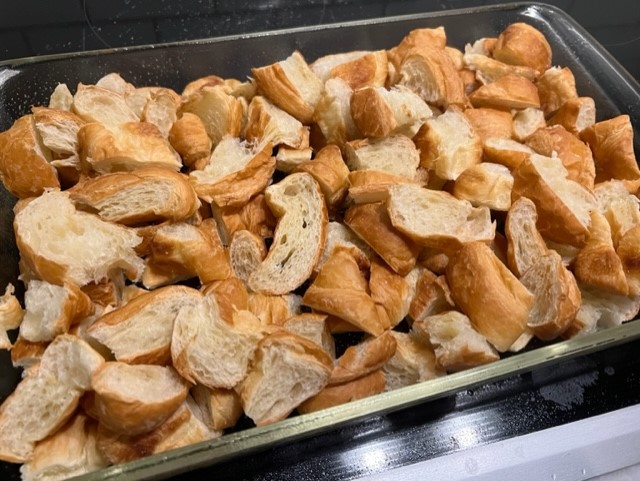
  1. Butter or coat with cooking spray a 9″x13″ baking dish. Add the croissants pieces to the casserole. It might seem like a lot of croissants, but after they soak into the custard overnight, the mixture will shrink some.
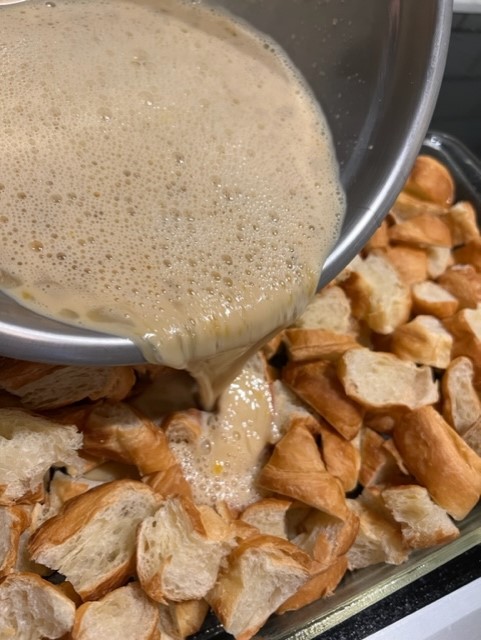
  2. In a large bowl, combine eggs, 1 cup of cream, milk, vanilla extract, cinnamon (if using), and brown sugar. Whisk the mixture until fully blended, about 1 minute. Pour the mixture over the croissant pieces and push down on the croissant with a spatula to ensure all the pieces are soaking into the custard.
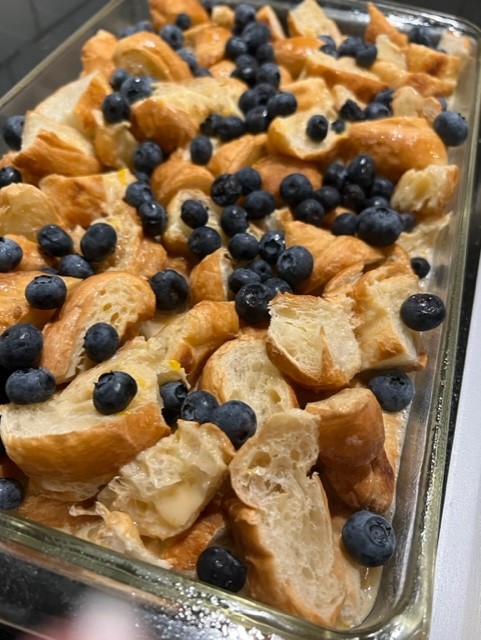
  3. Add the blueberries, lemon zest (if using) and drizzle with the maple syrup.
  4. Cover the baking dish with plastic wrap, or foil, and place in the refrigerator overnight or for at least 5 hours.
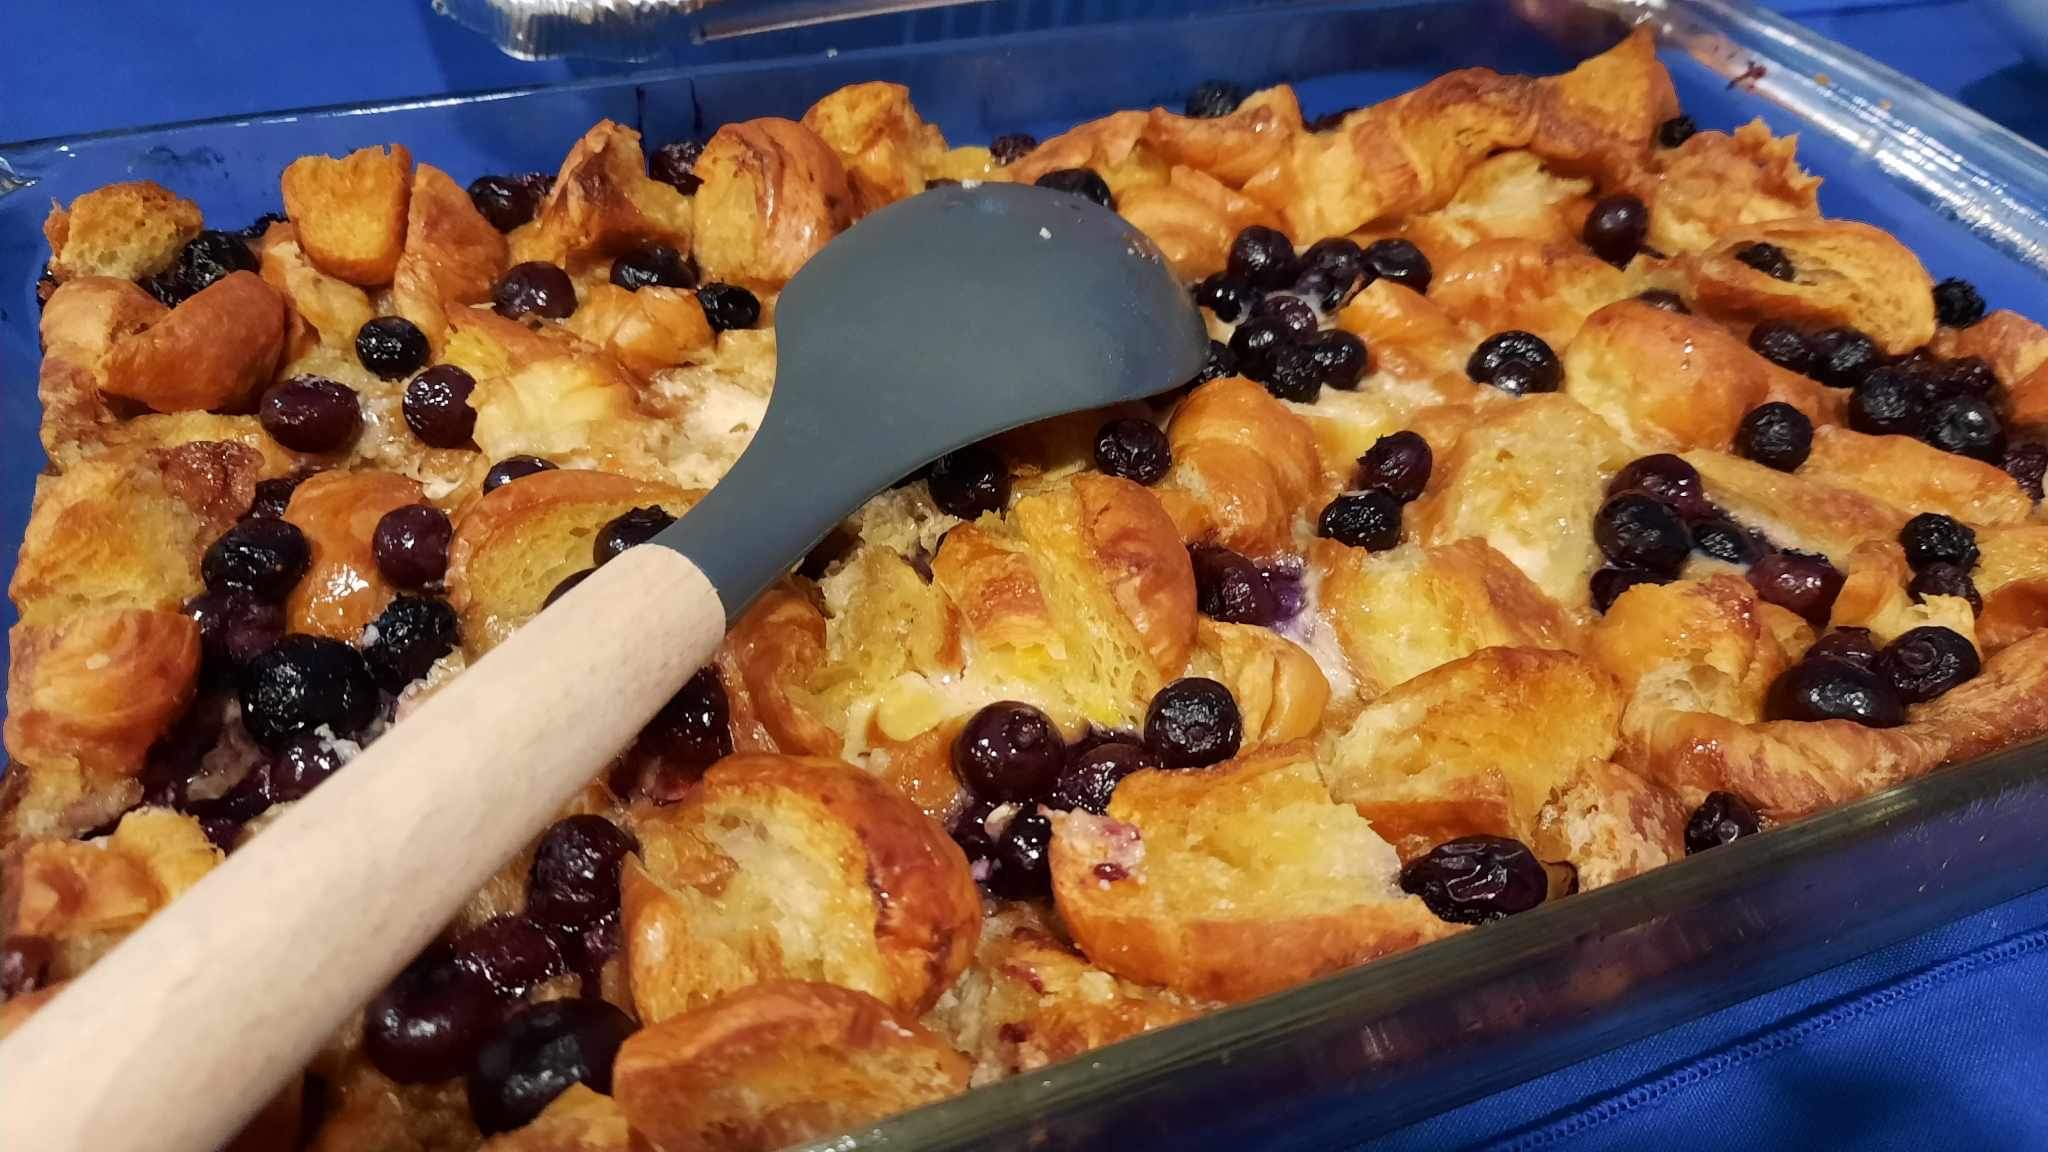
  5. When ready to bake, turn oven on to 350 degrees F, allow to preheat then place the casserole in the oven and bake for 40 minutes, or until the casserole top is golden brown (see pics for reference).
  6. Remove from the oven and allow to cool for 5-10 minutes before serving. Dust with confectionary sugar, if using.
  7. Serve with additional maple syrup and a drizzle of cream.

Makes 10 servings.

Cheers,

Veronique

Lemon Mustard Cream Sauce

Lemon Mustard Cream Sauce

This lemon and mustard cream sauce is perfect on basically everything. I originally made this easy mustard sauce to put on a pork schnitzel dish, but it’s equally great on fish and chicken. It’s creamy from the béchamel, tangy from the lemon juice and mustard, and a little licoricey from the tarragon.

Ingredients:

  • 2 Tbsp. butter
  • 2 Tbsp. all-purpose flour
  • 1 Tbsp. Dijon mustard
  • 1 Tbsp. coarse ground mustard (could also use 2 tablespoons of Dijon mustard instead of 1 tablespoon each Dijon and ground mustard)
  • Juice of half a lemon
  • 1 cup heavy cream
  • 1 cup chicken broth
  • ¼ tsp. each black pepper, salt and tarragon

Directions:

  1. In a medium saucepan over medium heat, melt the butter. Add the flour, whisking constantly, and cook for 2 minutes.
  2. Add the mustards and lemon juice, whisk well and continue to cook for 1 minute.
  3. Add the cream, chicken broth and spices, whisking until the mixture comes to a simmer. Reduce the heat to medium-low and cook for about 20 minutes, until the sauce has thickened.

Yield: 1 ½ cups.

Gilding the French Onion Soup

At our home, we LOVE French onion soup. When we moved into our new home recently, we unpacked everything we owned, no more bins in the attic, no more boxes in the garage, we literally unpacked the equivalent of two full kitchens! In the process, I realized that we have 10 French onion soup bowls, so I decided we need to make it more often!

Cheesy Garlic Toast
Garlic Toast French Onion Soup

While I typically use my Traditional French Onion Soup recipe, I like to tweak it now and then. This past weekend, I replaced the regular toasted French bread I normally use with toasted cheesy garlic bread and it was fabulous. Yes, I know adding cheesy bread under the cheesy topping is gilding the lily, but, why not! 

Enjoy!

Mediterranean Spinach and Feta Quiche

Mediterranean Spinach and Feta Quiche

I recently hosted a Greek-themed dinner party when I overbought a ton of ingredients (surprise surprise). With a buttery pie crust in the freezer, lots of sautéed spinach, Feta cheese, eggs and red onions on hand, I decided on a Mediterranean quiche!

Quiches are so versatile as they’re a great way to use up leftovers. This version is a vegetarian quiche but adding cooked bacon, leftover roast chicken or diced ham would also be great.

I think the crust is the most important part of a good quiche and I provide the EASY way to make a fail proof crust below where you put all the ingredients in the food processor and let it do the work – try it!

You’ll see that I added some Mozzarella for that cheesy stringy pull but replacing with all Feta would also work well.

Ingredients:

  • 1 pie crust, homemade or store-bought
  • 1 Tbsp. vegetable oil
  • ½ medium red onion, thinly sliced
  • 6 large eggs
  • 1 cup heavy cream
  • ½ tsp. each salt, freshly cracked pepper and oregano
  • Big pinch of ground nutmeg
  • 2 cups cooked spinach, squeezed dry
  • 1 cup crumbled Feta cheese
  • 1 cup shredded Mozzarella cheese

Directions:

  1. Preheat oven to 375 degrees.
  2. Add the pie crust to a 9″ pie plate and place in the freezer for 15 minutes.
  3. In a medium sauté pan over medium high heat, add the oil and sliced onion. Cook stirring frequently until the onions have softened, about 4 minutes. Take the pan off the heat and allow to cool for 10 minutes.
  4. In a large bowl, whisk together the eggs, cream and the spices for 60 seconds.
  5. Top the pie crust with the sautéed onion, then the spinach, then the Feta and then the Mozzarella. Place the pie plate on a baking sheet in case of spills. Carefully pour the egg mixture over the cheeses and place the quiche in the oven to bake for 40-45 minutes. The quiche is done when the center is no longer giggly. If the surface of the quiche browns quicker than the allotted time, cover loosely with foil.
  6. Allow to cool 15 minutes before serving. The quiche is great at room temperature.

Makes 6-8 servings.

Easy Miso Cod en Papillote

Easy Miso Cod en Papillote

It feels wrong to even call this a recipe, but, if I don’t document it, I’ll forget how tasty it is and that I should make it more often! It’s even keto-friendly!

This is a very simple process and prefect for a weeknight meal of cod cooked in an aluminum foil packet on the grill. No oven to turn on, no messes to clean up!

I had wild caught cod on hand but this would be delicious with many non oily fish like mahi mahi, bass, sole, halibut or haddock. I had miso paste in the fridge so I used some of that along with lemon juice and olive oil, but some ginger dressing or even some Italian dressing would work great also.

Ingredients:

Two 4-6 ounce cod filets

2 Tbsp. each miso paste, olive oil and lemon juice

4 slices of lemon, seeds removed

20-30 raw baby asparagus spears

Salt and pepper

Uncooked Fish Packet

Directions:

Turn your gas grill to medium flame (or turn the oven on to 375 degrees).

Cut two large pieces of aluminum foil and lay them on a work surface. Lightly coat each foil piece with cooking spray.

Place a cod filet and 10-15 asparagus spears in the center of each of the foil pieces. Spoon the miso paste over the fish then drizzle the fish and asparagus with olive oil then lemon juice. Season with a big pinch of salt and pepper. Place two slices of lemon over each fish filet then wrap the foil tightly over the fish and asparagus to create an air tight packet.

Place the foil packets on the grill, close the grill lid and cook for 15 minutes. Carefully remove the packets from the grill using a large spatula and equally carefully unwrap the foil packets.

Dish can be served right in the foil packets or transferred to a plate for a low carb meal. We served ours with basmati rice.

Makes two servings.

Gabrielle’s Blueberry Pancakes

Gabrielle’s Blueberry Pancakes

Blueberry pancake – pure yumminess! My niece Gabrielle and I exchange breakfast photos frequently via Facebook messenger. Our favorites are strawberry and raspberry toasts, crepes, muffins, etc so I was surprised when she messaged me last week to say she’d made blueberry pancake batter for our family reunion in Maine.

My Niece Gabrielle

We were camping and she got up early to get her breakfast ready. She cooked all the pancakes for the six of us on a single burner in a well-seasoned frying pan. When she opened the container her batter was in, she was shocked and upset the batter was blue! We told her it was normal as some of the blueberries burst and dyed the batter.

These are blueberry-packed, flavorful thinner-than-typical pancakes and simple enough for a budding 12 year-old chef-apprentice to make.

Ingredients:

  • 2 cups all-purpose flour
  • 1 Tbsp. baking powder
  • ¼ cup granulated sugar
  • ½ tsp. salt
  • 2 large eggs, beaten
  • ¼ cup butter, melted
  • 1 tsp. pure vanilla extract
  • 2 cups whole milk
  • 1 cup fresh blueberries
  • 8 Tbsp. butter for panfrying
  • Maple syrup (optional)

Directions:

  1. In a large bowl, whisk together the flour, baking powder, sugar and salt. Create a well in the center of the flour mixture and add the eggs, the melted butter, the vanilla and the milk. Whisk until the mixture is lump-free and silky, about a minute. Add the blueberries and fold them into the batter gently. Mixture can keep in the refrigerator in an air-tight container for up to three days.
  2. In a large skillet over medium-high heat, melt a half teaspoon of butter. Once melted, add ¼ cup of the blueberry batter. Fry one minute, flip and cook the second side for 30 seconds. Repeat with the rest of the batter.

Yields 16 pancakes.

Mussels in Garlic White Wine Sauce on the Grill

Mussels in Garlic White Wine Sauce on the Grill

I’m always looking for easy dishes for summer that I can make right on the grill and not in a hot kitchen. We love mussels and prepare them in several ways but our favorite, when it’s nice out, is to cook them right in our extremely old wok, right on my grill’s side burner or over charcoal. This is a very affordable dish and is great served right in the wok (or pan) for a group of friends.

Mussels in White Wine Sauce
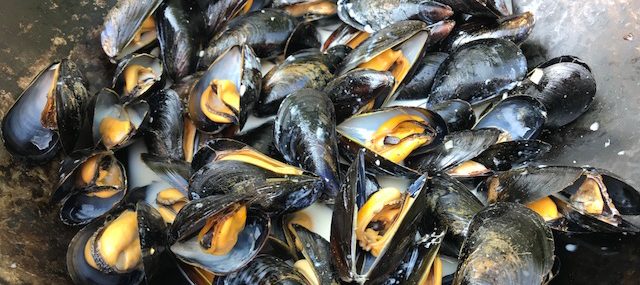
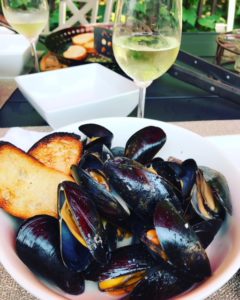
To clean the mussels, if not already done by your fishmonger, place them in a large bowl with about 2 quarts of water and ½ cup of all purpose flour. Allow them to sit for 30 minutes. This weird but effective technique will prompt the mussels to disgorge any grit/sand in them. The mussels can then be drained and place in a large colander under cold running water. Remove any “beards” from the mussels by pulling on them with your fingers. Any dirty mussels can be scrubbed with a small brush.
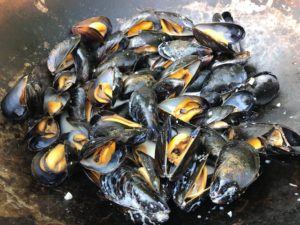
This Mussels in Garlic White Wine Sauce, also known as Moules Marinières in French, dish comes together super-fast and can be done at the last minute without too much attention paid to it while it cooks.

Ingredients:

  • 2 Tbsp. olive oil
  • 4 cloves garlic, minced
  • ½ tsp. red pepper flakes (can omit)
  • Zest of 1 lemon
  • 2 cups white wine
  • Big pinch each of freshly ground black pepper and salt
  • ½ cup heavy cream (can omit)
  • 2 pounds mussels, cleaned and de-bearded (see method in the overview)
  • 4 slices grilled bread
  • 2 lemon wedges for garnish

Mussels CookingDirections

  1. Add the oil and chopped garlic to the wok (or big sauté pan) over the charcoal and cook for a minute until fragrant. Add the red pepper flakes, the zest, the white wine and the salt and pepper. Once hot and simmering, add the cream and mussels and close the lid. Cook for 8-10 minutes, until mussels are open, shaking the wok every minute or so to ensure all mussels bathe in the wine broth.
  2. Discard any mussels that don’t open.
  3. Serve with grilled bread and lemon wedges.

Serves two.

Easy Boeuf Bourguignon (Beef Burgundy)

Easy Boeuf Bourguignon (Beef Burgundy)

Beef Burgundy on Polenta

Warm weather’s on its way and with that, the end of slowly simmered or roasted dishes at our home. In anticipation of warmer days, I decided to make one of my favorite cold weather dishes: Boeuf Bourguignon or just beef cooked in Burgundy wine (I actually like a heavier wine for this dish, don’t judge).

If you haven’t invested in a heavy duty cast iron Dutch oven, just do it. You’ll use it all the time. If you want to, you could make the recipe through step 4 and throw everything in a slow cooker to cook for 8 hours. Up to you….I just love the long, slow simmered cook and the periodic stirring of the pot.

For you purists, this isn’t a very traditional recipe, just go along, it’s tasty. I served this dish over my Easy Creamy Polenta.

Ingredients:

  • 9 Tbsp. vegetable oil
  • 6 Tbsp. all-purpose flour, for dredging
  • 1 tsp. each salt and pepper
  • 3 pounds beef chuck, cubed into large bite size pieces (you can find this already done in your grocery store)
  • 4 slices slab bacon, diced
  • 1 large Spanish onion, medium diced
  • 2 carrots, medium diced
  • 3 celery ribs, medium diced
  • 1 pound Cremini mushrooms, chopped
  • 2 Tbsp. tomato paste
  • 3 cups Cabernet Sauvignon or other dry full-bodied red wine
  • 32 ounces beef broth
  • 2 bay leaves
  • 1 Tbsp. fresh thyme

Directions:

  1. Warm 3 tablespoons of the oil in a large Dutch oven over high heat.
  2. Add the salt and pepper to the flour then sprinkle over the beef. Toss to coat then shake beef pieces to remove excess flour.
  3. Sear half the beef in the hot oil until browned, about 4 minutes total and then remove to a platter. Repeat with the second half of the beef and 3 more tablespoons of oil and transfer to the first batch of beef on the platter and set aside.
  4. Lower the heat to medium-high, add the bacon and cook stirring occasionally until a little browned, 4 minutes. Add the onions, the carrots and the celery to the bacon and cook for 5 minutes, stirring occasionally. Add the mushrooms and continue cooking for another 3 minutes. Add the tomato paste and cook for a minute. Add the wine and broth and scrape all the brown bits that have formed on the bottom of the Dutch oven. Add the beef back to the pot with the bay leaves and the thyme.
  5. Lower the heat to medium-low, cover tightly and cook for 2 hours, stirring occasionally. Lower the heat to low and cook for another 2 hours, covered.
  6. At this point, you can serve the beef or cool the pot completely and refrigerate overnight. To reheat the next day, an hour prior to serving, take the pot out of the fridge and preheat oven to 275 degrees. Warm the beef in the oven for about an hour, basting the meat with the sauce every 15 minutes.

Makes 6 hearty servings.

Easy Beef Burgundy (Boeuf Bourguignon)
Serves 6
A scrumptious beef and wine recipe.
Write a review
Print
Prep Time
15 min
Cook Time
4 hr 20 min
Total Time
4 hr 35 min
Prep Time
15 min
Cook Time
4 hr 20 min
Total Time
4 hr 35 min
Ingredients
  1. • 9 Tbsp. vegetable oil
  2. • 6 Tbsp. all-purpose flour, for dredging
  3. • 1 tsp. each salt and pepper
  4. • 3 pounds beef chuck, cubed into large bite size pieces (you can find this already done in your grocery store)
  5. • 4 slices slab bacon, diced
  6. • 1 large Spanish onion, medium diced
  7. • 2 carrots, medium diced
  8. • 3 celery ribs, medium diced
  9. • 1 pound Cremini mushrooms, chopped
  10. • 2 Tbsp. tomato paste
  11. • 3 cups Cabernet Sauvignon or other dry full-bodied red wine
  12. • 32 ounces beef broth
  13. • 2 bay leaves
  14. • 1 Tbsp. fresh thyme
Instructions
  1. 1. Warm 3 tablespoons of the oil in a large Dutch oven over high heat.
  2. 2. Add the salt and pepper to the flour then sprinkle over the beef. Toss to coat then shake beef pieces to remove excess flour.
  3. 3. Sear half the beef in the hot oil until browned, about 4 minutes total and then remove to a platter. Repeat with the second half of the beef and 3 more tablespoons of oil and transfer to the first batch of beef on the platter and set aside.
  4. 4. Lower the heat to medium-high, add the bacon and cook stirring occasionally until a little browned, 4 minutes. Add the onions, the carrots and the celery to the bacon and cook for 5 minutes, stirring occasionally. Add the mushrooms and continue cooking for another 3 minutes. Add the tomato paste and cook for a minute. Add the wine and broth and scrape all the brown bits that have formed on the bottom of the Dutch oven. Add the beef back to the pot with the bay leaves and the thyme.
  5. 5. Lower the heat to medium-low, cover tightly and cook for 2 hours, stirring occasionally. Lower the heat to low and cook for another 2 hours, covered.
  6. 6. At this point, you can serve the beef or cool the pot completely and refrigerate overnight. To reheat the next day, an hour prior to serving, take the pot out of the fridge and preheat oven to 275 degrees. Warm the beef in the oven for about an hour, basting the meat with the sauce every 15 minutes.
Food & Wine Chickie Insider https://www.foodandwinechickie.com/

Creamy Soft Polenta

Creamy Soft Polenta

Polenta is comfort in a bowl and ultra-easy to make. It’s a perfect complement for hearty toppings like short ribs, boeuf Bourguignon or sautéed mixed mushrooms. It’s also delicious served on its own with an extra grating of Parmesan.

This week, I served my polenta with rich, delectable boeuf Bourguignon (beef in Burgundy sauce) and it was fabulous. Since it was just two of us, I simply halved the below recipe. The polenta will congeal into the shape of the dish it’s stored in so I often make the recipe below and store the leftovers in a square container in the fridge then ‘unmold’, cut into squares and pan fry slabs of cheesy deliciousness to serve with grilled Portobello mushrooms.

I use a combination of medium and finely-ground corn meal for smoothness with just a bit of texture but you can use a cup of either one instead. No need to buy two kinds of corn meal if you don’t want to.

Ingredients:

  • 4 cups water
  • 1 tsp. salt
  • ½ cup medium stone ground corn meal
  • ½ cup fine stone ground corn meal   
  • 4 Tbsp. butter
  • ½ cup grated Parmesan cheese plus 1 Tbsp. for garnish
  • 1 cup white cheddar (optional but best)
  • Freshly ground black pepper

Polenta on Beef Burgundy

Directions:

  1. Over medium-high heat in a heavy saucepan, bring the water to a boil. Add the salt and reduce heat to medium. While whisking, add the corn meal in a slow, steady stream. Whisk vigorously for a minute, until thickened a bit. Lower heat to medium-low and cook covered for 15 minutes, stirring every minute or so in order to prevent scorching on the bottom of the pan.
  2. Add the butter and stir until fully incorporated.
  3. Add the Parmesan and stir until fully incorporated.
  4. Add the cheddar (if using) and stir until fully incorporated.
  5. Serve immediately with a dusting of pepper and the reserved Parmesan.

Makes 4 servings.

Easy Creamy Polenta
Serves 4
A delicious, easy-to-make polenta recipe to pair with saucy, hearty dishes or served on its creamy, delectable own.
Write a review
Print
Prep Time
5 min
Cook Time
15 min
Total Time
15 min
Prep Time
5 min
Cook Time
15 min
Total Time
15 min
Ingredients
  1. • 4 cups water
  2. • 1 tsp. salt
  3. • ½ cup medium stone ground corn meal
  4. • ½ cup fine stone ground corn meal
  5. • 4 Tbsp. butter
  6. • ½ cup grated Parmesan cheese plus 1 Tbsp. for garnish
  7. • 1 cup white cheddar (optional but best)
  8. • Freshly ground black pepper
Instructions
  1. 1. Over medium-high heat in a heavy saucepan, bring the water to a boil. Add the salt and reduce heat to medium. While whisking, add the corn meal in a slow, steady stream. Whisk vigorously for a minute, until thickened a bit. Lower heat to medium-low and cook covered for 10 minutes, stirring every minute or so in order to prevent scorching on the bottom of the pan.
  2. 2. Add the butter and stir until fully incorporated.
  3. 3. Add the Parmesan and stir until fully incorporated.
  4. 4. Add the cheddar (if using) and stir until fully incorporated.
  5. 5. Serve immediately with a dusting of pepper.
Food & Wine Chickie Insider https://www.foodandwinechickie.com/

Crustless Chipotle Cheesy Quiches

Crustless Chipotle Cheesy Quiches

cooked-quichesI’m one of the ambassadors for #FoodieChats, a Monday evening Twitter chat where we socialize with thousands of foodies about all things food! Every week, we welcome a sponsor who informs us, in a fun way, about its products or services. This week, Sartori Cheese is our sponsor, and eventhough I don’t do a lot of product reviews, when Sartori Cheese offered to send me a few of their cheeses, I accepted – who doesn’t love cheese!

My really tough task, was to come up with a recipe featuring the delish cheeses sent to me. REALLY tough…not! I actually came up with two recipes, and I’m sharing the first one below. It’s a quick dish you can make on Sundays that are fast to reheat in the microwave during those busy weekday mornings.

Ingredients:

Directions:

  1. Preheat the oven to 350 degrees.
  2. Coat 6 of the cups of a 12 muffin pan with cooking spray, be generous.
  3. In a medium mixing bowl (for easy pouring, I use an 8-cup measuring cup), whisk the eggs with the water, salt and pepper until fully blended, about 1 minute.
  4. Pour an equal amount of the egg mixture into the 6 muffin cups.
  5. Sprinkle the cheese equally over the egg mixture.
  6. Place the muffin pan on a sheet tray (in case of drips) and bake for about 20 minutes, or until the egg is no longer runny – the quiches will be puffy like a soufflé.
  7. Allow the quiches to cool in the pan for about 5 minutes then unmold and let cool completely.
  8. Store the quiches in an airtight container in the fridge until ready to use – up to a week.
  9. To reheat, place two quiches on a plate, cover with a paper towel and microwave for 60-90 seconds.

Makes 3 servings (2 quiches each).

About Sartori

Sartori, a fourth-generation family owned company, has proudly produced award-winning, artisan cheese for customers worldwide since 1939. Rooted in Plymouth, Wisconsin, Sartori’s emphasis on a high-quality and handcrafted approach to cheesemaking is a timeless family tradition. For more information, please visit www.sartoricheese.com.

Cheers,

Veronique