

You’re at a party and appetizers are served. Every single time, the humble spinach and artichoke dip will be king. It’s warm, comforting, gooey and so….so delicious.
This version of the popular dip features fresh spinach, which makes a huge difference in taste and texture. Serve this with either toasted French bread or with scoop chips (my favorite).

Be sure the cream cheese is at room temperature BEFORE you assemble this dish.
Ingredients:
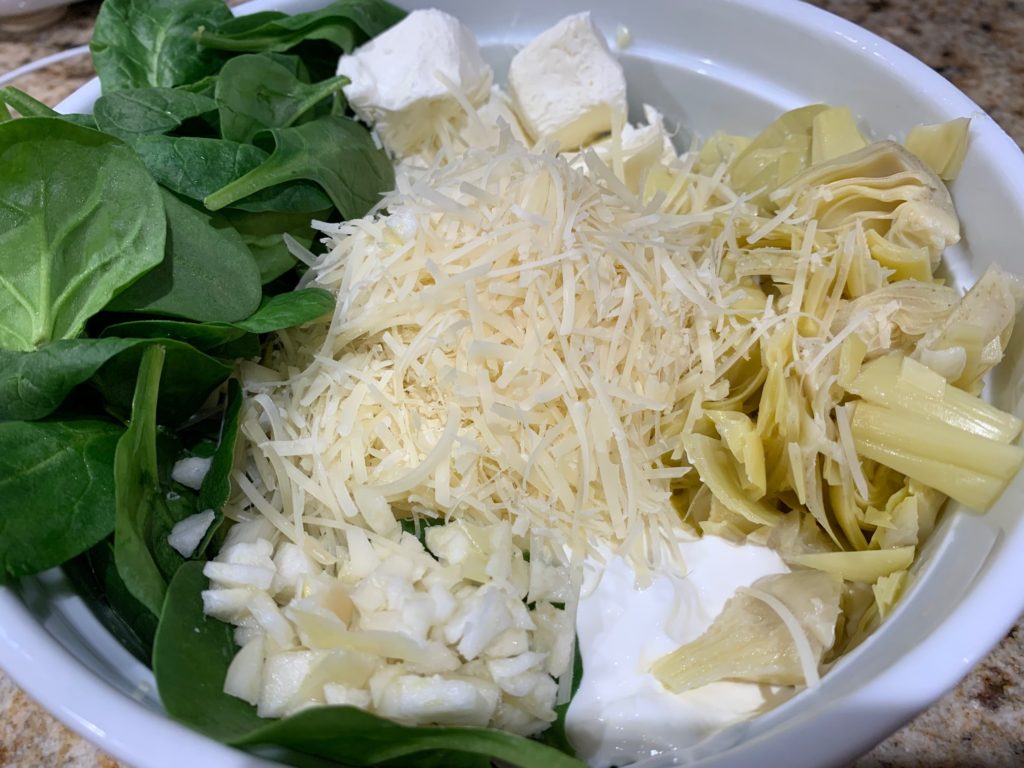
- 5 ounces fresh spinach
- 1 cup sour cream (don’t use low fat), room temperature
- One 8-ounce package cream cheese (don’t use low fat), room temperature
- One 15-ounce can artichoke hearts, drained and roughly chopped
- 2 garlic cloves, minced
- 12 ounces shredded Mozzarella cheese, divided
- 5 ounces shredded Parmesan cheese
- Two big pinches each of salt and pepper

Directions:
- Preheat oven to 375 degrees.
- To a large bowl, add the spinach, the sour cream, the cream cheese, the artichokes, the garlic, half the Mozzarella, the Parmesan and the salt/pepper. Mix until combined.
- Coat a 9×9 baking dish with cooking spray (of butter well) – could also use a cast iron skillet. Spread the spinach mixture in an even layer and top with the rest of the Mozzarella.
- Bake for 25-30 minutes. Then tun the broiler to high and broil for 1-2 minutes or until the top of the dip is golden brown.
8-10 servings (unless you’re my gang, then it’s 4-6 servings).
Inspired by this recipe.


Recent Comments