Maple Blondies with Maple Icing

Maple Blondies with Maple Icing

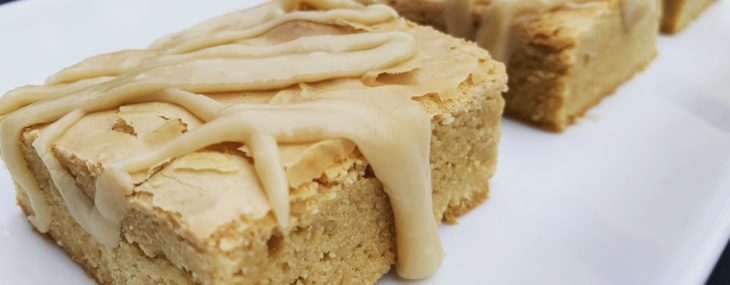
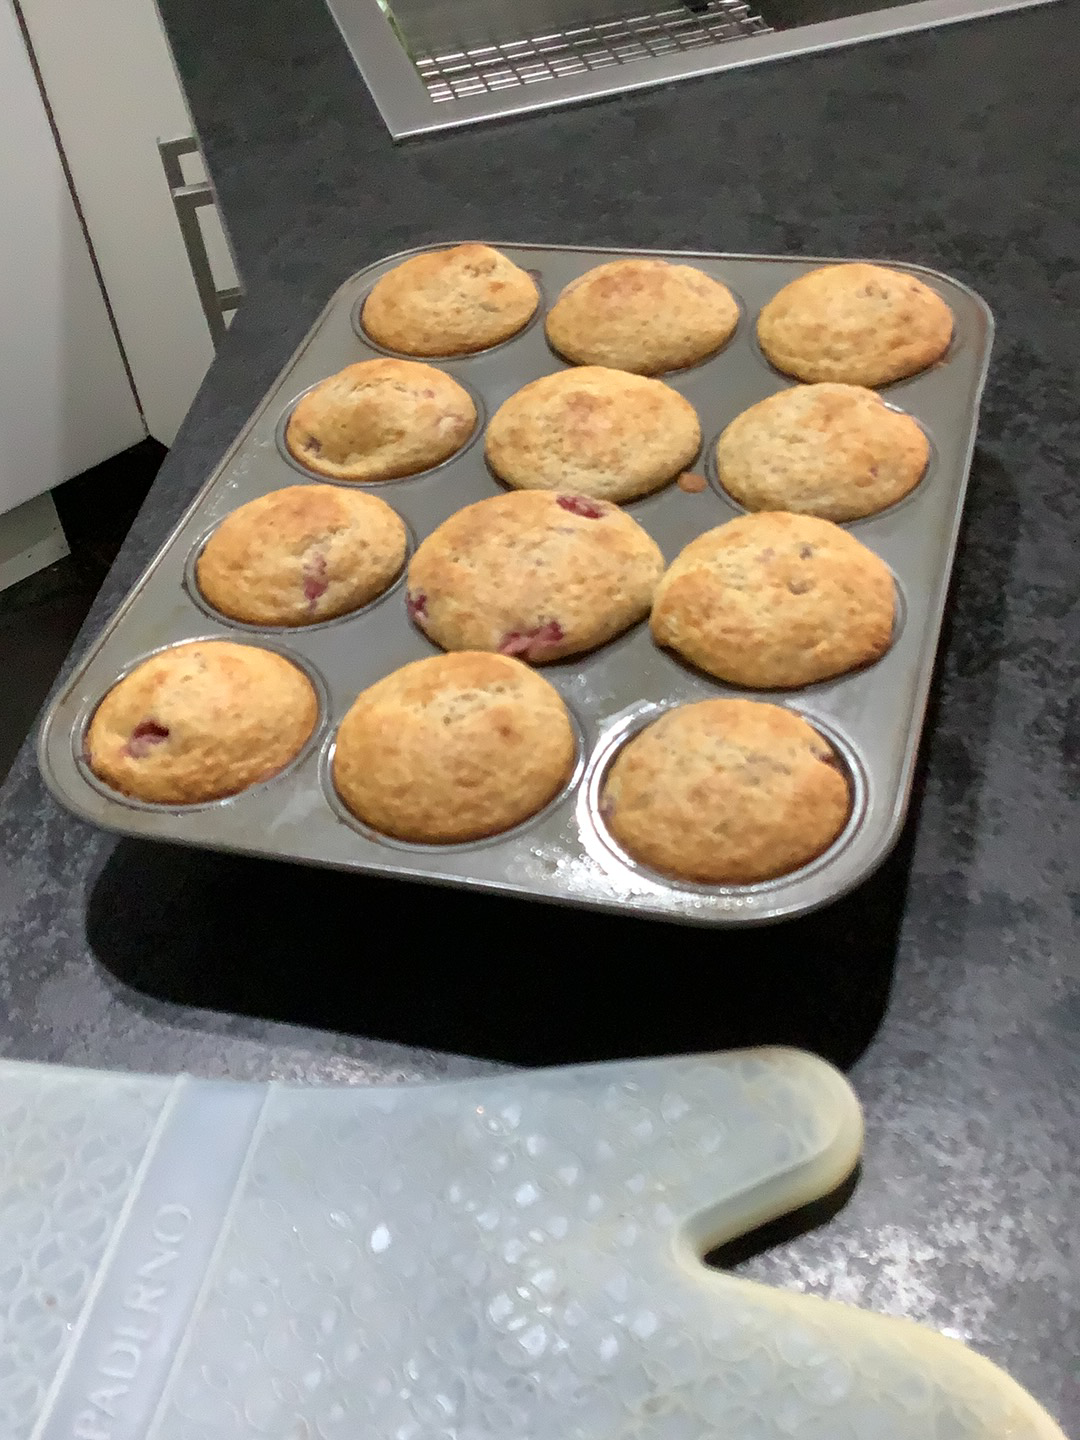
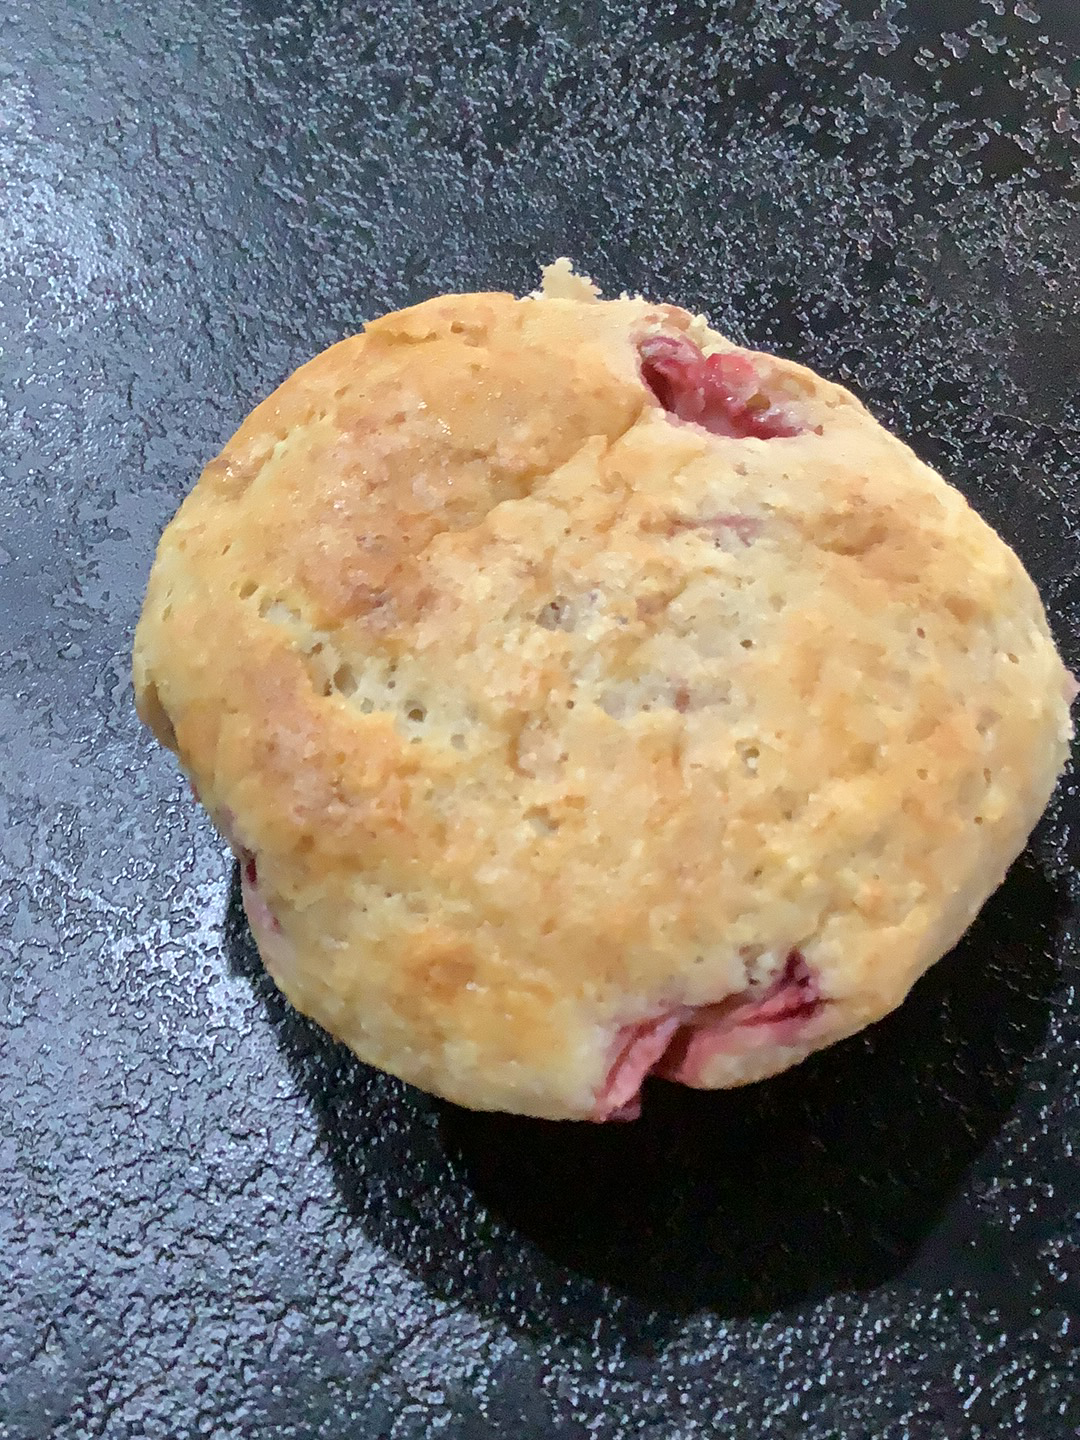
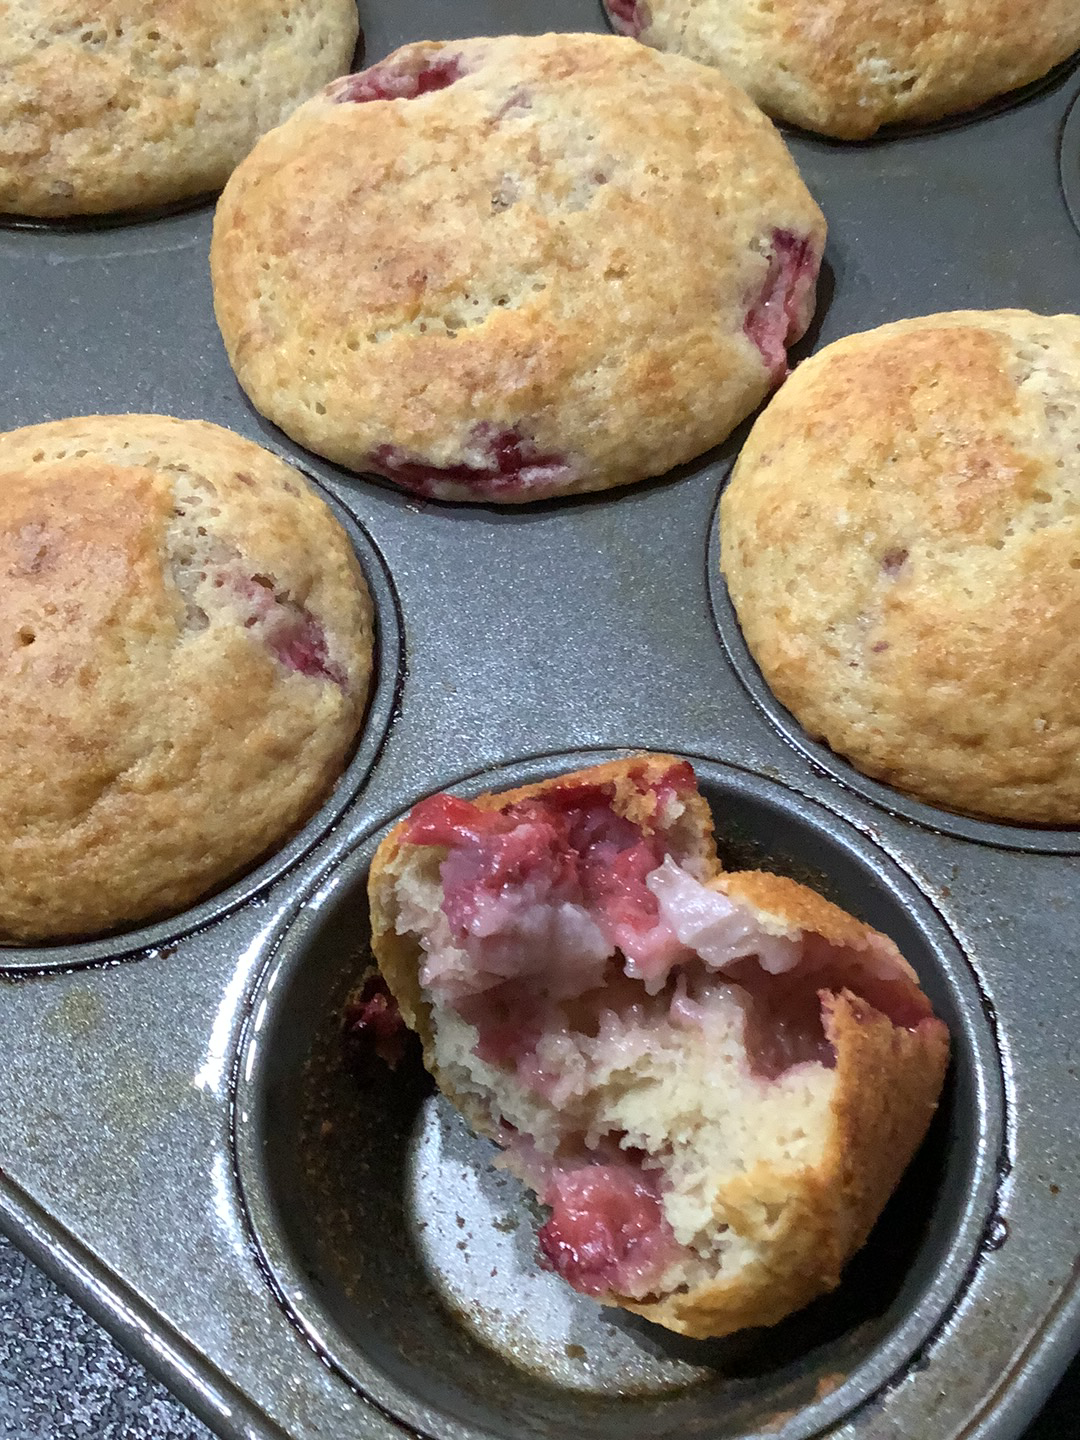
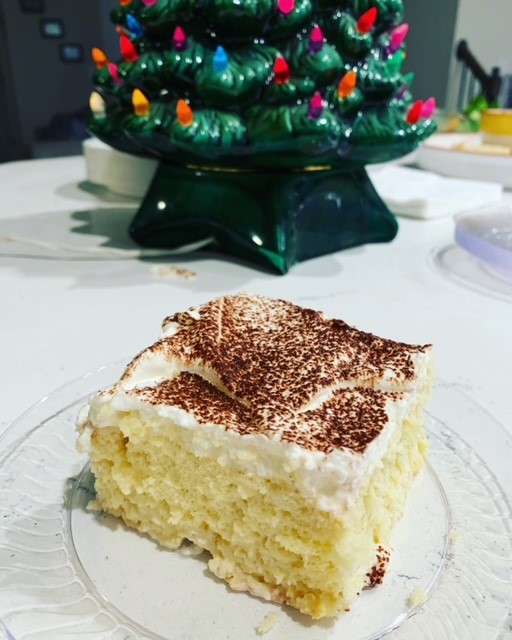
I’ve never been much of a Blondies girl – there, I’ve said it. I love chocolate and it seems senseless to make brownies without chocolate. Well, that WAS my mindset until I baked these MAPLE blondies. As a Canadian, maple is queen and tops even chocolate in baked goods, in my humble opinion. I then took this dessert over the top by adding MAPLE icing which gets a bit crackly when it cools and is fabulous – maple2 if you will.

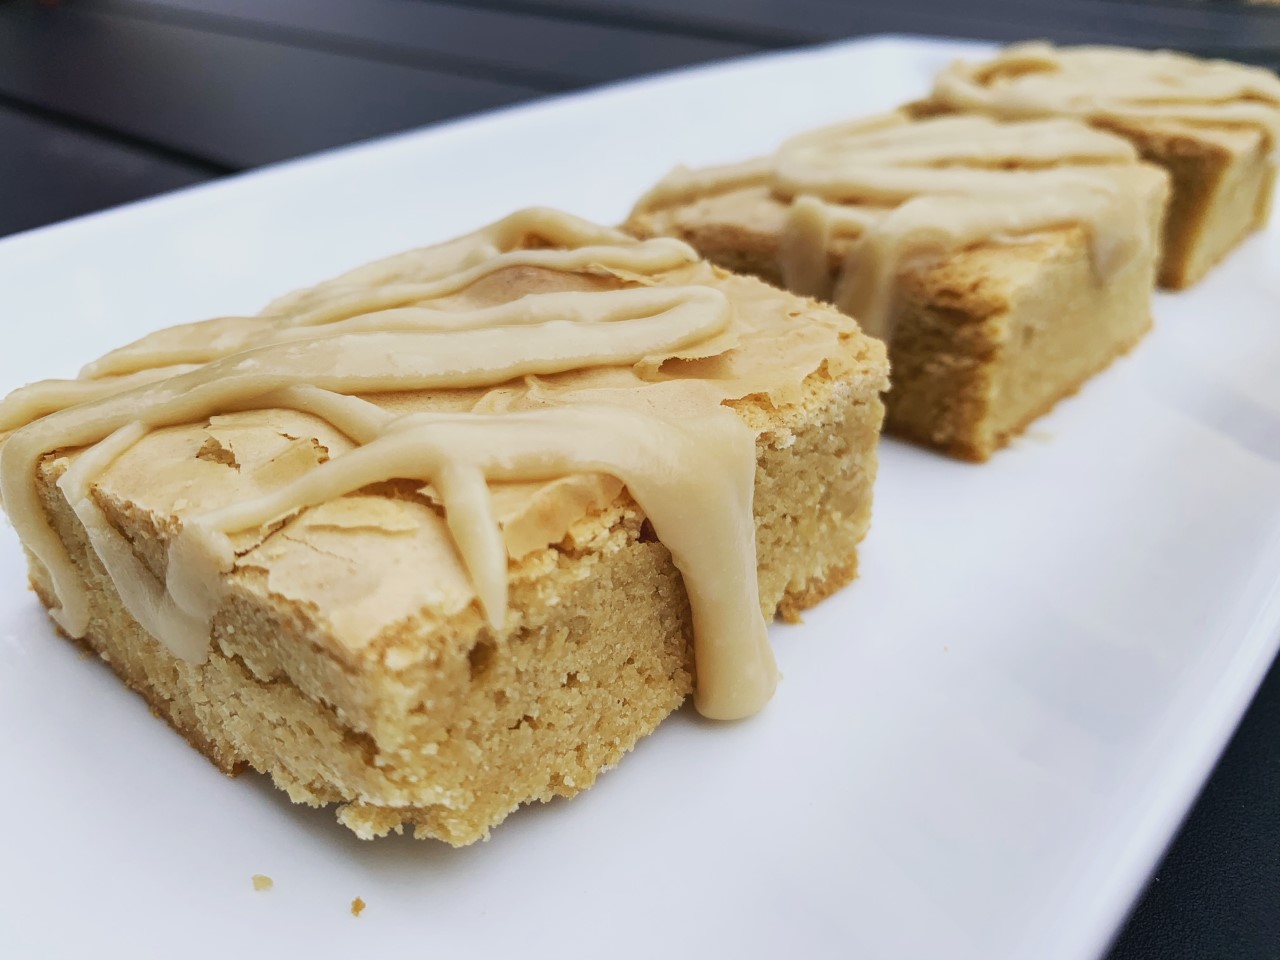
This recipe comes together very easily and I used THIS RECIPE for the Blondies that I found on Pinterest (are we friends there yet?) and created a quick maple icing that I drizzled on while the Blondies were still warm. I’ve frosted cookies with this icing in the past, but on MAPLE Blondies, it’s amazing.

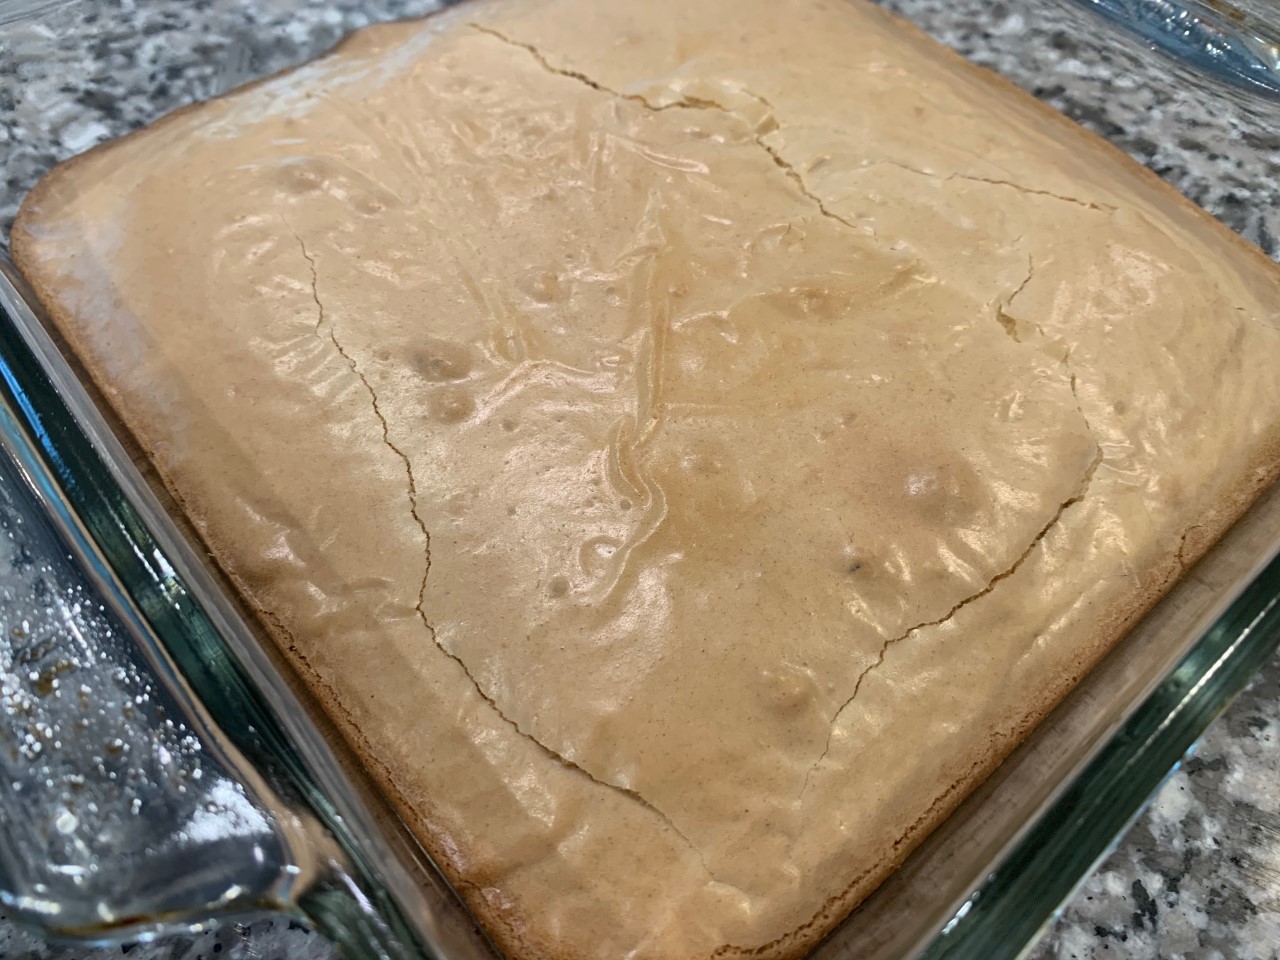
In terms of baking time for the Blondies, less is more. It indicates to bake 30-35 minutes in the recipe, and I went 32 minutes and next time, I’d go 29-30 minutes to get an even chewier texture. I know my oven runs a bit hot too, so test with a toothpick after 29-30 to see how you’re doing with doneness.

Blondies right out of the oven
Making the icing
The finished icing – smells incredible!

Blondies Recipe

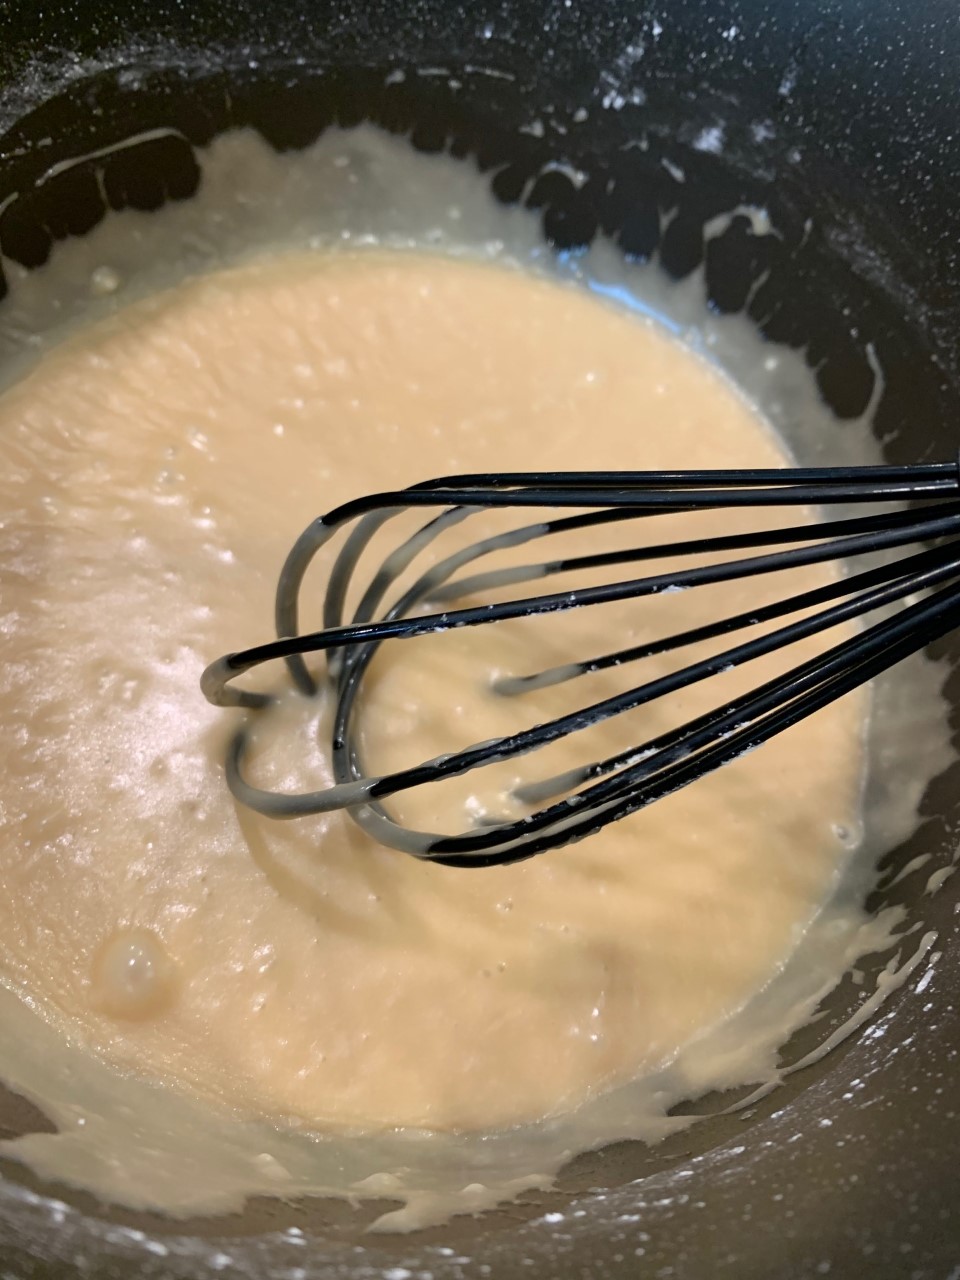
Maple Icing Ingredients:

  • 2 Tbsp. butter
  • 1/3 cup pure maple syrup, ideally from Quebec!
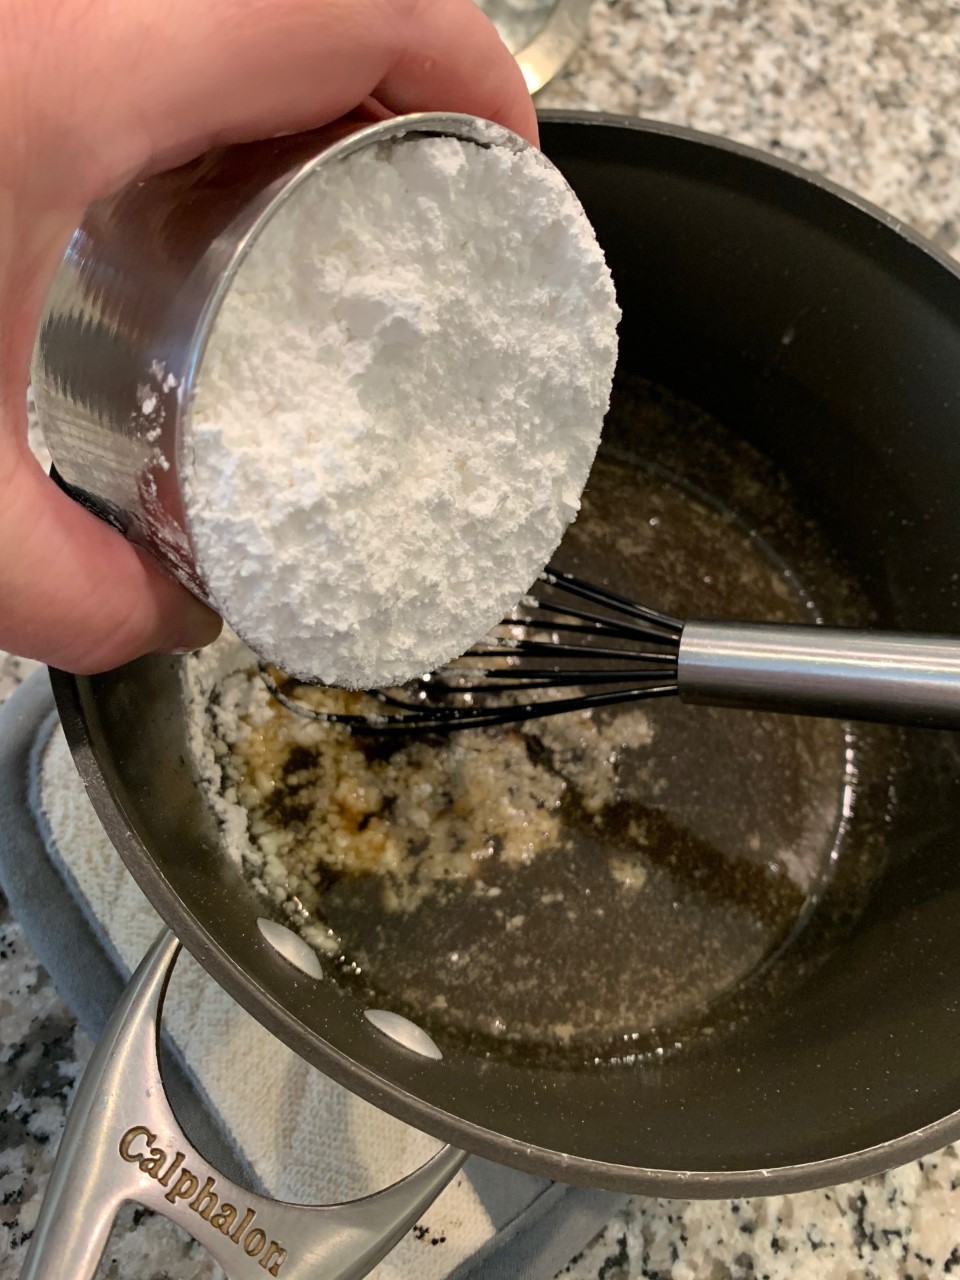
  • 1 cup powdered sugar, sifted
  • ¼ tsp. sea salt

Maple Icing Directions:

  1. Allow Blondies to cool for 10 minutes while making the icing.
  2. Over medium-low heat in a small saucepan, melt the butter, add the maple syrup, and stir to combine. Turn the heat off.
  3. Add the powdered sugar and the salt and stir until fully incorporated with no lumps remaining.
  4. Drizzle over the blondies (I placed the hot icing in a zip top bag and cut a small corner and used the bag as a pastry bag – this is optional!) and allow to set for 15 minutes.

Yields 12 Blondies.

Mom’s Strawberry Muffins

Mom’s Strawberry Muffins

My mom, who lives in Quebec, Canada, is so cute. Over the years, she’s learned that I need to see photos of the food she cooks. No photos…it didn’t happen!

Today, she baked strawberry muffins that she made using fresh strawberries she’d frozen last summer for such a recipe. I had her take three different photos of the muffins and she complied and now I can share the recipe and her images with you.

This easy muffin recipe can also be made using raspberries, blackberries or blueberries.

Fresh out of the oven!

Ingredients:

  • 2 1/3 cups all-purpose flour
  • ¾ cup granulated sugar
  • ¼ cup brown sugar
  • 2 ½ tsp. baking powder
  • 1 cup strawberries, either fresh or frozen then thawed, diced into small pieces
  • 1 cup milk
  • 1/3 cup vanilla yogurt
  • 1 large egg, beaten
  • 1 tsp. pure vanilla extract
Just want to cut into it!
Look at the juicy strawberries!

Directions:

  1. Preheat oven to 400 degrees.
  2. Either coat in cooking spray a 12-muffin tin or add paper liners.
  3. In a medium bowl, combine the flour, sugars and the baking powder. Carefully add the strawberry pieces and set aside.
  4. In a separate medium bowl, whisk together the milk, yogurt, egg and vanilla extract.
  5. Pour the liquid mixture over the dry ingredients and carefully incorporate with a spatula or wooden spoon – don’t overmix!
  6. Fill the muffin cups until about 2/3 full and bake until the muffin tops are golden brown and no longer wet on the inside when a wooden toothpick is inserted, about 20 minutes.
  7. Allow to cool 10 minutes before unmolding (if not using the paper liners).

Yields 12 muffins.

Old York Cellars Cod with Vegetable Sauce

Old York Cellars Cod with Vegetable Sauce

As families prepare for another socially distanced Easter and Passover meal, some may be looking for ways to make their holiday a bit more special this year.

Old York Cellars Chef Jose Diaz has prepared this easy, DIY recipe for cod for two that offers the perfect touch for an Easter or Passover meal to be remembered.

You’ll see that the recipe calls for Old York Cellars dry white wine and that’s available for purchase at the winery’s website. The recipe also features a Old York Cellars Malbec Marinara, a sauce hand-made by Dogwood Farms in Hillsborough NJ using Old York Cellars Malbec – yum!

Photo by Old York Cellars

Ingredients

  • 1 russet potato – peeled
  • 4 Tbsp. olive oil, divided
  • 1 celery stalk – chopped
  • 1 carrot – chopped
  • 1 leek – sliced
  • 1 onion – chopped
  • 1 tomato – chopped
  • 2 garlic cloves – minced
  • 1 red bell pepper – chopped
  • 1 ½ tsp. each salt and freshly group black pepper, divided
  • 1 Tbsp. paprika
  • ½ cup Old York Cellars dry white wine
  • ½ cup Old York Cellars Malbec Marinara
  • 1 tablespoon fresh parsley
  • 6-ounce filet with skin on

Directions:

  1. In a pot of boiling water, cook the potato for 35-45 minutes, or until tender. Remove from the water and let stand 3 minutes then slice.
  2. Set a medium-large pot over medium-high heat and once warmed, add one tablespoon of olive oil. After 30 seconds, add the celery, the carrots, the leeks, the onion, the tomato, the garlic and the red pepper. Stir for a minute then add two more tablespoons of olive oil over vegetables along with one teaspoon each of the salt/pepper, and the paprika. Cook for 5 minutes, stirring occasionally, then add the wine and marinara sauce. Decrease heat to low, cover the pot and allow the sauce to simmer for 25 minutes, stirring occasionally.
  3. Once the saucy vegetables are cooked, purée the mixture until smooth using either an immersion blender or a food processor.
  4. Put the pureed sauce through fine mesh strainer using a rubber spatula (optional if you want).
  5. Return pureed and strained (if straining) vegetables to the pot and simmer over low heat while the fish is being sauteed.
  6. Season the cod with the remaining salt and pepper.
  7. Place frying pan on stove over high heat. Add remaining two tablespoons olive oil to the pan and warm up. Once oil begins to shimmer, add the cod, skin side down and cook for 5 minutes until cod begins to firm up and turns slightly white.
  8. Remove cod from pan and place skin side up into the vegetable purée and cook for an additional 10 minutes.
  9. To serve, spoon two tablespoons of vegetable purée onto a plate and swirl around the plate with the back of the spoon.
  10. Add cooked potatoes over the vegetable purée then place the cod skin side down on potatoes and add more sauce to plate.
  11. Garnish with fresh parsley and drizzle with olive oil.

Serves 2.

About Old York Cellars

Set amidst some of the oldest vineyards in the Garden State, Old York Cellars is a working farm that offers a full selection of award-winning wines and an extraordinary experience both inside and outside of the tasting room. The winery plays host to a variety of special events and exciting programs including seasonal Wine Festivals, Music Under the Stars, Comedy Nights, Specialty Tasting Experiences, and the exclusive Vintner’s Club.

Winery in Ringoes Open Daily 12 – 5 PM  (Starting April 3rd the winery will be open until 7 PM)

Old York Cellars Winery & Vineyards, 80 Old York Road, Ringoes, New Jersey 08551, Phone:  908-284-9463

Old York Cellars Tasting Room & Restaurant, Quaker Bridge Mall, Route 1, Lawrenceville, NJ, Phone:  609-799-2707

Old York Cellars Wine Shop, Bridgewater Commons Mall, 400 Commons Way, Bridgewater, NJ, Phone:  908-722-2222

Easy Irish Soda Bread

Easy Irish Soda Bread

Irish Soda Bread is a popular bread served in the days leading up to St Patrick’s Day around the world. It was introduced in the late 1830s when bicarbonate soda was brought to the U.K. The bread grew in popularity, as a necessity, when Ireland was in its poorest state and when food needed to be made using basic and inexpensive ingredients like flour (mostly wheat in those days), baking soda, salt and soured milk (what’s been replaced by buttermilk in today’s recipes).

This past weekend, my fiend Marge posted an awesome picture of a freshly baked loaf of Irish soda bread and it enticed me to get in the kitchen and make one too. She uses the same recipe every year around St Patrick’s Day, Ina Garten’s Irish Soda Bread recipe.

I made a couple changes to the recipe:

  1. I used 1 ½ teaspoons of baking soda for a bit more soda taste
  2. I used half golden raisins and half red currants instead of only currants as I love the look of golden raisins in bread
  3. I baked the bread for 50 minutes and it was perfectly-done
Butter and Soda
Buttermilk and Egg
Currants & Golden Raisins
Dried Fruit Coated in Flour
Dough After Kneading in the Bowl
Pre-Baked Bread with Cross

Note: while the recipe said the batter would be “very wet”, mine wasn’t. It was moist and instead of kneading it on the counter with more flour, which would have made the load way too dry, I gave the dough a few kneads by hand in the bowl it was mixed in and then simply plopped it on my baking sheet – saved a step and I feel it spared me from an overly-dry bread. Also, while the recipe calls for you to cut an X in the dough prior to baking, us Catholics know it’s really a cross, not an X 😊.

I had a delicious slice with dinner which consisted of my Creamy Chicken Noodle Soup and it was awesome.

Hope you try baking a loaf!

Veronique  

Creamy Chicken Noodle Soup

Creamy Chicken Noodle Soup

At our home, we love soup. If we’re connected on Facebook or Instagram, you’ll see lots of soup pics, especially in the winter. I’m Canadian and my guy is Dutch, two countries big on soups, and while we each have favorites, this Creamy Chicken Noodle Soup is one we both love.

Every so often when I have a few hours of downtime in the house, I’ll simmer or roast a whole chicken and then take the meat off the bones and bag individual portions and freeze for quick weeknight meals and for soup. For this soup, I do a double bag, about two cups. I’ll then simmer down the chicken carcass and make broth that I also freeze for future use, like this soup.

In this soup, you could use leftover rice or pasta for a great way to clear up the fridge with no waste. I often use linguine or fettucine. If you don’t have a blender/stick blender, simply skip that step and you’ll have a lovely soup that’s a bit chunkier. The soup gets its lovely coral color from the cooked carrots.

Ingredients:

  • 2 Tbsp. vegetable oil
  • 3 medium carrots, diced
  • 1 medium yellow onion, diced
  • 4 stalks celery, diced
  • 2 garlic cloves, minced
  • 8 cups low-sodium chicken broth
  • 1 tsp. each dried thyme, salt and pepper
  • 1 cup heavy cream combined with 1 Tbsp. cornstarch
  • 2 cups diced/shredded roasted chicken
  • ¼ pound linguine, broken into 2” pieces

Directions:

  1. In a large stockpot warm the oil over medium heat. Add the carrot, onion and celery and sauté until tender, about 10 minutes, stirring occasionally. Add the garlic and continue cooking for another minute.
  2. Add chicken broth, thyme, salt, pepper and cook for 10 more minutes.
  3. Add half the soup to a blender (or use a stick blender) and purée for about a minute. Return the puréed soup to a clean saucepan and purée the second half of the soup and add to the 1st batch of puréed soup.
  4. Turn the heat to medium and add the cream/cornstarch mixture to the soup. Bring to a simmer and cook/stir for 3-4 minutes until the soup has thickened.
  5. Add the pasta, lower heat to medium-low and cook 10-15 more minutes, until the pasta is cooked through. If using cooked pasta or cooked rice, reduce the cooking time to 2 minutes instead of 10-15 minutes just to reheat the cold pasta/rice.

Serves 6 generously.

Quebec Meat Pies (Pâtés a la Viande or Tourtières)

Quebec Meat Pies (Pâtés a la Viande or Tourtières)

Meat pie, pâté a la viande, tourtière….there are so many names for the popular Quebec dish! The idea is a mixture of cooked ground meats baked between two flaky pastries.

Where I’m from in Quebec, the holidays simply wouldn’t be joyous without a meat pie on our Christmas tables. There are a gazillion versions, typically passed down from generation to generation, and every family claims theirs is the best and THE recipe.

My one criticism of the meat pie is that depending on how fatty the meats are, the pie can be dry. In my family, we use a mixture of pork and beef and it’s still what I prefer. Once in a while, I add small cubes of potatoes and that’s tasty too. This year, I saw someone on one of my Canadian Facebook pages that said her family uses mashed potatoes in their meat pies. What!!?? Then I thought…mmmm….wouldn’t that make the meat mixture creamy and not crumbly/dry? The answer is 100% YES!! These were the best meat pies I’ve ever had and I’ll always make them with mashed potatoes going forward.

My Snack of Leftover Mixture

For this Quebec Tourtière recipe, I make a double batch of my buttery Fail Proof Pie Crust recipe and for the two, double-crusted meat pies. Simply omit the sugar in the crust recipe as this is a savory pie.

Ingredients:

  • 2 large or 3 medium Russet potatoes, cut into chunks
  • 2 Tbsp. vegetable oil
  • 1 ½ pounds ground beef (80%/20% fat)
  • 1 ½ pounds ground pork
  • 2 small onions, diced
  • 1 cup brewed medium roast coffee
  • 1 cup beef broth
  • ¼ tsp. ground cinnamon
  • ¼ tsp. ground nutmeg
  • ½ tsp. ground clove
  • 2 tsp. salt
  • ½ tsp. black pepper
  • 4 9” pie crusts
  • 1 egg + 1 Tbsp. water stirred well
Mashed Potatoes and Meat Pot
Meat with the Mashed Potatoes Combined
Eggy Crust for Sealing
Meat Pie Ready for Baking

Directions:

  1. Place the potato pieces in a medium saucepan and cover with water. Over high heat, bring the water to a boil then turn the heat down to medium and simmer for about 20 minutes, until the potatoes are fork tender. Drain very well and return the potatoes to the pan to dry for a few minutes then mash well with a potato masher. Set aside.
  2. In a large saucepan over medium-high heat, warm the oil then add the ground beef and the ground pork and cook for 4-5 minutes, stirring occasionally, until no longer pink. Add the onion and continue cooking for 3-4 minutes until the onion has softened. Add the coffee, broth and all the spices and stir well. Cook over medium heat for 10 minutes until some of the liquid has evaporated. Add the mashed potatoes to the meat mixture and still until well-distributed and the potatoes have absorbed the liquid.
  3. Preheat oven to 350 degrees.
  4. Place a pie crust in each of two 9” pie plates. Add enough of the meat mixture to the two pies so that the meat is a bit above the height of the pie plate (you may have some leftover meat which is delish eaten out of a bowl as a side treat). With wet fingers from dipping in water, wet the crust on the lip of each pie to create the ‘glue’ that will adhere to the top crust. Cover with the remaining two crusts and crimp the bottom and top crusts together to ensure they’re sealed. Cut some slits in the top crusts to create a way for extra moisture to escape. Brush the egg mixture over the pies. Place the pies in the oven and bake for 45 minutes, until the pies crusts are golden brown.
  5. Enjoy the pies right away or cool completely and place in zip top bags then in the fridge for up to 4 days or in the freezer for up to 2 months. To reheat, bring the pies to room them and bake in a 325-degree oven for about 10 minutes.

Makes two 9” meat pies serving 6-8 each.

Tres Leches Cake

Tres Leches Cake

I picked up some groceries at Whole Foods a few weeks back, and while I don’t typically buy store-made dessert, I peeked a slice of Tres Leches Cake that I had to have. It was absolutely fabulous, so kudos to WF for this treat I hadn’t had in many years.

If you’re not familiar with Tres Leches Cake, it’s a vanilla/white cake popular in Mexico that is soaked in three kinds of milk (tres leches) then frosted in whipped cream. Typically, cinnamon is sprinkled over the cream, but since I don’t like cinnamon (yeah, I know), I dusted some good quality cocoa power on it for the ‘right’ look.

Cake Baking

The recipe I used came out just perfect and wasn’t too sweet, which is sometimes the case with this cake. Another issue I’ve seen with this cake over the years was that some versions use way too much milks which can cause it to collapse. This was NOT the case here.

Baked Cake

Here’s a link to the recipe by Sabrina of Dinner Then Dessert. Next time I make this fabulous dessert, I’ll add a couple more spoons of powdered sugar to the whipped cream.

Three Milks for Soaking

Regarding the 4 cups of whipped cream listed in the recipe. That’s 4 cups of whipped cream made from 2 cups of heavy whipping cream. Just thought I’d clarify.

I’m not sure why I hadn’t made Tres Leches Cake in 30+ years but that won’t happen again as it’s a great dessert. You’ll see in the photos that I used a disposable pan and it’s because I brought this to a potluck where it was well-received.

Please comment if you try this recipe!

Veronique  

Easy Potato Latkes for Beginners

Easy Potato Latkes for Beginners

A couple of weeks ago, I was “challenged” by the team at Yarden Wines to make latkes that could be paired with some of their fantastic wines. If you’re not yet familiar with Yarden Wines, it encompasses Golan Heights Winery and Galil Mountain Winery, located in the Golan Heights and Galilee regions of Israel. Keep an eye out for more posts about wines from Israel.

What are latkes? According to Chabad.org Latke is Yiddish for “pancake.” On Chanukah, it is traditional to serve potato latkes fried in oil to celebrate the Chanukah miracle.

While I’ve made latkes once many years ago, I’m certainly no pro at making them so I turned to Pinterest for a good recipe and easy directions. The recipe I selected is by Sue from The View from Great Island (great blog by the way and amazing photography). Sue’s recipe, HOW TO MAKE PERFECT LATKES, was so easy to follow and featured lots of photos to help me along the way.

The results, if I may say so myself, were some of the best latkes I’ve ever eaten. Crunchy, crisp on the outside, moist and tender on the inside.

Here’s a link to the recipe and below are modifications I made:

  • Used two large Russet potatoes
  • Added a pinch of nutmeg
  • Used a ¼ cup scoop to measure out the latke ‘batter’ for each portion in my cast iron pan. I like the latkes a bit bigger and a little rounder in the middle to ensure a moist inside.
  • Replace the more typical chives with green onion.
  • Skipped the apple sauce since I’m not a fan and served the latkes with sour cream.
  • Grated the potatoes and onion by hand on a box grater. While more work, I actually like doing that step by hand.
  • Gave the lakes a nice sprinkling of salt after frying when I placed them on the paper towel.

I paired the latkes with the 2019 Gilgal Chardonnay by Yarden Wines and it was terrific match. This wine retails for around $15 a bottle and a great addition to your collection.

Don’t hesitate to try this latkes recipe, it’s super great and it’ll wow your friends and family.

Happy cooking,

Veronique

Vegan Fudge with Walnuts

Vegan Fudge with Walnuts

Yes, you read that recipe title correctly – VEGAN! My dear friend Sharon’s been living a vegan, unprocessed foods lifestyle for a while now and posts recipes of foods she’s reinventing as vegan that always look tasty and interesting. This past week, she posted a recipe I finally decided to try and post here as it’s perfect for the upcoming holidays – Vegan Fudge!

Photo Credit: Diane Biancamano

The recipe was created by amazing vegan chef/recipe creator/food blogger Dianne Wenz. Dianne and I ran in some of the same circles both being New Jersey food bloggers, before I relocated to Charlotte. Her popular food blog, Dianne’s Vegan Kitchen, is filled with fantastic recipes and tips for adopting and living a vegan lifestyle.

Two things attracted me to this recipe: 1) the fudge looks creamy and velvety 2) the recipe calls for homemade dairy-free condensed milk – WHAT!!?? If find all this intriguing and fantastic.

Photo Credit: Sharon Lewis

Here’s Dianne’s recipe for Vegan HOMEMADE VEGAN FUDGE (WITH DAIRY-FREE CONDENSED MILK). The recipe calls for walnuts, which I think are a must in fudge, but please skip if you don’t like them or if there are food allergies in your homes.

I cannot wait to make this for the holidays and hope you give it a try too!

Cheers,

Veronique

Cheesy Bacon Chicken Bake

Cheesy Bacon Chicken Bake

While baked chicken recipes can be boring and sometimes even bland, this easy weeknight Cheesy Bacon Chicken Bake recipe is just the opposite.

It came to me as we were trying to empty our freezer and fridge before our move out of state. We had some chicken breasts in the freezer, that I thawed, and a block of cream cheese and some pre-cooked bacon to use up, so the Cheesy Bacon Chicken Bake was born.

This low carb recipe comes together in mere minutes and is perfect for weeknights or an easy weekend dinner. You could add things like cubed ham instead of bacon or add cooked spinach or cooked mushrooms and it would be delicious. The shredded cheese you use can also be changed to Swiss or Colby or Jack, or whatever you have on hand.

The chicken can be served with rice or a side salad for those living the keto life.

Ingredients:

  • 4 boneless, skinless breasts halves, sliced in half horizontally (you’ll have 8 pieces)
  • 1/3 cup mayonnaise (I used Duke’s)
  • 8 ounces cream cheese, softened
  • 2 cups shredded sharp Cheddar cheese, divided
  • ½ tsp. each salt, pepper and garlic powder
  • 8 slices cooked bacon, chopped into bite size pieces
  • Chopped scallions, optional

Directions:

  1. Preheat the oven to 375 degrees.
  2. In a rectangular baking dish (I used an 11’x7” Pyrex) place the chicken breasts in an even layer (a bit of overlap is fine).
  3. In a medium bowl, combine the mayo, cream cheese, 1 cup shredded Cheddar, the spices and chopped bacon.
  4. Top the chicken with the cheese/bacon mixture then top that with the rest of the Cheddar.
  5. Bake for 35-40 minutes or until the internal temperature of the chicken is 165 degrees and the cheese has melted and is lightly golden.
  6. Garnish with the scallions, if using.

Serves 4.