Chocolate Lava Cake in a Minute

Chocolate Lava Cake in a Minute

Chocolate Lava CakesFirst off, there is indeed a reason why I’m sharing a recipe that’s completely not “from scratch” and that’s cooked in the microwave, of all things. Every Memorial Day, friends come up from Florida to celebrate with us and we’ve gotten in the habit of finding the most hands off recipes on the net and reproducing them for one of our dinners to see if our guests notice the difference. Last year, we did the embarrassing 60 Second Mixed Berry Cobbler that our friends LOVED. This year, I picked a chocolate lava cake recipe that uses a brownie mix and is cooked in the microwave. Was I doubtful this would work and would actually be edible – YES!!!

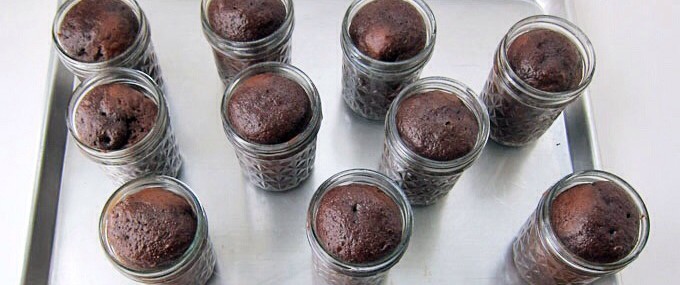
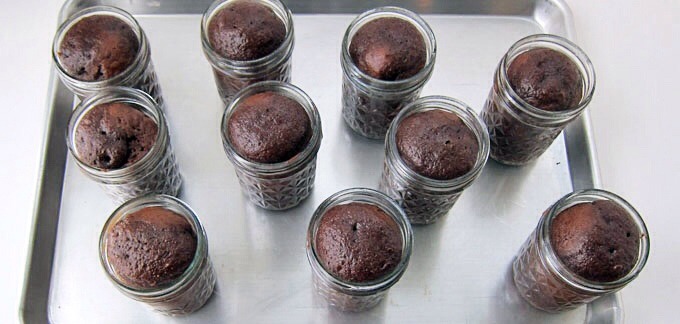
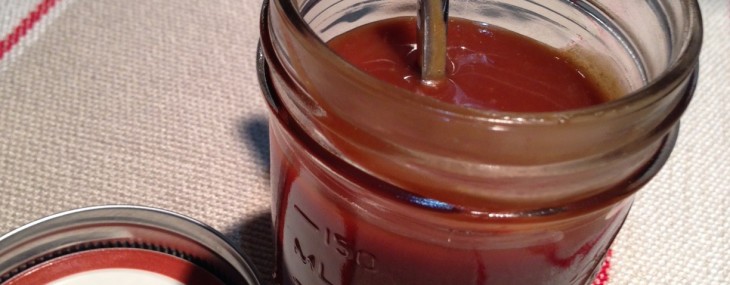
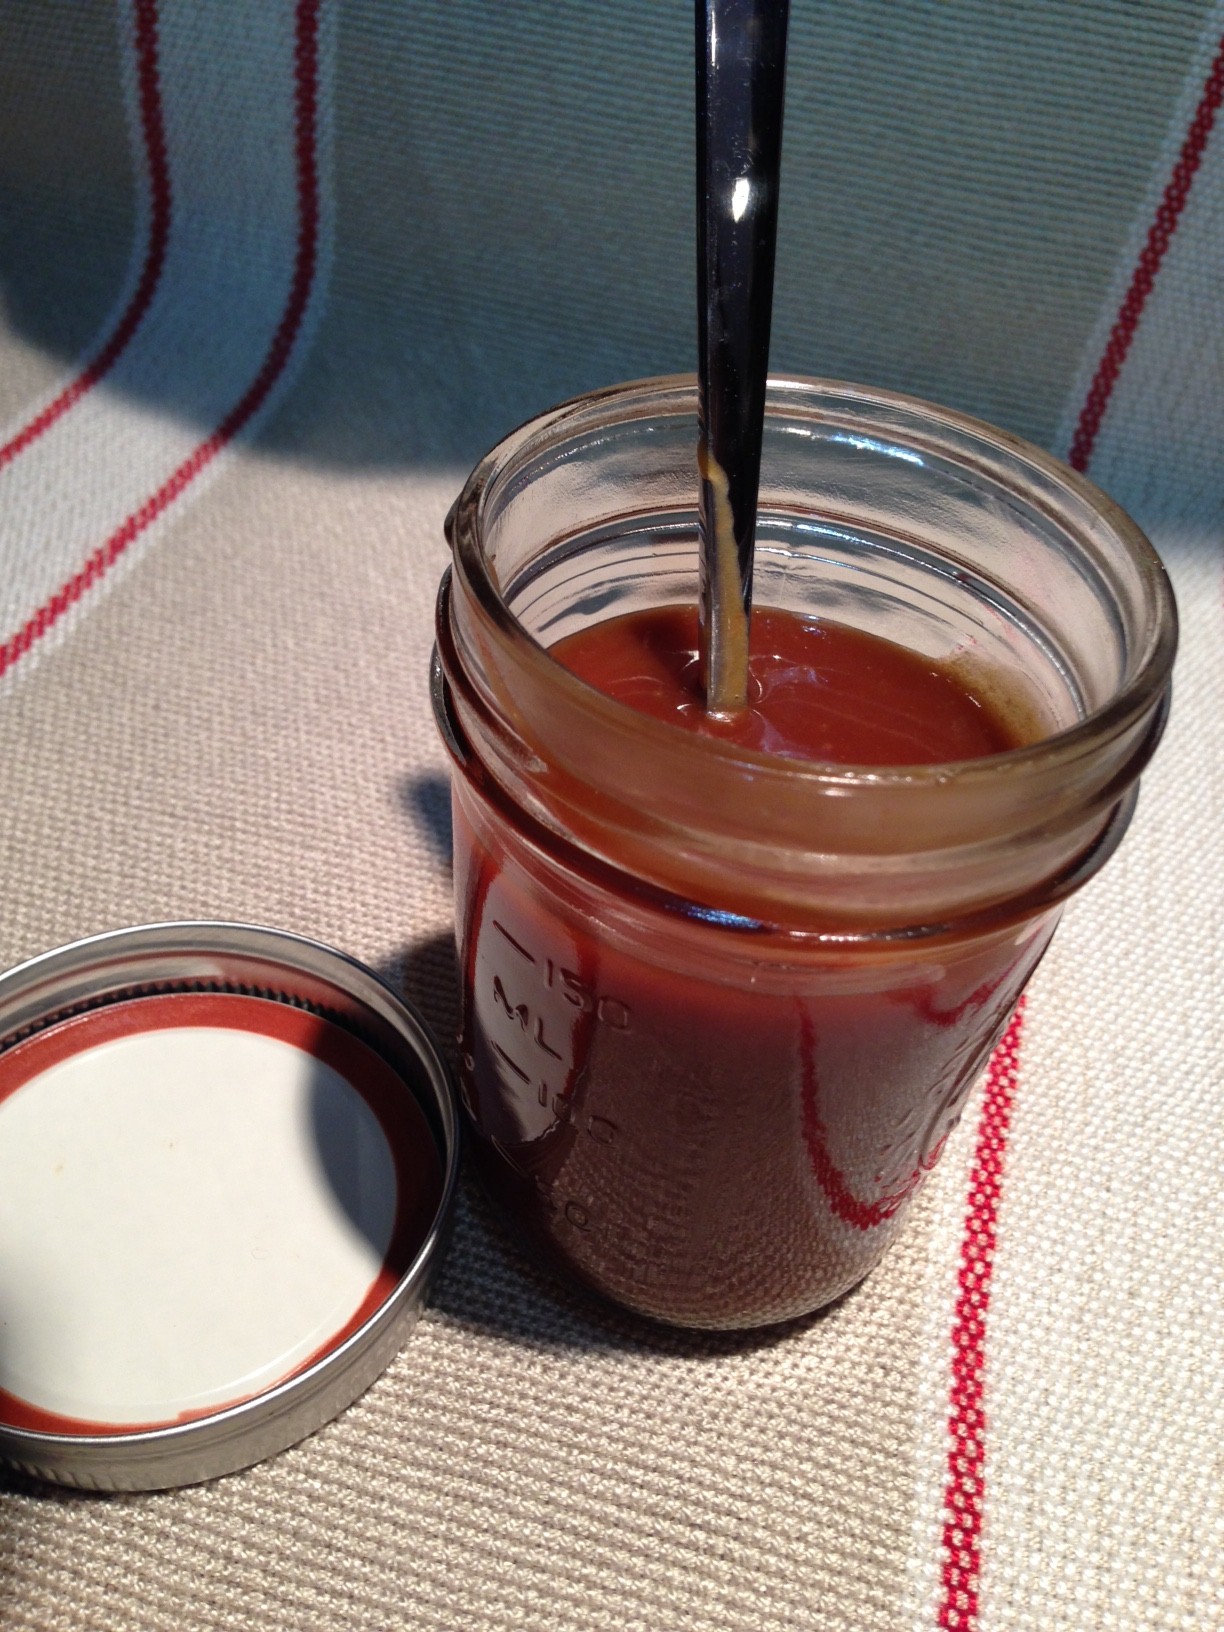
The main reason I picked this recipe is that it could be made way in advance and just cooked (microwaved) at the last minute. The addition of an extra egg over what the brownie mix calls for creates a more cakey brownie, so closer to a true chocolate lava cake. Was this the best version of this popular dessert I’ve had – nope. Was it pretty good considering the 2 minutes it took to make and the 5 minutes it took to cook – yes. I cooked 4 cakes at a time, but each cake would cook for a minute if microwaved as a single serving.

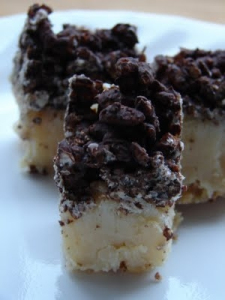
While cooking, each cake puffs up like a soufflé and once it comes out of the microwave, it deflates leaving room for a scoop of ice cream in the jars. Using good quality ice cream does improve these babies.  

PARTY TIP: You can make the cakes up to step 4 below, cover each jar with plastic wrap and refrigerate for up to 2 days. Just bring to room temperature before continuing to step 5, the cooking part.

Ingredients:

  • 1 brownie mix (I used Pillsbury Chocolate Fudge in a family size for 9×13 pan) prepared to package directions
  • 1 large egg
  • 16 Dove Milk Chocolate Promise individual chocolates
  • Vanilla ice cream

Directions:

  1. To the brownie batter made to package directions, add the egg and stir to combine.
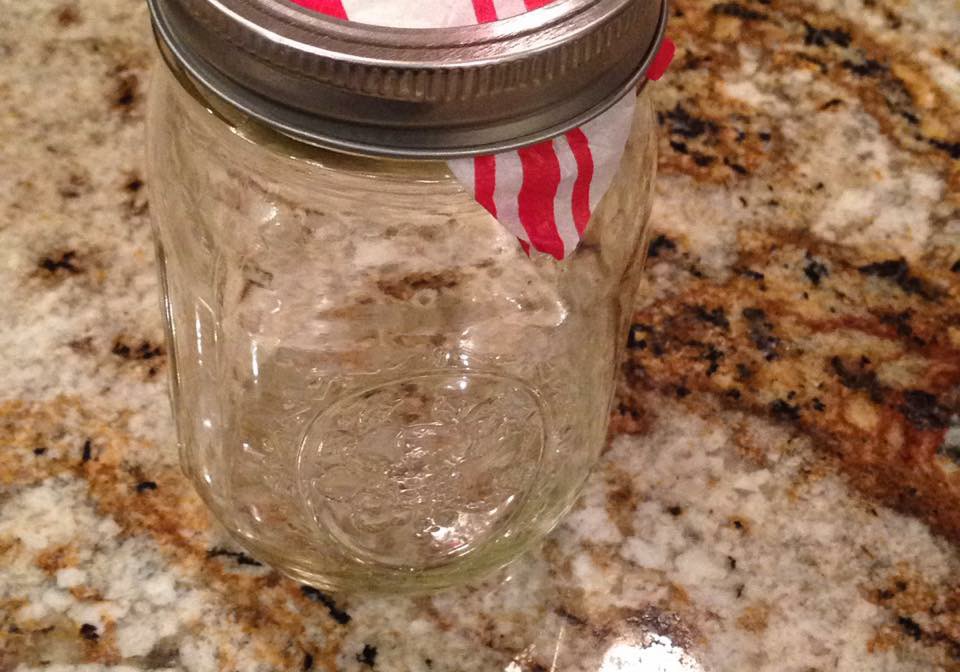
  2. Coat 8 (6 oz) canning jars (or other microwave-safe small containers) with cooking spray.
  3. Spoon about 1/3 of a cup of batter in each jar – it shouldn’t be more than half full.
  4. Place 2 of the Dove chocolates in the center of the batter in the jars and cover them with batter.
  5. Microwave on full power for 1 minute per cake. I cooked 4 cakes at a time for 2 ½ minutes total.
  6. Serve the cakes, topped with a scoop of ice cream, while still warm.

Makes 8 individual servings.

I used this recipe as inspiration.

Meyer Lemon Madelaines

Meyer Lemon Madelaines

Meyer LemonsI just can’t help myself when I see Meyer lemons in the grocery store – I need to get them! Does it matter I had no plans to bake last weekend? No! I went ahead and bought a big bag of the bright yellow, juicy and sweet lemons.

While I would typically go for my standard Meyer Lemon Tart, I was in the mood for cookies, so when I saw this recipe by The Little Kitchen, I jumped at the chance to try my antique madeleine pan.

One tip, you might be tempted to overfill the madeleine pan with batter – don’t! You want a somewhat thin cookie that’ll be crisp on the outside (see photo below). Also, if you have two madeleine pans, you can bake all the cookies at once. I only have one pan, so I need to bake one batch, wait for the pan to cool then rebutter and flour for the second batch.

Right amount of batter

Right amount of batter

Madelaines Ingredients:

  • 2 cups all-purpose flour
  • ½ tsp. baking soda
  • 1 tsp. baking powder
  • ¼ tsp. salt
  • 1 ¼ cups granulated sugar
  • 1 ½ Tbsp. zest of two Meyer lemons
  • 2 tsp. pure vanilla extract
  • 3 large eggs
  • 1 cup (2 sticks) unsalted butter, melted and cooled
  • 2 Tbsp. Meyer lemon juice
  • ½ cup fat free plain Greek yogurt

Meyer Lemon Glaze Ingredients:

  • 1 cup powdered sugar
  • 1 Tbsp. Meyer lemon juice
  • 2 Tbsp. milk
Glazed Meyer Lemon Madelaines

Glazed Meyer Lemon Madelaines

Madelaines Directions:

  1. Preheat oven to 350 degrees. Butter and flour a madeleine pan.
  2. In a medium bowl, mix the dry ingredients: flour, baking soda, baking powder and salt). Set aside.
  3. In another medium bowl, add sugar, lemon zest and vanilla extract and mix together with a rubber spatula. Using a whisk, add the eggs, one at a time, to the sugar mixture. Whisk in melted butter, lemon juice and the Greek yogurt. In two batches, fold in flour mixture being careful not to over combine. Chill the batter for 5 to 10 minutes in the refrigerator.
  4. Using a teaspoon as a measure, spoon batter into Madeleine pan cavities. Bake for 9 to 12 minutes.
  5. Cool for 1 minute then flip over onto a baking rack and allow to cool for two minutes. Once cool enough to handle, wash you pan, butter and flour it and bake the second dozen cookies.  

Meyer Lemon Glaze Directions (While the cookies cool, make the glaze):

  1. In a small bowl, combine the powdered sugar, lemon juice and milk and whisk until a smooth glaze has formed, about 1 minute.
  2. Drip the glaze over the cookies with a spoon and serve immediately. If storing cookies, don’t add glaze until ready to serve. Cookies are best when served right after baking.

Makes 2 dozen madelaines.

Talenti Sea Salt Caramel Gelato Sandwich

Talenti Sea Salt Caramel Gelato Sandwich

Ice Cream SandwichI know this isn’t much of a “recipe” since the gelato is store-bought, BUT, this is by far the BEST commercial gelato I’ve had, so I thought I’d share the wealth (no, I’m not being compensated by Talenti, it’s just a great product).

Ingredients:

Filling Ice Cream Sandwich


Directions:

  1. 15 minutes before assembling, take the gelato out of the freezer and place on a counter to soften slightly.
  2. Using a small ice cream scoop, place two gelato balls on the flat side of a cookie. Top with a second cookie, so the flat side is on the gelato side. Smoosh, technical baking term, the cookies slightly so the gelato spreads across the cookie for a guaranteed bite of cookie/gelato throughout the whole sandwich.
  3. Repeat with the other 3 sandwiches. Place the sandwiches in the freezer in an air-tight container until ready to serve.

Makes 4 sandwiches.

Easy Valentine’s Day Menu and Wine Pairings

Easy Valentine’s Day Menu and Wine Pairings

happy valentines day 2014From experience, we all know Valentine’s Day at a restaurant can be hectic and restricted to fixed menus. For those of you who prefer to stay home and cook up a romantic meal, here is some inspirational recipes with affordable wine recommendations. 

BONUS – breakfast:  Waffles with Raspberries and Nutella

Whichever dish you decide to prepare for your loved one(s) this Valentine’s Day, I hope your meal is paired with love.

Cheers,

Veronique

Sugar and Spice Candied Nuts

Sugar and Spice Candied Nuts

Empty Jar
Empty Jar – Forgot a Photo!

This candied nuts recipe post was updated 1/4/21.

On New Year’s Eve, we met some friends for a celebratory meal and to my joy, my friend Diane had brought me a jar of homemade candied pecans. I’m not much of a cinnamon fan, so I don’t typically like these types of spiced and candied nuts, but Diane’s version is simply perfect.

These candied nuts are perfect to give to friends around the holidays and would make a great hostess gift. I like to use a combination of pecans and walnuts.

Ingredients:

  • 1/3 cup dark brown sugar
  • 2/3 cup white granulated sugar
  • 1 tsp. kosher salt
  • Generous pinch of cayenne pepper
  • 1 tsp. ground cinnamon (I skip this and it’s still awesome)
  • 1 egg white, room temperature
  • 1 Tbsp. water
  • 1 pound walnuts or pecan halves or whole peeled hazelnuts (or a combination)

Directions: 

  1. Preheat oven to 300 degrees.
  2. Mix sugars, salt, cayenne, and cinnamon, making sure there are no lumps; set aside.
  3. Beat egg white and water until frothy but not stiff.
  4. Add nuts, and stir to coat evenly. Sprinkle nuts with sugar mixture, and toss until evenly coated.
  5. Spread sugared nuts in a single layer on a cookie sheet lined with parchment paper. Bake for 30 minutes, stirring occasionally.
  6. Remove from oven, and separate nuts as they cool.
  7. When completely cool, place the nuts into a bowl, breaking up any that stick together.

Adapted from Elizabeth Karmel of Hill Country

Cheers,

Veronique

5 Must Try Delectable Holiday Treats

Divine Squares

Divine Squares

Homemade treats are always well-received by guests at holiday parties. Even the strictest dieters indulge during the holidays and below are top treats sure to please holiday revelers.

Please share images and comments about these holiday treats if you make them!

Cheers,

Veronique

Easy Salted Caramel Sauce

Easy Salted Caramel Sauce

Caramel SauceI’ve shared caramel sauce recipes in the past but I thought the timing was perfect with the holidays around the corner, to do another.

This one doesn’t require fancy equipment, perfect temperature on a candy thermometer or fuss – it’s based on judging the right color for the caramel and acting fast.

Ingredients:

  • 1 cup granulates sugar
  • 1 tsp. light corn syrup
  • ¼ cup water
  • ½ cup heavy cream
  • 1 Tbsp. pure vanilla extract
  • ½ tsp. sea salt

Directions

  1. Add the sugar, corn syrup and water to a medium saucepan (the hot caramel will bubble violently when the cream’s added, so be sure to use a saucepan that’ll allow for that extra volume) over high heat until the mixture comes to a boil, whisking just to incorporate the sugar into the liquid.
  2. Allow the mixture to boil, swirling the pan to keep the liquid from browning in one spot (no whisking) for about 10 minutes over medium-high heat, or until the caramel is a deep golden color – watch carefully so as to not burn it.
  3. Put oven mitts on when the caramel is the desired color, turn the heat to low and add the cream. Swirl to incorporate then add vanilla and salt. Cook for an extra minute, whisking to be sure the caramel is smooth.
  4. Pour the sauce in a 2-cup glass measuring cup, let cool for 5 minutes then pour in a glass jar, cool completely then seal tightly. Caramel sauce will keep for a couple weeks in an airtight container at room temperature. I find the ideal vessel for this is a canning jar.

Makes 1 ½ cups of caramel sauce.

5 Easy Pies for Non Pumpkin Pie Eaters

Strawberry Rhubarb Pie

Strawberry Rhubarb Pie

I’m just not a fan of cinnamon so pumpkin pie isn’t a pie I enjoy. Since it seems fitting to bake pies for Thanksgiving, here are five, fail-proof pies to serve to your guests or bring as a hostess present for Turkey Day!

Cheers,

Veronique

2nd Annual FryFest

2nd Annual FryFest

Fried Mac & Cheese

Fried Mac & Cheese

The second installment of FryFest is behind us. Much like the 2013 FryFest, this year’s all-fried event was held on a beautiful late summer day.

This year, we fried a few of last year’s favorites along with new items. Here’s what my brother-in-food, Danny Chin of Eat with Dan, and me served our 13 guests:

Finger Food

Corn Dogs – Veronique

Arancini (Rice Balls) – Veronique

Spring rolls -Danny

Fried Ravioli – Veronique

Poutine – Veronique & Danny

Fried Onion Rings – Veronique & Danny

Danny Chin Making Spring Rolls

Danny Chin Making Spring Rolls

Entrée

Fried Chicken – Danny

Fried Mac & Cheese – Veronique

Dessert

Fried Oreos – Veronique & Danny

Fried Candy Bars – Veronique & Danny

Zeppolis – Veronique

The corn dogs were super with a light batter of flour and corn meal giving the dogs a slight crunch with a hint of sweetness.

The Arancini might have been my favorite with a creamy risotto interior and golden brown crunchy exterior. Perfect way to use up leftover risotto.

Danny’s spring rolls are always a hit and I loved watching him roll over 60 rolls in less than 30 minutes.

Fried raviolis, or as my St Louis friends call them, toasted ravs, were a nice munchies, especially with homemade tomato sauce.

Fried Chicken

Fried Chicken

For my poutine, I know this will be sacrilegious to my folks in Quebec, I ordered cheddar cheese curds from Ellsworth Cooperative Creamery in Wisconsin. More on those folks in a future post. My handcut fries were double-fried for a perfect balance of creamy inside and crispy outside – yum.

Fried onion rings were a bust this year, bad revision to last year’s yummy rings.

THE fried chicken – absolutely delicious. My pal Danny smartly chose drumsticks, thighs and some tenderloins. For me, it’s all about dark meat and the overnight buttermilk bath combined with the seasoned flour coating made for a juicy, flavorful and crispy delicacy – well done my friend!

Fried mac & cheese – yes, it’s slightly irresponsible, health-wise, but so darn tasty. I made my extra cheesy macaroni and cheese recipe for this and will do full instructions in a future post. Guest at the dinner who works with local restaurants told me I should help out some restaurants with their version after tasting mine!

Fried Oreos and bite size candy bars went into a simple, slightly sweet batter. Super tasty and a recipe will come soon – I promise.

Fried Oreos

Fried Oreos

I’d made my super easy Zeppolis last year and made them again as they were a hit. For a fun touch, I used brown paper sandwich bags, added powdered sugar to them and place 2-3 hot Zeppolis inside for each guest to shake and eat without sharing.

It was a fun night which is now followed by tons of dieting and exercise, of course. I couldn’t have done it without Danny and my friend Lisa who was a huge help with the a la minute frying.       

Have you liked Eat with Dan on Facebook? Have you followed him on Twitter? Do it now for drop-dead gorgeous food photos.

Cheers,

Veronique

Elegant Key Lime Tart

Elegant Key Lime Tart

Key Lime TartThis weekend, I was invited to brunch at a friend’s summer home. Since I’m the known baker in my group, I was asked to bring dessert when I inquired as to what I could bring.

To some, that might be an inconvenience, for me, having an excuse to bake is super.

Key Lime Tart 2Since it was a gorgeous warm day and my local grocer had key limes, I decided to make my Zesty Key Lime Tart which always gets good reviews. To switch things up a bit, I opted to use my new 14 x 5 tart pan with a removable bottom. It turned out so cute and I even did fancy meringue piping which looked darling.

Funny how switching up a pan can totally change the whole presentation of a dessert. By the way, I used the exact same measurements as for my round tart version.

For an easy and very summery dessert, give this tart a try.

Cheers,

Veronique